
I have been baking yeasted breads, buns, flat bread and the like for many years and always viewed sourdough as one of those out of reach things that someone else could perfect, but not for me. And to be honest, I did not even buy it very often. After all I had bread at home. But that said, I had been learning about it during all those years and it always seemed to be a daunting skill to master. That was until recently when I took on the challenge to learn about sourdough. And now, almost 2 years later and many learning opportunities later, I am able to make things like Homemade sourdough bagels.
What is sourdough?
Healthline, in their article How Healthy Is Sourdough? How to Make It and More, state that "Sourdough uses an ancient form of bread leavening. It relies on a mix of wild yeast and lactic acid bacteria that are naturally present in flour, rather than baker’s yeast, to leaven the dough.". Basically, it ferments and the gases from the fermenting process cause the bread to rise.
Why sourdough
For me, besides the health benefits of sourdough, the ability to make bread without the use of commercial yeast opens up all kinds of possibilities and also for sourdough gluten free. There is a whole other world when you start talking about not using commercial yeast for your bread making. And for me, I have only scratched the surface with my sourdough bread making thus far. Although I am happy with my progress to date, Diana, the author of Sourdough and Heavy Metal has attained a superior level of using sourdough that has enabled her to amass a repertoire of delicious looking recipes for me to try. Diana does not use commercial yeast in any of her recipe's but rather has a number of "creature's" that she uses to make such a large assortment of baked goods. And, she quite often bakes them in cast iron she has restored to productive use. It is all very interesting and nothing short of inspirational and amazing. Something to work towards for sure. If you are already making use of sourdough, I would definitely check out her blog and website.
Equally amazing is the sourdough creations that Rachel with Remembering Maggie Lane has created. Her knowledge of baking with gluten free flours has proved invaluable in my own gluten free sourdough baking adventures. She too has some very impressive sourdough baked goods. And, her artistic ability in scoring the sourdough bread is nothing short of impressive. Scoring is the act of slashing the surface of the bread to allow the gasses to escape the loaf in a controlled manner to prevent tearing. I could not think of a better person to write her e-book called Scoring Sourdough Bread.
But sourdough is not just for breads and buns. It can be used in so many things like cookies, brownies, cakes, buns, waffles and pancakes, to mention a few. It is a whole other world that I never knew existed. But what a delicious world it has opened up.
Sure I could make quite a few of these items using traditional yeast and I already make a lot of sweets, loaves and dainties, so why would I want to use sourdough. Simply put,
- because the sourdough uses wild yeasts it allows me to bake bread should yeast not be available as we saw recently.
- the slow rise of the sourdough breads gives the beneficial bacteria contained in the sourdough an opportunity to break down the flours and thus makes it more digestible and more nutritious.
- it stays fresh longer than yeasted breads.
- it gives me options for the use of gluten free products.
- it gives me the ability to make some more traditional type breads that use sourdough.
- it gives me the ability to have a homemade sourdough product rather than buying it in the store.
- it gives me the opportunity to learn something new that will be beneficial.
- it gives me another option for generating income on the homestead.
- it gives me the opportunity to gift sourdough baked goods to friend's and family who enjoy sourdough baked goods.
Starting with sourdough
As I mentioned earlier, I had been thinking about trying my hand at sourdough and it wasn't until I saw a video by Homesteading Family where Carolyn talked about how easy making sourdough was and that a lot of things I thought to be true about sourdough were in fact not true. I did some more exploration on her process on the Homesteading Family website and YouTube channel and she just made it sound so simple. What I also liked was that there was no waste as you developed the sourdough starter. The extra sourdough starter became things like pancakes, waffles, cookies and cakes, to name a few. So I signed up for the class The Art of Homemade Bread back in November, 2020.
The first part of the course dealt with making yeasted breads and although I have been baking bread for many years I had never ventured far from traditional white flour loaves. My bread making skills are all self taught and although I was aware of the other techniques and flour options, I never saw the need. After all, I had bread in the freezer. But I can honestly say the yeasted bread making part of the course was very educational and opened my eyes to quite a few things that I never knew before. And then I dove head first into the sourdough portion of the course.
The course has you make your own sourdough starter right from scratch. Simply, flour and water. The biggest shock for me was the cost to purchase the organic flour. When you are starting a sourdough starter it is recommended that organic flour be used because of the possibility of there not being just flour in the store-bought flour and that the store-bought flour is bleached and denatured. The sourdough thrives better if it has the complete meal and not just part of it. And also, they do desiccate wheat with glyphosate prior to harvest and that can't be good for a fermenting process. If you want to learn more about the use of glyphosate in food crops be sure to check out Achieving a Permaculture Design Principle with the Back to Eden Gardening method. With all this in mind, there is a possibility that certain flours may inhibit the growth of wild yeasts and beneficial bacteria and therefore make my sourdough ventures into paper mache. So I took the plunge and bought organic all purpose white flour.
It was also recommended that city tap water not be used because the bleach that is in tap water would also stop any wild yeast or beneficial bacteria from growing. After all, that's why they put it there in the first place. Being I use bottled water for all things cooking, I thought it would be okay to use the water but decided to stack the cards in my favor and bought distilled water. But was quickly uncomfortable about the bottled distilled water. If you want to learn why, be sure to check out Canning Water...Yes, Water! - Reusing odd shaped jars.
So with all purpose organic flour and distilled water in hand I started my starter with just flour and water. But because baking with gluten free flours was important to me going down the sourdough exploration road, I decided to start a gluten free starter as well. And then with twice daily feedings around my schedule, after the first week I had very weak but active starters.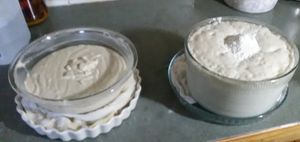
So active in fact that 5 hours after it's final feeding before baking the all purpose organic starter blew out of the bowl. 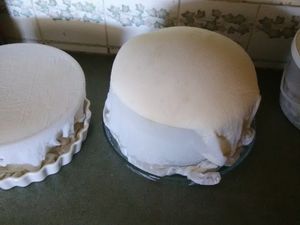
Feeling very encouraged by the results I continued to feed the starters twice daily and at the end of each week I would have a bake day. Using recipe's from the The Art of Homemade Bread and other sources, things like cinnamon rolls, peanut butter cookies, batter breads, gluten free brownies and farm loaves of sourdough bread were all made from these two starters at various stages of the sourdough starters development.
Although the bread's were not always perfect, I always found it intriguing and pleasing to be able to use the extra from the sourdough starters development to make things like gluten free chocolate cake. I hate wasting food and besides, the organic all purpose flour and gluten free flours were expensive.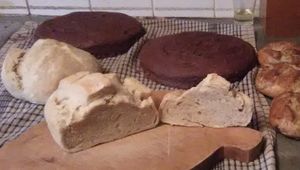
And as the weeks went by and I filled my freezer with some delicious baking, there were many learning opportunities. Who knew that bread made with gluten free flour and slow risen in the fridge for a couple days will bounce like a ball once its baked? That was an interesting bake day and one that resulted in a huge learning opportunity that Diana from Sourdough & Heavy Metal, Rachel from Remembering Maggie Lane, Michele from Chocolate Box Cottage and members of the Homestead Kitchen Membership were instrumental in helping to figure out what I did wrong.
One thing I learned early on is that baking with sourdough, especially for breads, really means developing a "feel" for it, something that is totally different than the yeasted breads I had been baking up until now. And now, almost two years later, I have developed that feel so that I can get more consistent results and bake things like Sourdough Bagels. But from what I understand, baking with sourdough in any form is always a learning opportunity.
Baking sourdough bagels
The cool thing about the sourdough starters is that I don't need to keep them going on the counter. I can keep a small amount (start with 1/2 cup) in the refrigerator and just feed them more flour and water on occasion, usually weekly. But if I forget to feed them, no biggy. Just pick up where I left off. These sourdough "mothers" will continue to develop and grow in the refrigerator always at the ready when I want to bake something.
The day before I want to bake something I just take out a small amount of the starter from the refrigerator sourdough "mother", feed it some more flour and water and leave it sit on the counter. I put about 1/2 cup of the fed "mother" back in the refrigerator for the next time. It took almost a month to fill this jar the last time.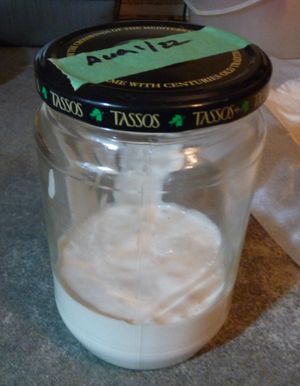
I like to feed the sourdough starter I left out of the refrigerator for baking at least twice to get the volume I need for a recipe. But even after one feeding it is extremely active. Notice all the bubbles.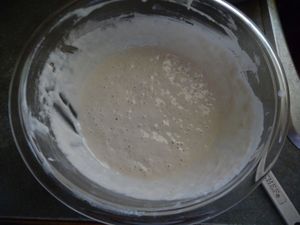
Once I figure I have enough sourdough starter for what I am baking, shortly after feeding the sourdough starter I measure out what I need and either bake something else with the leftovers or as I did this time, I spread it out to air dry as a dried backup for my refrigerator sourdough starter "mother".
For the Sourdough Bagels I am using the recipe from The Art of Homemade Bread course that was shared courtesy of Kelsey Steffen from Full of Days in her blog post Simple Homemade Sourdough Bagels. For this recipe I measure 2 cups of sourdough starter into a bowl.
To this 2 cups of sourdough starter I add 1 1/4 cups of warm water, 1 tablespoon of North Prairie Gold Cold Pressed Non-GMO Canola Oil and 1 tablespoon of Redmond Real Salt. I gave it a good mix to distribute all the ingredients.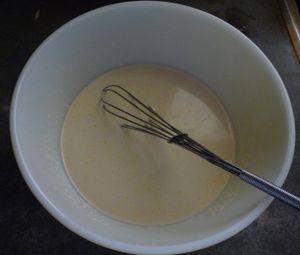
I wanted a sourdough whole wheat bagel so to this wet ingredients I add 2 1/2 cups of whole wheat flour and 2 1/4 cups of all purpose flour for a total of 4 3/4 cups of flour. Although the recipe calls for 5 to 5 1/2 cups of flour, being I have made these before with whole wheat flour I know that I need to decrease the flour a bit. It is all part of developing the "feel" and I can always add more if needed.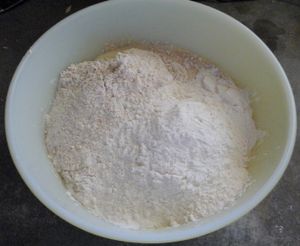
The recipe I am using requires the use of a stand mixer, but being I do not have one I use a wooden spoon to mix all the ingredients till it becomes too stiff to mix.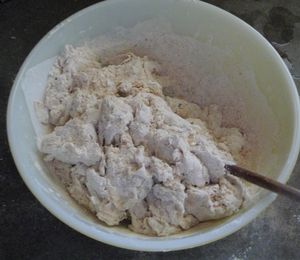
Once the dough reaches this point, I loose the spoon and start kneading the dough with my hands till it starts to stick together. At this point, I leave it rest for 10 minutes so that the flours can equally moisten and thereby reduce the amount of time I need to knead. 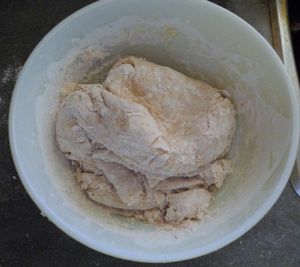
After the 10 minutes has passed, it is time to start kneading the sourdough bagel dough again. The recipe calls for kneading the dough on a low setting for 4 minutes but because I am doing this by hand I knead the dough for 5 minutes. During that time it will change texture and become smoother and hold together more. Making sure not to exceed the 5 1/2 cups of flour, add a little bit of flour during this time if it is too wet. 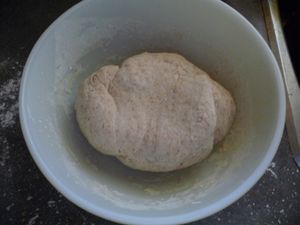
It is now time to let it rise for 4 hours. But first, I put about a tablespoon of oil in the bottom of the bowl and roll the sourdough bagel dough around in the oil to coat it. This will help prevent drying while it is rising.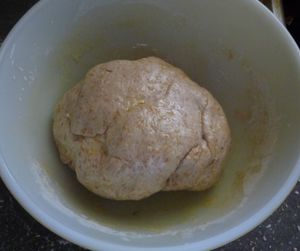
After it has risen for 4 hours, it will have more than doubled in size and will be ready to shape the bagels.
Turn the sourdough bagel dough out onto a lightly floured surface, flatten slightly and cut the sourdough bagel dough into 12 roughly equal portions.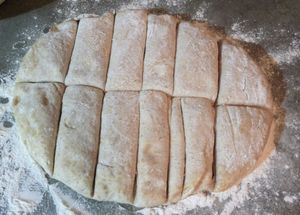
Roll each portion into a ball of about equal size, adjusting the amount of sourdough bagel dough as necessary. I added a little too much flour this time and they were a little harder to shape into a ball because of it, but they were still fine.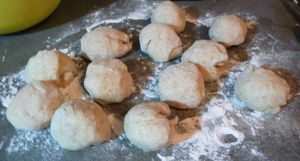
I then flatten the ball between my hands and poke my thumb through the center. I gently stretch the sourdough bagel dough into a bagel shape and place them on a parchment paper lined cookie sheet. I have not perfected my technique for making the bagel shape so some of them look a little funny, but they will all taste good. Although the recipe does not call for the use of parchment paper, I find that with my pans, it works a whole lot better.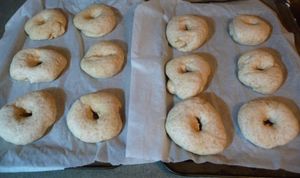
I covered them with a damp cloth and let them rise for 1 hour.
15 minutes before the bagels are done rising, I filled a dutch oven half full of water, and put it onto the stove to bring to a boil. I also preheated the oven to 450F (232C).
Once the sourdough whole wheat bagels were done rising and the water had come to a boil, I add 1 tablespoon of baking soda to the boiling water. I then carefully dropped three bagels into the boiling water. After the first one, the baking soda will foam and the remaining two have to be carefully dropped in the water so as not to burn myself.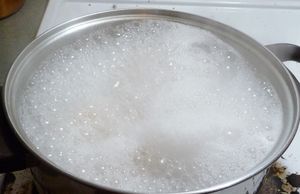
After 30 seconds, flip the sourdough bagels using a pair of tongs or other utensil and boil for another 30 seconds.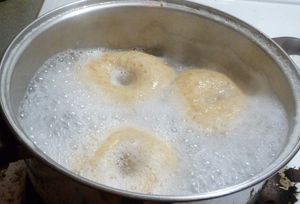
Once they have boiled the 30 seconds take them out of the boiling water solution and set them back on the lined cookie sheets. Repeat process until all the sourdough bagels have been boiled.
I beat 1 egg with 1 tablespoon of water and brushed the mixture onto all the sourdough bagels.
Sprinkle the top of the sourdough bagels with whatever topping you want to use. I have tried garlic, rosemary, and cinnamon thus far and so far I like them plain or with cinnamon the best.
Place in the preheated oven and bake for 8 minutes, then rotate the sheets and bake for 7 - 9 minutes more. The internal temperature of the sourdough bagel should have reached 195 F (90.5 C). Once they are finished baking remove from the cookie sheet and place on the counter to cool. They may not all be perfect but they are homemade and I will enjoy these sourdough bagels.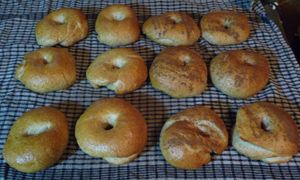
Once cooled, they can be eaten fresh or tossed in the freezer for storage.
Final thoughts
Although I have not completely perfected my sourdough bread making yet, I am quite happy with the results that I have achieved thus far with the organic all purpose flour. I am still working at the gluten free breads, but they are a whole different beast all together. In the meantime I continue to enjoy the baked goods made from my sourdough starters.
I am so glad that I took The Art of Homemade Bread class as it is opening up a whole other world of bread and baked goods that I had never enjoyed up until now. And who knows, maybe someday some of the creations that Diana with Sourdough & Heavy Metal creates may make an appearance on my table. As I enjoy a bagel on occasion, it is nice to have these Homemade Sourdough Bagels sitting at the ready for me to enjoy. And enjoy it I will. This one was so good with a little cream cheese.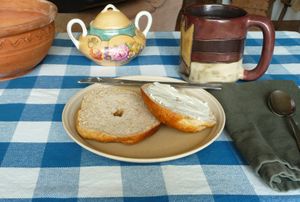
I hope you enjoyed this exploration into my adventures with sourdough and specifically the making of Homemade sourdough bagels. If you did and If you enjoy this content, please consider joining the My Boreal Homestead Life community. By supplying your email address at the bottom of the page and hitting "sign up" or by clicking Join, you will ensure you get an email notification when I post new blogs to the My Boreal Homestead Life site.
Thank you for joining me on the front porch of My Boreal Homestead Life as we explore this Homegrown, Homestead life, In a modern world.
ADDITIONAL RESOURCES
- Heartway Farms - Sourdough Bread Tutorial | Heartway Farms | Easy Sourdough Bread
- Heartway Farms - How to Make Crusty Artisan Bread | Easy Homemade Bread | Beginner Artisan Bread
- Melissa K Norris - Sourdough
- Farmhouse on Boone - Sourdough Recipes
