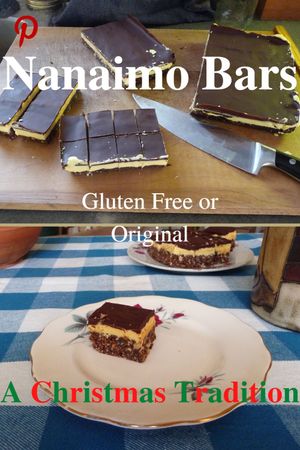
For the Christmas season, a special occasion or just because, the Nanaimo Bar is a wonderful addition to add to a tray of dainties. With its chocolate graham crust, custard filling and chocolate topping, this delectable, no bake confection is usually one of the first to disappear. As part of my Christmas baking tradition, whether it be an original version of the square or a gluten free Nanaimo Bar, making this dainty is a must.
Nanaimo Bar History
Discussion about where the Nanaimo Bar was first created is varied. Although it was made famous by the city of Nanaimo, British Columbia, after whom the confection was supposedly named, the FoodNetwork article The History of Nanaimo Bars: A Beloved Treat states that "The first known recipe for Nanaimo bars appeared in the 1952 Women’s Auxiliary of the Nanaimo Hospital Cookbook and was labelled “chocolate square.” One year later, a similar recipe was published in Vancouver’s Edith Adams’ Cookbook, this time going by the name “Nanaimo Bar.”".
But for me, despite the Nanaimo Bar being named as distinctively Canadian as highlighted in the New York Times article A Bite-Size Square of Canada’s History, Culture and Craving, the importance of the Nanaimo Bar origin is lost to my own history of the Nanaimo bar.
I did not grow up with Nanaimo Bars making an appearance on a Christmas tray of dainties and it was only some 30 years ago after I discovered them from some friends that lived and originated from British Columbia, that I started to add them as a Christmas baking staple. After that introduction, not only did Nanaimo Bars make an appearance on many a Christmas tray of dainties that I gifted or took to the office at Christmas time, they made their way onto dainty trays at each of my friends' children's weddings. And for that reason, as funny as it sounds, they will always hold a special meaning for me.
But as time has a habit doing, time changes things and the Nanaimo Bar became something that not all my family and friends could enjoy, despite their desire to do so. Nut allergies, gluten intolerance and Celiac Disease prompted me to modify the original recipe to leave out nuts and/or coconut if I could not ensure a safe end product. But it also prompted me to develop a Gluten Free Nanaimo Bar that may or may not contain nuts and coconut, depending on who it was for. But in all cases, despite my years of tweaking the original recipe, I feel I have figured out a way to make this no bake confection so that all those who wish to do so can enjoy a slice or two of Nanaimo Bar.
Preparations for making Nanimo Bars
When I bake slices that I want a nice even cutting, I like to line my pans for ease of slice removal and slicing. Certainly this Nanaimo Bar recipe can be made without any sort of pan lining, but today I lined the 9 x 13 inch (22 cm x 33 cm) pan with wax paper. By using wax paper for no bake recipes and tin foil for baked slices, I am able to easily remove the entire slice from the pan in one action, reuse the pan after a quick wash and cut the slice in more even slices.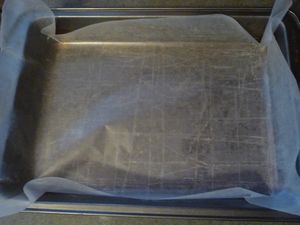
After lining the pan, I prepare the dry ingredients for the chocolate graham base. I buy a lot of my baking ingredients in bulk and store in 5 gallon pails or some sort of larger containers and for items that may go rancid or melt I store the pails in the freezer. Although I have a smaller "using" container in the cupboard, the walnuts I need for this Nanaimo Bar recipe are walnut halves and so they must be chopped first.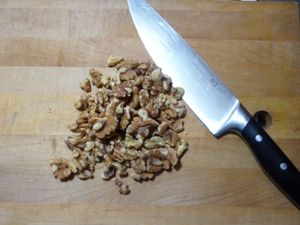
Although the recipe I use as a guide is for a 9 x 9 inch (22 x 22 cm) pan, to make a 9 x 13 inch (22 x 33 cm) I make a batch and a half. Although you can double the recipe for the bigger pan, I find the 1 1/2 batch gives a nice thickness to the slice. But to avoid confusion, the ingredients listed in this article will be for a 9 x 9 inch (22 x 22 cm) pan of Nanaimo Bars.
After the walnuts are chopped, 1/2 cup (125 ml) are added to a bowl with 1 3/4 cup (400 ml) of Graham cracker crumbs and 3/4 cup (175 ml) of medium or fine unsweetened coconut. Set the bowl aside.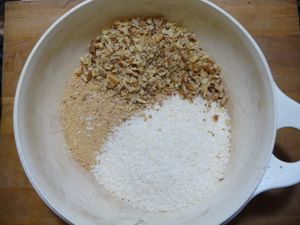
Nanaimo Bar Chocolate Graham Bottom layer
With the dry ingredients prepared it is now time to combine the wet ingredients. In a saucepan on medium heat, add 1/2 cup (125 ml) butter or margarine, 1/4 cup (50 ml) granulated sugar and 5 tablespoons (75 ml) of cocoa. I have made Nanaimo Bars with butter and I have made with margarine, but prefer the butter. After all, health issues aside, it's Christmas! I have used all kinds of Cocoa in the past but prefer a Dutch Process Cocoa Powder I pick up from my local Nutters store where I buy my bulk foods. I have been shopping there since the owner opened the store and being she is all about ethically grown and harvested, I am confident that this chocolate powder meets with the guidelines for Ethically harvested chocolate and chocolate powders. As explored in the article The Chocolate Scorecard: Putting more ethical chocolate on the menu it is important that I try to do my best to ensure my dollar goes to the right chocolate company.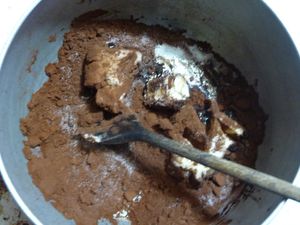
Stir the wet ingredients while they melt and combine. While the wet ingredients start to melt together, whip one egg. If I am making 1 1/2 batch, I used two smaller eggs. But in a pinch, I have also used two eggs and it was fine. As all recipes are written for large sized eggs, I keep this in mind when determining egg size to use.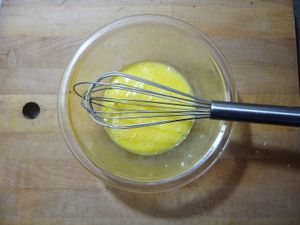
Once all the ingredients are melted and combined, add the whipped egg and continue to whisk vigorously and cook the wet ingredients until thickened. The ingredients will turn from a dull brown to a shiny brown and will noticeably have a thick consistency while whisking.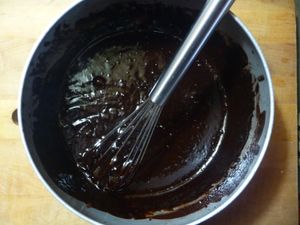
To the thickened melted ingredients, I then added the bowl of dry ingredients and mixed till crumbly. To be honest, I use my hand mixer as it makes short work of this and makes the crumb quite, well, crumbly.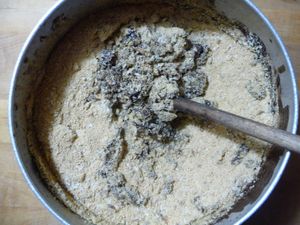
Once well mixed, I dump the chocolate graham bottom layer ingredients into the prepared pan and distribute as evenly as possible. Patting down with the spatula will help with this.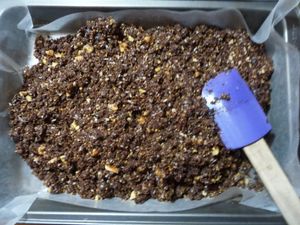
And finally, I firmly press into the prepared pan. I like to use another pan to do this as it creates a nice even surface and allows an easier job of pressing the chocolate graham crust into place.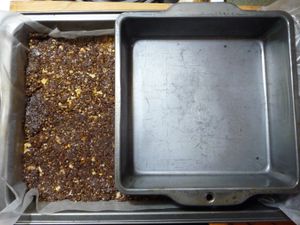
At this point, I refrigerate for one hour or longer. The chilling firms up the crust so that crumbs do not get mixed into the next layer, the custard layer.
Nanaimo Bars Custard Layer
After the Chocolate Graham bottom layer has been chilled, it is time to prepare the middle layer. There are many recipes out there for this layer, including mint, but I like making Nanaimo Bars using Bird's Custard Powder.
To a clean mixing bowl, add 1/2 cup (125 ml) softened butter or margarine and beat till creamy. I like butter for this layer. I have used both before, but as I said before, it's Christmas!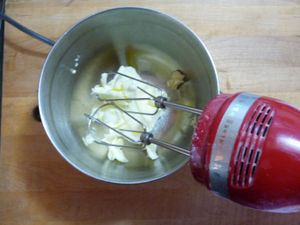
In a small bowl mix 2 tablespoons (30 ml) of milk or cream with 2 tablespoons (30 ml) of Bird's Custard powder and add to creamed butter. Although I have used milk many times, I do like the texture the cream creates. I do find that I need to add a bit more cream though.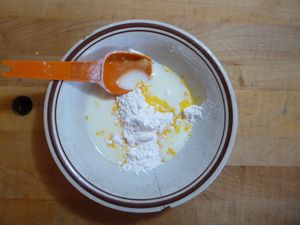
To the bowl of butter, milk and custard powder add 2 cups (500 ml) of icing sugar and mix very well. It will start very dry but will turn into a spreadable custard layer. Adjust the amount of cream or milk accordingly to achieve a very thick but spreadable custard layer. If it is too thin the filling will ooze out when it is being sliced.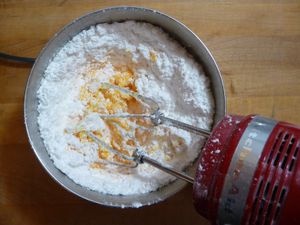
I have added everything to the bowl before mixing and it works fine. Regardless of how it is done, once the custard layer is thoroughly mixed, I scrape it onto the chilled Chocolate Graham bottom layer.
After I spread the custard layer evenly over the bottom layer, I returned it to the fridge to chill while I prepare the top layer.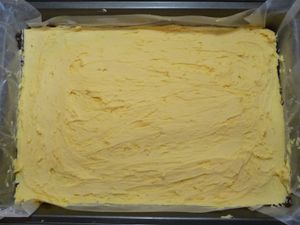
Nanaimo Bar Chocolate layer
The third and final layer of the Nanaimo Bar is pure chocolate. I have seen variations on this layer, including a chocolate ganache, but I prefer a melted semisweet chocolate layer. I do need to do some more research to determine if the chocolate is ethically harvested by the Baker's brand, owned by Kraft Heinz, of semisweet chocolate.
Combine 4 squares (150 ml) of semisweet chocolate with 3 tablespoons (50 ml) of butter or margarine. I use 2/3 butter and 1/3 margarine as I like the gloss the margarine gives. But, all butter works fine too.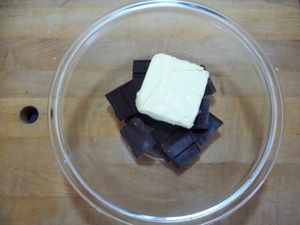
Melting of chocolate should always be done slowly to avoid scorching the chocolate. A double boiler or a glass bowl set inside a pot of boiling water will work nicely. But I use my microwave for this instead. I heat the chocolate and butter for one minute on high power and then reduce the power to 50 % for another minute. I give it a stir and then cook for another minute at 50% power. I keep repeating until the chocolate is totally melted adding a bit more butter or margarine, if necessary. What I am looking for with the melted chocolate is that it has a somewhat pourable consistency. This consistency, once hardened will ensure that slicing can be done without the chocolate cracking.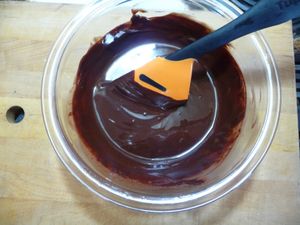
I poured the melted chocolate over the second layer and spread a bit. I don't spend too long spreading as the hot melted chocolate will melt the custard layer and combine with the melted chocolate.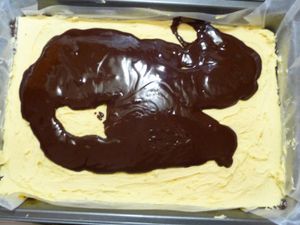
But rather, before it has a chance to set up, I tip the whole pan from side to side and around to allow the chocolate to flow to all surfaces of the Nanaimo Bar resulting in a evenly distributed chocolate third layer. Return it to the refrigerator to completely set up before slicing.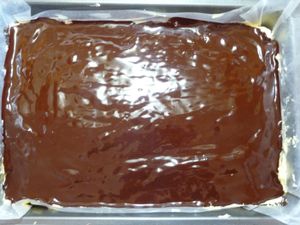
Gluten Free Nanaimo Bar
As I mentioned earlier in this article, over time I have had to develop a recipe that would be suitable for family and friends that are gluten intolerant or have Celiac Disease. To that end, I have found that Kinnikinnick brand of Graham style crumbs fits the bill with the added bonus of being nut, peanut, soy and dairy free. Checks all the boxes for my family and friends. They also have a complete line of gluten free specialty products for those that need.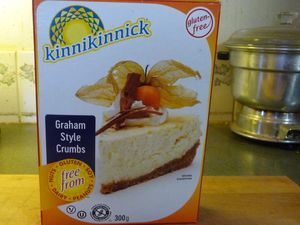
Although I do not notice a huge difference in the texture of the Nanaimo Bar Chocolate Graham Bottom layer, I do find that reducing the butter or margarine by half (1/2) results in a less greasy end product. Either way is good, I just find it better reducing the butter or margarine.
With the exception of reducing the butter or margarine and substituting cup for cup for the Graham cracker crumbs, the remaining Nanaimo Bar Recipe is followed.
Slicing Nanaimo Bars
Some recipes state that to ensure non cracking of the chocolate, a scoring of the chocolate can be done before the chocolate layer sets up. Although I am certain this would work, I find that with the chocolate prepared as I do, a sharp knife is all that I require to ensure clean cuts.
To start the slicing of the Nanaimo Bar, I lift the entire slice from the pan using the wax paper to lift it out. I place it on the cutting board and peeled the wax paper off. The Nanaimo Bar is quite rigid at this point so tipping it on it's side to aid in wax paper removal will not harm it. Then using a ruler to determine the center of the long side, I make the first scoring cut to mark where I will cut. Then slice through to the cutting board. Take one half, find where the center is and cut through. Take one of the halves and repeat. Once you are down to the last 1/8, you can now slice into pieces about 1 x 1 inch (2.5 x 2.5 cm) or 1 x 1.25 inches (2.5 x 3 cm), depending on pan size.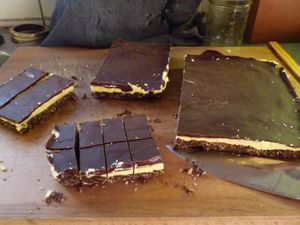
I sliced the Gluten Free Nanaimo Bar in the same manner.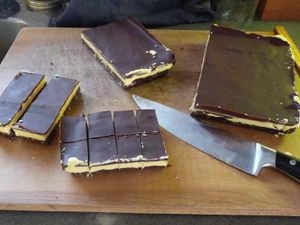
After slicing, the Nanaimo Bar and the Gluten Free Nanaimo Bar can be enjoyed immediately or frozen for placing on the Christmas Dainties tray at a later date.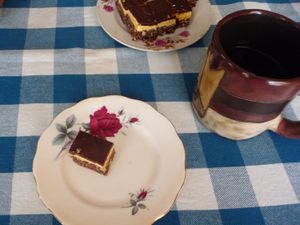
Final Thoughts
I hope you give the Nanaimo Bars a try for your Christmas Dainties tray. I have combined the ingredients in the next section of this article as I thought for ease of reference it would be nice to have the ingredients list all in one place rather than scattered throughout the process.
If you enjoy this content, please consider joining the My Boreal Homestead Life community. By supplying your email address at the bottom of the page and hitting "sign up" or by clicking Join, you will ensure you get an email notification when I post new blogs to the My Boreal Homestead Life site.
Thank you for joining me on the front porch of My Boreal Homestead Life as we explore this Homegrown, Homestead life, In a modern world.
Nanaimo Bar Recipe
This will make a 9 x 9 inch (22 x 22 cm) pan of Nanaimo Bars.
Chocolate Graham Bottom Layer:
- 1/2 cup (125 ml) butter or margarine (use 1/4 cup (50 ml) if using Kinnikinnick gluten free crumbs
- 1/4 cup (50 ml) granulated sugar
- 5 tablespoons (75 ml) cocoa
- 1 egg, beaten
- 1 3/4 cup (400 ml) of Graham cracker crumbs or Kinnikinnick Brand gluten free crumbs
- 3/4 cup (175 ml) fine or medium coconut
- 1/2 cup (125 ml) finely chopped walnuts
Custard Second Layer:
- 1/2 cup (125 ml) butter or margarine
- 2 tablespoons (30 ml) milk or cream
- 2 tablespoons (30 ml) Bird's Custard Powder
- 2 cups (500 ml) icing sugar
Chocolate Third Layer:
- 4 squares (150 ml) semisweet chocolate
- 3 tablespoons (50 ml) butter or margarine
Additional Resources
- Allrecipes - Nanaimo Bars
- Canadian Living - Classic Nanaimo Bars
- Waiting for Blancmange - Easy Nanaimo Bars without Custard Powder
- The Home Intent - Healthy Nanaimo Bars |No Custard Powder Recipe