For years I bought softneck garlic every spring and although I did have limited success, the bulbs that were produced, if any, were less than impressive. It always seemed that they would not have enough time to grow to maturity or alternatively they would sprout and then die a few weeks later. Then I tried growing hardneck garlic in my raised bed garden and was pleasantly surprised and impressed. And so, I will be trialing some new hardneck garlic varieties for culinary and medicinal use.
What is the difference between hardneck and softneck garlic
Although hardneck and softneck garlic both belong to the Family Amaryllidaceae and Genus Allium, like onions, as the names imply, the main difference is in the neck of the garlic. The hardneck varieties have a central stem(stalk) from which the leaves grow and the cloves form around the base of the centralized stem(stalk). Hardneck varieties will also produce a scape around mid summer, essentially a flower, that must be removed so that the garlic bulb will develop properly. But not to waste the garlic scape as it is delicious in culinary favorites like stir fry's, garlic scape pesto and other delicious dishes. Softneck varieties have a soft neck that is made up of the leaves that are sent up as the cloves form, much like its family member the onion, and when finished growing the green top will fall over.
Although both types of garlic can be planted in the fall or spring, the hardneck garlic does grow bigger cloves when planted in the fall and being that it requires prolonged exposure to cold weather of at least 40 days at 40 F (4 C) or less, fall is a good time to plant. This process is called vernalization. I do know of people however that plant their garlic as early in the spring as possible, even if they have to remove snow to do so. They then allow the soil to thaw deep enough to plant their garlic of both types. It works for them. But as the article What Is the Difference Between Hardneck and Softneck Garlic? explains, "hardneck garlic is cold-hardy, able to tolerate overwintering in harsh climates down to zone 0. If you live in an area where cool-season lawns (bluegrass, perennial rye, fine fescue) are the norm, a hardneck garlic is a better choice. Softneck garlic grows typically best in climates with hot summers and mild winters, places where warm-season Zoysia and Bermuda lawns thrive from zone 8 to 12." In these parts, I have found softneck garlic needs to be planted very early in the spring to become sizeable, if it grows well at all. However, as the article from John Boy Farms in Alberta identifies in the article How to grow garlic in Canada, Silverskin and Artichoke varieties might be something for me to try as they are more suited to the climate here.
Generally speaking most articles say that the softneck varieties of garlic do store better. As stated in "What is the Difference Between Hardneck and Softneck Garlic? "Softneck varieties tend to store better than hardnecks because of their dense heads and tightly wrapped cloves. This tight wrapping helps the cloves preserve their moisture while also preventing disease from getting in." However I have also had hardneck garlic last until the following fall in my cellar. So perhaps this is site and storage condition specific rather than variety specific but for now I will follow the lead of the literature.
The size of the cloves and the flavor is another difference. For most hardneck garlic varieties the cloves are generally bigger, although fewer, and have a stronger flavor for culinary and medicinal uses. And although softneck garlic varieties can be used interchangeably with hardneck garlic varieties, there will be a number of smaller cloves and their flavor will not be as intense.
Benefits of garlic
To some, garlic can have a very over powering flavor in the culinary world. But for others, the addition of garlic is a must as it adds a whole depth of flavor that only serves to enhance the dishes being prepared. I use a lot of garlic in everything from pesto, spaghetti sauces, fried potatoes and meat dishes, to name a few. Although it is not recommended by the National Center for Home Preservation to store minced garlic in oil for easy culinary use, use in pickles and high acid foods is doable provided that acidity levels are not modified outside the safe range. However, canning on their own is not recommended because garlic would need to be treated the same as onions, being a member of the same family, and with the low acid nature of garlic they need to be pressure canned. Something I agree would result in an unfavorable end product. However, I do add to dills, pickles and relishes with no concern about food safety. All that said, for culinary use, having fresh or dehydrated garlic on hand is an easy way to add some wonderful flavor.
Garlic has long been touted for its medicinal value for fighting things like colds and other things that might ail you. It's antibacterial, anitviral and anti-fungal properties combined with the its nutritional benefits of being high in protein, vitamin C, potassium, calcium, and phosphorus, as well as other beneficial nutrients makes it a definite asset to have in the apothecary. And although there is no scientific research to support these uses as identified in Garlic - Uses, Side Effects, and More, historical use of garlic "has been used to fight parasites, prevent the common cold, and treat respiratory complaints." as identified in All About Garlic. With all the benefits of garlic, regardless whether it is softneck garlic or hardneck garlic, it is why I continue to grow garlic and why it is an important part of my apothecary as I explore in Home Remedies using Natural Medicines - a glimpse into my Apothecary and use of herbal remedies.
Growing Garlic
For many years I would buy garlic in the spring from my local box store and plant it at the same time I would plant my onions and rest of the garden. After all, they are part of the same family. Although the garlic would come up it would never develop a huge bulb if it grew past the second leaf stage. So not wanting to give up on the goal of growing a sizeable amount of garlic I started researching what I was doing wrong and found out that part of my problem may have been due to to the fact that garlic require vernalization. As explained in the article Planting Garlic in the Spring: How to Grow Big Bulbs, vernalization is effectively exposing the garlic to temperatures of 0 C to -3 C (32F to 26.6F) for two to three weeks to trick the garlic into thinking it went through a winter as garlic requires cold exposure for proper growth. Although I assumed that the box store garlic had been exposed to cold, I am thinking that I was mistaken. But this also makes sense as to why some remove the snow to allow for planting their garlic as early as possible and expose the garlic to the early spring cold temperatures.
I am lucky if I get my garden worked and planted by May 20, the earliest a garden should go in for Zone 3b. I have been known to plant the garden as late as June 15, as I explore with In the garden - When Garden Planning does Not go as Planned, and I can still do well for most vegetables as I explore in Canning tomatoes - Preserving a surprise harvest. But for the garlic the temperatures are too warm and there is just not enough time when I plant this late. So fall planting of garlic it is.
I had tried planting garlic in fall before, but thinking I would remember where I planted them I did not mark the rows. Well as you can imagine, I worked them up in the spring because I forgot they were there. Feeling somewhat discouraged about growing garlic I was about to give up but then I read the article Planting Garlic in Fall and decided to give it another go.
In the summer of 2021 I constructed a number of raised bed gardens to compensate for quack grass and tree roots, as I explored in How to container garden. So that fall with the raised beds completed and feeling a little encouraged after reading the article, I decided to try my hand once more at growing garlic. But I would plant them in one of the raised beds so that I could not work them up in the spring. After all, it is said that garlic is easy to grow.
Although my planting methods have been somewhat correct all these years as confirmed by Planting Garlic in Fall, one of the areas I was lacking was in nitrogen. Garlic are huge nitrogen feeders and I know that in previous crops I had not been supplementing with a high nitrogen fertilizer. Perhaps this was one of the reasons I was struggling. So although I could have supplemented at the planting time, I decided to wait until spring and then I would supplement with some high nitrogen bone meal. So, as guided by the John Boy Farms article, I planted the garlic around the last week of September. I never mulched it, but over the winter the raised beds did have a lot of snow on them. So now all I could do was wait for spring.
And it worked! In the spring the cloves sprouted and grew quite nicely so that by late summer it looked like I may have some nice garlic to harvest.
So when it came time to harvest I was pleasantly surprised at the results. I left some of them a little long as indicated by the fact that they have grown into individual wrapped cloves rather than a paper covered bulb, but none the less, I was happy.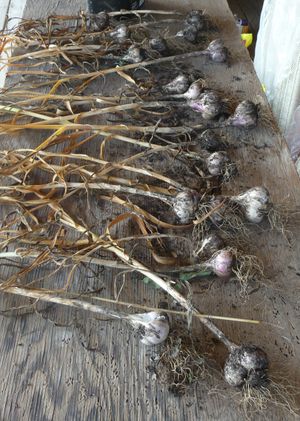
Planting garlic in fall
I was so happy and encouraged with the results that I decided to trial a number of varieties and to do so by making a raised garlic bed in the inground garden. The location I chose to do this is close to the raised beds and is one that I struggle with growing deep root crops due to tree roots. But my thinking is that being garlic is shallow rooted and if I mound the dirt and create a lasagna garden bed the tree roots should not be problematic for the garlic.
As I mentioned in the article Fall planting of cool weather crops for fall gardening in Zone 3b, I decided to really expand my fall planting of garlic this year and am trialing a number of varieties. Although I ordered 10 bulbs of Russian Red, for all the other varieties I ordered three bulbs of each variety to trial. I also decided to plant some of the cloves from the over developed bulbs I grew in one of the raised beds. The hardneck garlic varieties I am trialing in 2022 are as follows:
- Chesnok Red from John Boy Farms
- Majestic from John Boy Farms
- Big Boy from John Boy Farms
- Music from John Boy Farms
- Russian Red from Kipp Garlic.
With the nice fall we had I put off planting the garlic until October 19 for fear it would be too warm and the garlic cloves would sprout. And as it was, the planting day was quite nice. The recommended timing for planting fall garlic is about two weeks before the first hard killing frost or until the ground freezes as indicated in Planting Garlic in Fall. In 2022 that frost had not happened yet but looking at the long range it was coming and so planting needed to happen as I did not want to be chopping holes in the frozen soil.
But before I could plant the garlic cloves, I needed to prep the bed. I tilled the soil to make raking the soil into a mound a little easier. After it was worked, the soil was raked into a mound approximately three foot across which should allow for 3 rows of garlic to be planted.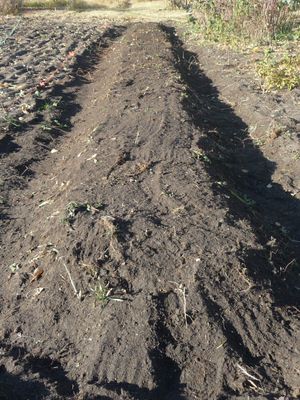
Once prepared, I determined the center of the mound and put a string line in place to help with spacing. Despite the recommendation from Kipp Garlic in How to plant Garlic In Alberta Canada and from John Boy Farms in Planting Garlic which stated to plant cloves from 4 - 8 inches (10 - 20 cm) in the row and to space rows 6 - 12 inches (15 - 30 cm) apart I decided that I would plant the rows 9 inches (23 cm) apart and the cloves themselves would be roughly 9 inches ( 23 cm) apart as well. As recommended by the John Boy Farms article Planting Garlic in Fall, I would ensure the top of the garlic was 1 - 2 inches (2.5 - 5 cm) deep and not exceed the 4 inch (10 cm) recommendation of Kipp Garlic in How to plant Garlic in Alberta Canada. My hand is the perfect tool for determining spacing and it is always where I left it. I had decided that I was going to do sections of each variety and ensure that I marked them so I knew where one garlic variety started and ended. In addition I would write it down in my journal incase I can't read the labels come next fall. The first up was the Russian Red garlic.
  Labeled cedar shingles in place, I separated all the cloves from the bulbs so I could just plant. Garlic cloves are planted pointy end up and are separated from the bulb for planting. After all the cloves were separated, a small hole was dug with my fingers and the clove was placed in the hole, moving along the rows and spacing as I had decided to do. My spacing tool worked well and allowed me to dig the hole as well and place the clove all in one motion. I placed each clove in the 3 rows I had decided on for the mound and would cover all the garlic once it was all planted.
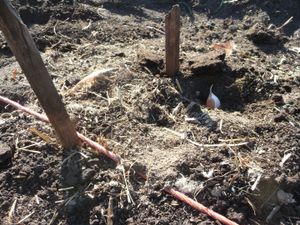
Once all the Russian Red garlic were planted, the same process was used for the remaining garlic varieties. New labels were placed to mark the next variety section which was Music garlic. I have heard some good things about this variety so I wanted to try it. There were not many cloves on the bulb, but they were large.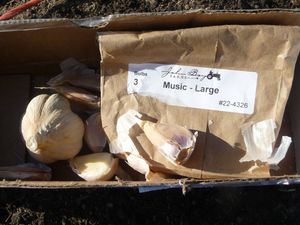
Followed by Majestic garlic which had some nice big cloves.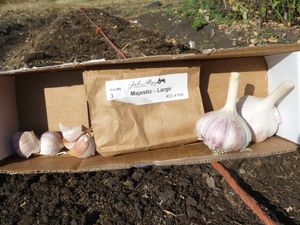
Big Boy garlic variety followed and again some nice big cloves. It is claimed that with the right conditions bulbs can grow to three inches (7.6 cm) across. I guess I'll see.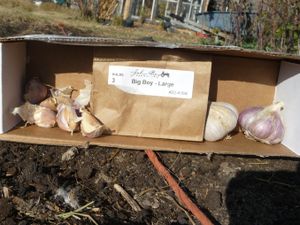
Chesnok garlic variety was next. I found there was a lot of smaller type cloves with this variety. Although it is typical to plant only the larger cloves so that larger bulbs are produced, I decided to plant everything to see what happened.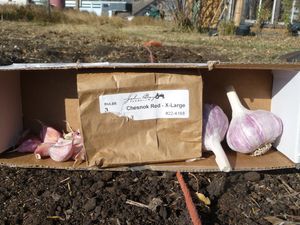
And to complete the row, I planted a few of my homegrown, unknown variety garlic.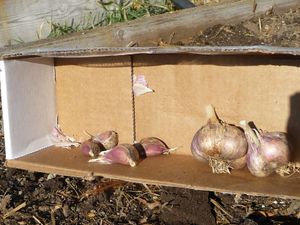
With all the garlic planted, I then covered them all with the mounded top soil and prepared to mulch the entire bed.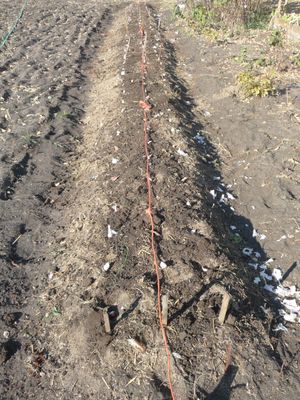
But first, I had a few cloves of the homegrown unknown garlic variety left so I decided to throw them into one of the raised beds I had built in How to Container Garden.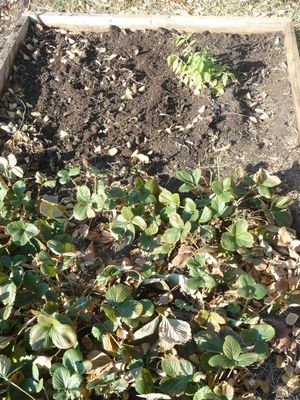
Mulching Garlic
As I mentioned earlier, the garlic was planted 1 - 2 inches (2.5 - 5 cm) deep because I knew the mulch I was adding would add about another 1/2 inch or so to the overall depth of the garlic clove. Being that garlic is a heavy feeder of nitrogen, I figured I would use two different high nitrogen sources from the homestead, chicken and horse manure. So first up I went to the chicken house and got some dry litter from the coop and spread it thinly over the entire bed.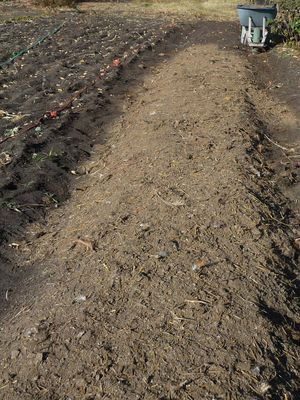
I then went to the horse manure pile and got a couple wheel barrow's of well rotted manure to spread thinly over the raised bed. I have now added the second layer to the lasagna garden raised bed garden and once completed have added about half inch (1 cm) in total to the buried garlic cloves. I found it interesting on the different colors and textures of the two manure types.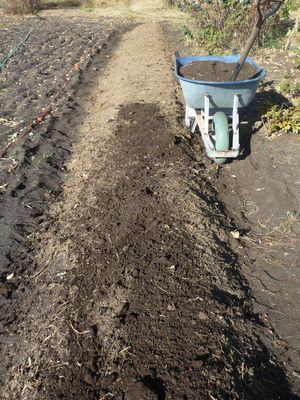
With the nitrogen sources in place I should not need to supplement with additional nitrogen next summer, but will see how things are at that time. The final step to putting this newly formed garlic raised bed to bed for the winter is to top dress the mound with some of the hardwood mulch I got for establishing my Back to Eden beds in Achieving a Permaculture Design Principle with the Back to Eden Gardening method. I decided I would not be putting a thick mulch layer over the bed, as I did when establishing the other Back to Eden bed, so that the soil could warm quicker in the spring therefore allowing growth to start sooner. However, I wanted to put some over the entire raised garlic bed to help prevent erosion, maybe help a bit with weed suppression in the spring and to prevent the cats from using it as a litter box.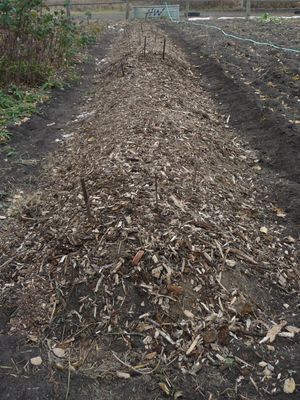
Final Thoughts
Although I am extremely pleased with how this whole project turned out and I feel that I have created a perfect environment for growing some really nice garlic, the truth will show itself. With the chicken and horse manure I added plus the mulch layer, the tips of the garlic cloves should be buried with about 3 inches (7.6 cm) of material. With a decent snow cover they should be well protected from the harsh winter weather, typical for Zone 3b. As it turned out, we never got any moisture for a couple weeks and so the bed remained dry as I did not water it. The cloves should not have sprouted so I will see how that affects the growth in the spring.
At the end of it all, I planted 169 cloves of garlic. That's a lot of garlic! Now to wait till spring to see how many come up, how each variety does through the summer and then for fall to see how much I will have on hand to gift, sell, dehydrate and to use fresh for culinary and medicinal uses.
If you enjoy this content, please consider joining the My Boreal Homestead Life community. By supplying your email address at the bottom of the page and hitting "sign up" or by clicking Join, you will ensure you get an email notification when I post new blogs to the My Boreal Homestead Life site.
Thank you for joining me on the front porch of My Boreal Homestead Life as we explore this Homegrown, Homestead life, In a modern world.
ADDITIONAL RESOURCES
- Homesteading Family - How to Plant Garlic (Fall Garlic Planting)
- Homesteading Family - Preparing the Garden for Winter: No-Till Gardening
- Simeon & Alex - formerly Swedish Homestead - Take charge of your food supply - How to plant garlic
- Roots & Refuge - How To Plant Garlic (And Elephant Garlic)
- Simple Living Alaska - Turning this Bare Land into a Garden