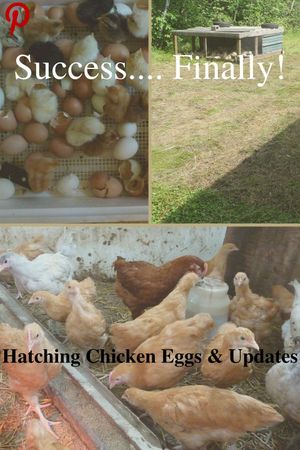
I have been hatching chicken eggs for a few years now but this year I bought a new incubator and have been trying to successfully hatch chicken eggs. Although the two previous hatches have been less than successful, this go round I think I may have figured out what is going on.
Backstory
Over the years, I have been exploring raising some sort of meat bird that could reduce my dependence on the hatchery for meat bird chicks. I knew I could raise my own layers with the bird varieties I have, but the meat birds have been a stumbling block. So this year I decided I would try raising some Jersey Giants and Buff Orpington to satisfy that want for self reliance. I explore this process in How to Incubate Eggs.. I bought some Buff Orpington chicks rather than buying hatching eggs and am glad I did. But I wanted the Jersey Giant's as well so I purchased some Jersey Giant hatching eggs to incubate along with eggs from my own flock. From the original set of 15 Jersey Gian eggs, I got one Jersey Giant. And from the eggs gathered from my own flock, I had 4 live chicks. All very disappointing to be sure, but the Jersey Giant hen is doing well at about two months old. 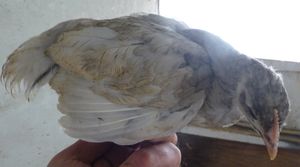
With the fact that I had such a dismal hatch the first time around, I thought I needed to figure out what was going on. Was it the technique, the eggs or just bad luck? So I ordered another six Jersey Giant eggs and then filled the remaining room in my HavaBator Incubator I purchased from Rochester Hatchery with eggs from my own flock. As I did not separate the birds by breed, the resulting chicks would be considered a barnyard mix. I was okay with that. I explored this process in the blog Is a self sufficient homestead doable? Incubating chicken eggs for meat and egg laying hens and incubating turkey eggs. Well suffice it to say, the hatch success was dismal. I had one egg hatch from my flock. No Jersey Giants hatched and so have decided that I will be not ordering any more. I broke open all the eggs and found much the same results as before. Namely, the majority of the chicks were dyng at day 18 or 19. But why? I needed to know.
So the research began into reasons that resulted in this poor success with hatching chicken eggs. Although I felt confident that the feed was acceptable, I also realized that it could be a factor. But the piece of research that I found as an ahha moment, and I explored in Incubating chicken eggs - Will I be successful this time?, was that the chicks needed a lot of air in the last days of the hatch and that it was better to increase air flow and find other ways to increase humidity. As I had been leaving the vent plug in the incubator as per the instructions that came with the incubator my ahha moment was profound. So despite the Hava-Bator incubator's instructions, I pulled out the vent plug and left it out for the entire 21 days of incubation and thereby allowing for fresh air to enter the incubator.
The third attempt at hatching chicken eggs
For the third attempt at hatching chicken eggs, I monitored the temperature daily to ensure the temperature stayed around 99.5 F (37.5 C), which is one degree lower than I normally have hatched eggs, but decided that because of some counter research to the 100.5 F I would give it a whirl. Bottom line is that as long as long as the temperature stays in the 99 - 102 F (37.2 - 38.9 C) range, hatching of chicken eggs should be successful. I also monitored the humidity to ensure a 50-55 percent humidity for the first 18 days with the hygrometer I purchased during the last hatching experience.  And although the humidity level would decrease as the water evaporated during the hatch and raise high when I added water, the average stayed in the recommended setting range of 50 - 55%. But this time I did not candle the eggs and I left the Hava-Bator incubator closed all the time except to add water. I decided that whatever will be will be and there was no point in candling this time and risk jarring the eggs. This decision was based in part on an interview that Melisa K Norris did with Tom McMurray of Murray McMurray hatchery in Breeding Chickens (Meat Birds) – Tips for Success where he explains why they never candle eggs once they are in the incubator. The eggs were left alone to do their thing for the next 18 days.
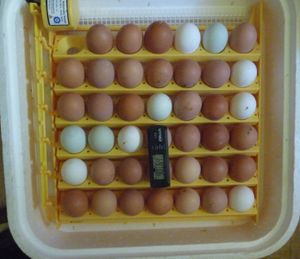
Hatching Day
On day 18, I took the eggs out of the automatic egg turner and layed the eggs flat on the floor of the incubator and then raised the humidity of the incubator to 65 - 70% for the final days of the set by adding extra water to the water tray as indicated in the instruction sheet. On day 20 evening I had one chick starting to pip out and by the end of day 21, I had 20 fluff balls running around the incubator. I left them in the incubator till the next day when I opened the incubator to remove them.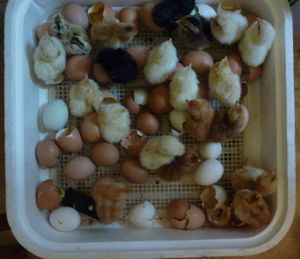
I had quite the color combinations in my barnyard mix of hatched chicks. Based on the colors I would have to say that my Ameraucana roosters have been busy. But I also have some beautiful colored hens which would attribute to the color and marking combinations of these chicks. These chicks look like Ameraucana chicks though.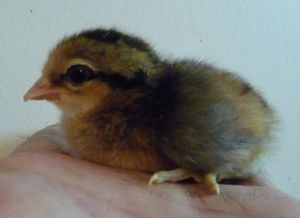
Some were black and some had interesting markings.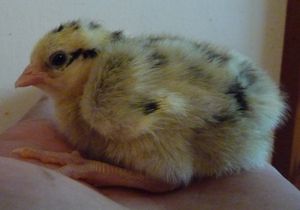
But I also got some Leghorn chicks as well.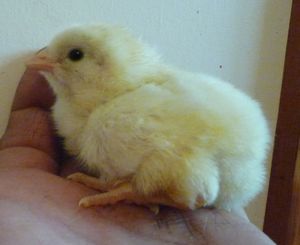
Moving chicks to their new home
I thought that the newly hatched chicks might be fine to combine with the young flock of Buff Orpington and the six birds from my first two hatches which are now about 2 months old.  My experience would dictate that combining newly hatched chicks with birds that are older than 3 - 4 weeks old never goes well. But I put those feelings aside and combined them. After all what could go wrong.
  Well, experience is always the great teacher and I should have listened to my experience. Within a few minutes the older birds started picking on the newly hatched chicks and started grabbing their feet and flinging them around the brooder pen.
I quickly pulled out the 20 chicks and brought them in the house and found a box I could use to make a brooder for them. I pulled out a brooding lamp with a shroud and put a 100 W incandescent bulb in it. I have found in the past that it is too hard to regulate the temperature in small enclosures using a heat lamp. It is always too warm and the risk of fire is of concern. But the incandescent bulb, if put close to the floor of the brooder, generates enough heat to keep the temperature directly under the bulb around 99 - 100 F (37 - 37.8 C) and the shroud on the brooder lamp helps hold the heat and acts a bit like a mother hen. There is just enough room under the shroud for the chicks to get under it. All 20 birds went into the cardboard box in my spare room where they will spend the next week or so.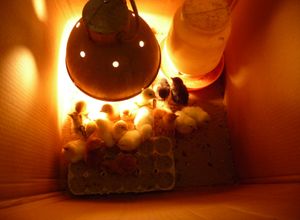
Analysis of successfully hatching chicken eggs
I left the unhatched eggs in the incubator for another two days to ensure that what was going to hatch would hatch. I have read some stories of eggs taking a little longer than the typical 21 days so I thought I would just leave well enough alone. But after two days I unplugged the incubator and cracked all the unhatched eggs to see what happened. The findings were interesting to say the least.
Of the 41 eggs that I put in the Hava-Bator incubator, 21 did not hatch. Of these 21 eggs, 11 eggs were clear indicating non fertilization. This 26.8 % clear rate is not dissimilar to my earlier incubations and is not surprising considering that I run a low rooster to hen ration of about 1 rooster to 20 hens. Recommended rates for good fertilization is about 1 in 10 but I choose to have more hens per rooster as I do not want to feed the extra roosters.
Of the remaining 10 eggs, 2 eggs had rings indicating the embryo died shortly after incubation started, 1 chick started to pip out but died, 1 chick died around day 5, 1 died at around day 15 and the remaining 5 died at day 19 or 20. For a graphic representation of the various chick development stages The Poultry Site has a complete illustration in Embryonic Development, Day by Day.
So although I had a successful hatch rate of 66.7% from the fertilized eggs, it was concerning to me that 5 chicks died at day 19 or 20 and one died during pipping. There are many reasons why this could happen as I identified in Incubating chicken eggs - Will I be successful this time? and despite the information provided by University of Illinois Extension office in the article, Some reasons for poor hatches, I could not help but feel that it was still tied to lack of oxygen. And so I made a phone call.
Next steps
I do like the style, ease of use and the quality of the HavaBator incubator manufactured by GQF Manufacturing. But the hatching success over the three times I was incubating chicken eggs was less than perfect at approximately 21% success rate overall. But being that I established through the last incubation that the poorer results were, at least in part, due to lack of oxygen supply I wanted to know if other people had experienced this. I was going to email GQF Manufacturing about it, but decided that talking to them directly was a better way. So I gave them a call and I am so glad I did. I got to speak to a gentleman who seemed very interested in my findings. We walked through my process and talked through what was happening. Although he said that he had not heard of anyone else having similar problems, he seemed genuinely receptive to my suggestion of removing the statement in the instruction manual that said the air plugs could stay in unless incubation was being done over 6000 ft above sea level. He also thought that drilling an extra vent hole in the plexiglass top would not be such a good idea because he thought it may cause a problem with spider cracking of the plexiglass. I can't disagree with him, but I still may try it at some point.
I mentioned to him that because the structure of the incubator was such that the lid is so tight fitting that perhaps there is not air sneaking in along the edge. I also mentioned that because the electrical chord is taking up one of the air holes, that perhaps the small red hole in the top of the incubator, the only air hole, was not sufficient to keep the oxygen levels high as more chicks hatch. He agreed that perhaps it could be either of these but emphasized that this is the first time he has heard of a problem and that a 66.7% hatching success was really not that bad. I couldn't disagree with him.
I mentioned to him that although it is too late in the year to try another hatch, next year I plan to prop the lid open a little bit to increase the oxygen flow in the setting area of the Hava-Bator incubator. He did not dismiss it and will be looking into this some more on his end.
But despite the air problem with the Hava-Bator Incubator that I bought from Rochester Hatchery, I really do like it and would recommend it. I would just emphasize that the plug for the air hole be left removed for the entire time one is hatching chicken eggs.
Rehoming the chicks
After spending a week inside the cardboard box in the spare room it was time to get them outside into the brooder. I had another batch of Cornish cross arriving the following week after the last birds hatched and so to make room for all the birds, I took the older young birds and moved them to another building leaving behind the one Sex-sal link brown AKA ISA Brown male that was the only chick to hatch from the second batch. He had had a rough go of it with all the older birds but was going to get some room mates more close to his age, about 4 weeks apart.
It is interesting how much they change in just a week. You can already see the flight feathers coming in.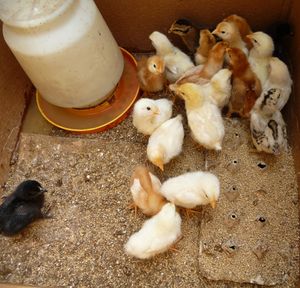
There are a couple black ones. Notice the green legs indicating that they are Ameraucana chicks and because of the leg color, if it is a hen, it will lay green eggs. Being it is so black makes me think it may be crossed with one of my Barred Plymoth Rock birds. Hard to know in a barnyard mix.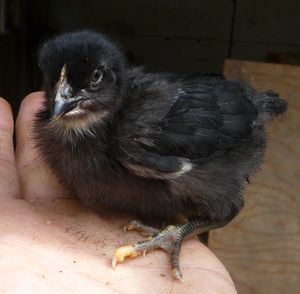
This chick is a very colorful Ameraucana cross. Notice no green legs despite the barring from an Ameraucana parent.
 Got a couple Sex-Sal link chicks as well to join the rest of the flock.
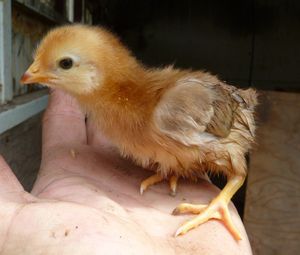
About two days later the Cornish Cross arrived for the next round of broilers to raise up. It certainly made for another, colorful brooder pen.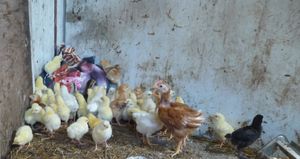
Other Updates
In about a month's time, the second batch of Cornish cross will be destined for the moveable chicken coop AKA chicken tractor I built in the blog post I try Pastured Poultry for the first time with a DIY moveable chicken coop. I move the chicken tractor every day and it is doing a good job of distributing the manure across the lawn. The bonus is no mowing grass and no cleaning pens. And other than lowering the wheels to give more clearance between the bottom of the moveable chicken coop AKA chicken tractor and the ground, I am happy with how it is working.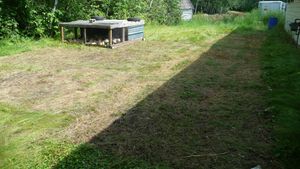
The turkeys I got with the first round of birds are doing well in their new home as well.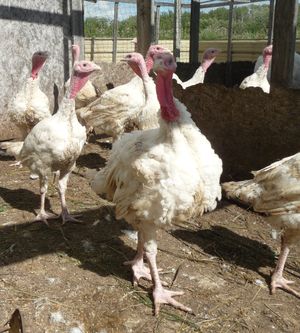
Final thoughts
It has been an interesting and learning year for me with incubating chicken eggs and although my success in incubating chicken eggs is limited to the last setting in the incubator, I am still very happy to have acquired the Hava-Bator Incubator manufactured by GQF Manufacturing and sold to me by Rochester Hatchery. Next year, I will try getting more air movement into the setting chamber but for this year, we will raise up the 26 chicks I got. It is sad to say, but winter is just around the corner.
Although the future of the 26 chicks I hatched out this year is uncertain at this time, it will be interesting to see how they all mature. When hatching chicken eggs the normal hen/rooster split is about 50/50 so once I determine which are roosters I will decide what their future will be. The hens will join the laying flock once they are old enough to do so at around 18 - 20 weeks of age.
I hope you enjoyed this exploration into the next chapter of my journey into establishing a self sustaining, self sufficient broiler and egg layer flocks. If you did and If you enjoy this content, please consider joining the My Boreal Homestead Life community. By supplying your email address at the bottom of the page and hitting "sign up" or by clicking Join, you will ensure you get an email notification when I post new blogs to the My Boreal Homestead Life site.
Thank you for joining me on the front porch of My Boreal Homestead Life as we explore this Homegrown, Homestead life, In a modern world.
ADDITIONAL RESOURCES
- Michigan State University - Why are chicken eggs different colors?
- Murray McMurray Hatchery Blog
- The Poultry Site - Care and incubation of hatching eggs
- Homesteading Family - Using Chickens to Restore the Land
- Homesteading Family - Raising Backyard Egg Laying Chickens
- Homesteading Family - Everything You Need to Know About Raising Meat Chickens
- Stoney Ridge Farmer - Everything Chickens
- Heartway Farms - Incubating chicks
- Heartway Farms - Raising Meat Birds
- Living Traditions Homestead - Hatching Quail Eggs Can Be Simple!
- Homesteading Family - How to Ferment Chicken Feed for Cheaper Healthier Chickens
- Farm Marketing Solutions - How To Make Money With Chicken Tractors
- Farm Marketing Solutions - What is a chicken tractor?