
Water is the key to so many things in life. It nourishes the land and in so doing nourishes the animals, birds, plant life and microbiology. Without food many species, including humans, could survive for quite some time but without water, things do not survive for long. I have tried a number of things over the years to secure a reliable water supply but it is only the last years that I have moved away from hauling water to a more secure water supply. However, it is not perfect and there is still more to figure out but for now, well, It's a well.
Backstory
As I explored in the article Water - The journey from sandpoint, dugouts and water tanks to a well, during the 30 years I have lived here I have used a number of water supply techniques, the most recent being a 45 gallon drum in the basement that I filled with 5 gallon pails of hauled city water. It worked, but I was always hauling water.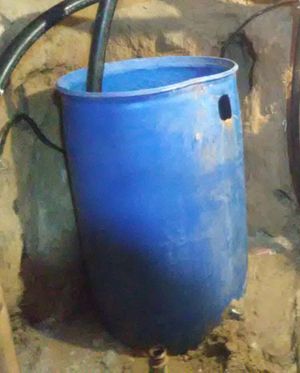
While I was hauling the water for the house and the animals, I was researching. There are many ways to secure a supply of water such as rain water catchment, dugout, sand points and a water well. And although each has it's merits as I explored in Water - The journey from sandpoint, dugouts and water tanks to a well, I eventually decided that a water well was the best option for me. And so, I started the journey to establishing a well as I explored in A Test well - The next step to Water security.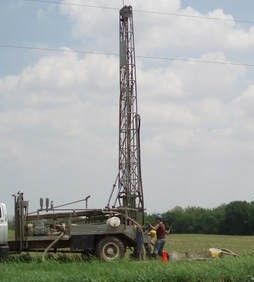
Drilling the well
With the decision to drill the well having been made, it was a matter of waiting until the well drilling contractor fit it into their schedule. To decrease my mobilization costs the well drilling contractor, Wellon Boring Co. Ltd, was working with other folks in the area to coordinate the well drilling. The date was eventually set for October 21, 2021. In the meantime, the well drilling contractor organized the materials they needed and had a truck load of fine gravel delivered for use in finishing the well.
The day finally arrived. It was a beautiful sunny fall day and although a wee bit chilly, it was perfect. Something I had pondered over, planned for, and talked about over and over again was finally going to come to fruition. Despite the chill in the air, as the well drilling contractor pulled their equipment into the yard and began to set up for the day ahead, the anticipation of what was to come made those hours, days and years of hauling water seem like I was graduating from one of the many classes of life that homesteading or farming teaches. And if nothing else, at the end of it all, it would make me appreciate the simple blessing of being able to turn on a tap to get water without having to haul it into the house first. 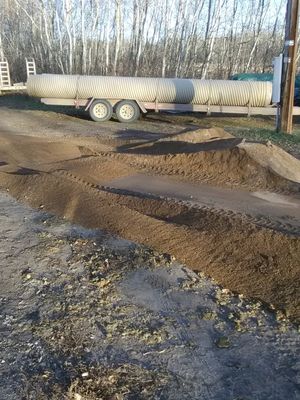
I had a lot of questions of the well drilling contractors and they were more than gracious with their responses. They took the time to explain things fully and ensure that I understood. But the first thing they needed to do was set up the well drilling equipment. After reviewing the findings of the test hole as I shared in A Test well - The next step to Water security, I decided to go for a large diameter well that would be bored to the clay, expected at 50' down, and so the equipment is sizeable.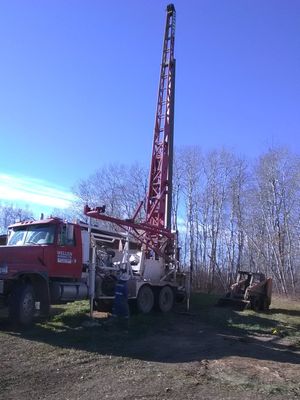
The well drilling contractor bores a 42" diameter hole that once completed will accept a 30 inch fiberglass casing and all the fine gravel that they had delivered. The equipment is of some size and has two toothed blades at the bottom of the well drilling bucket that scoops up the earth into the bucket. Once filled, the bucket is extracted from the earth, and with a flip of a leaver a trap door opens and the bucket empties. 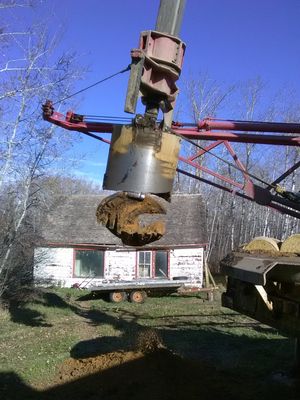
The trap door is closed and the bucket is lowered back into the hole to extract more earth. As each bucket is removed and dumped on the surface of the earth, you can see the various layers as identified in the test hole results.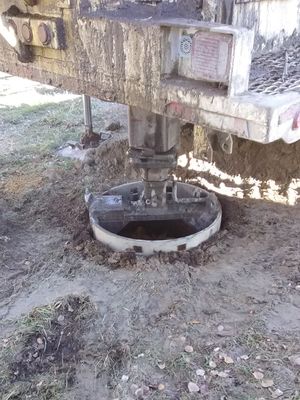
As the day wore on, the hole got deeper and deeper and once they got down a ways they started adding water to the hole. The well drilling contractor explained to me that this was to help prevent cave in. Because they are removing so much material from the hole, there is a risk that the weight of the surrounding earth would cause things to collapse without the water. Additionally, as the well drilling contractor got deeper the ground water will follow the path of least resistance and will head for the newly bored hole thereby causing wash out. The water helps equalize the pressure and prevent any type of collapse and/or wash out. A berm was built around the hole to prevent water from escaping as the drill head was lowered and removed from the hole. To help prevent a possible collapse and/or wash out , the well drilling contractor also added Bentonite Clay to the hole. The well drilling contractor explained that the clay would help to seal the sides of the hole and prevent seepage of the water into the surrounding area which therefore helps prevents collapse.
  Eventually the well drilling contractor ran out of water and so the drilling stopped while one of the workers went to go get more water. Although the hole contained the bentonite clay and was filled with water, a slow seepage was occurring. As we waited for the water truck to return, which seemed to take forever, we watched the level in the well slowly go down inside the newly bored well hole. Although it seemed like maybe a lesson in futility, I started to bucket water from my troughs. Whether it made a difference or not, replacing the lost water in the bored hole with 150 gallons of water did make me feel like I was perhaps saving the day by preventing a collapse. Shortly after, the water truck returned and the well drilling contractor was able to start well drilling again.
Setting the well casing
Bit by bit and foot by foot, the well drilling contractor bored deeper into the earth's surface. It was interesting to see the various strata of earth being dumped onto the pile beside the hole. Eventually though, clay started to come up with each bucket load and the equipment was having to work harder. Up to this point it was mostly sand so it was relatively easy digging. And then finally, we were at 50' and hit clay. The well drilling contractor continued to dig another two feet so that the bottom of the fiberglass casing was sitting in clay which would help support the fiberglass casing above. The large diameter hole was now bored and was ready to receive the fiberglass casing.
While boring was happening, in preparation for putting the fiberglass casing down the large bored hole, the well drilling contractor had to do some preparation. Using a miniature skill saw with an approximately 0.15 inch (3 mm) carbide tipped blade, a number of approximately 4" (10 cm) slots were cut horizontally down the length of the fiberglass casing about 8 inches (20 cm) apart around the circumference.  These slots will allow the water to flow into the well but would prevent the fine gravel, which will be added, from entering the well. A cap was also put onto the bottom section of the fiberglass casing that will rest on the clay at the bottom of the well.
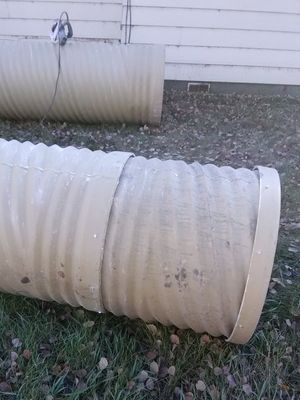
With the well hole ready to accept the bottom section of the well casing, the same equipment that bored the well picked up the prepared fiberglass casing and lowered it into the now water filled hole. At first it bobbed around but as the 30" well casing filled with water it soon lowered into place with the cable holding it from sinking out of sight. The first section was in place.  With the well drilling equipment holding the bottom section in place, the well drilling contractor was able to pick up the next section and lower it in place so as to connect it with screws to the bottom section.
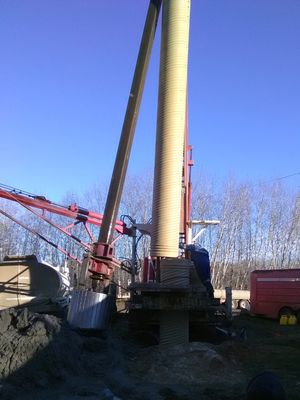
Once connected, the lower strap that was stopping the bottom section from sinking to the bottom of the hole was removed. A truly picturesque site with the clear blue sky as a back drop for the well casing slowly lowering into the ground with the sound of water gushing in through the slots in the fiberglass casing, pulling the entire well casing to the bottom of the hole where it shall remain for my lifetime at least. Although it had been a long day, it had been a very educational and exciting day, a true culmination of planning, years of learning opportunities and wishing. However, I was brought back to the reality of the situation when the well drilling contractors informed me that we were not out of the woods yet.
Developing a well
The well drilling equipment bores a hole that is 42" and the well casing is only 30". This leaves 6 inches (15 cm) on all sides of the fiberglass casing that needs to be back filled. But not backfilled with just anything. It needs to be a fine gravel such as the load of fine gravel that was delivered before the well drilling contractors arrived on site. Using a bobcat, the fine gravel was now being scooped up and slowly dumped around the fiberglass well casing. As the well drilling contractors informed me, this is where it gets tricky because the pressure of the gravel combined with the water can cause the well casing to collapse. And so, with obvious talent and intentionality, the well drilling contractors slowly backfilled in around the well casing until the entire hole was filled.
The fine gravel not only holds the well casing in place, but it also acts as a filter to stop the fine sand from entering the well casing and slowly filling the completed well with sand. With everything now in place, the final step was to develop the well.
Developing a well involves removing a large volume of water from the completed well to allow the water outside the well casing to come gushing in and thereby settle the gravel and to reopen the water veins underground. This is done with a very large metal container that has a trap door on the bottom. It is lowered into the hole, filled with water and then brought to the surface where the trap door is opened and the water is released.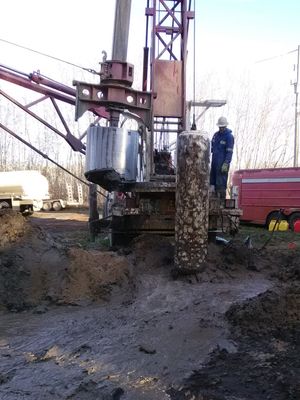
I do believe the container is about 100 gallons and many containers of water were brought to the surface. After quite a few containers of water being removed, I talked to the operator and he informed me that the well had an exceptional refill rate of 100 gallons/minute. In that moment it all seemed worth it.
But in developing a well, a lot of water is dumped on the ground and being the well is on the top of a small hill beside the house, a major river of sand and water developed. It eventually soaked away and dried up though. Poor planning on my part as to the placement of the bales. As if in a flashback to my childhood, some trenching had to be used to direct water flow to less detrimental areas.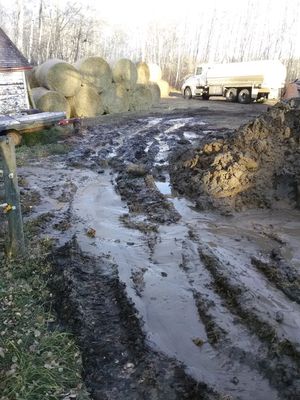
With the water well development completed, the water well is now ready for the next step to water security. Before the well drilling contractor put the lid on the newly developed water well, a quantity of bleach was dumped down the well which he explained is to kill any contaminants that may have entered through the process. I had to go to work that night and so the well drilling contractor, Wellen Boring Ltd, proceeded to clean up as best they could and even filled the trough I had emptied earlier. A nice little added touch.
Cost to drill a well
The cost to drill a well will vary dependent on whether you put in a small diameter well (5 inch) or a large diameter well (30 inch), where you are located and how deep you need to go. Although it may seem like an additional unwarranted cost, drilling a test well as I explored in A Test well - The next step to Water security is crucial to knowing the costs up front and not having those unexpected expenses.
I am not going to sugar coat it, the initial outlay of cash is expensive. But, if I break it down over the anticipated lifetime of the well and the fact that I do not have to haul water and the expense and lost time doing that, the cost is easier to swallow.
For my 30 inch (76 cm) diameter well that was bored 52' (15.8 m), the costs (in Canadian dollars) for drilling the well and test hole were as follows:
| Description | Qty | Rate | Amount |
|---|---|---|---|
| Dry Auger Testing | |||
| Dry Auger Test Drilling /ft | 50 ' | 12.50 | 625.00 |
| Auger Rig Mobilization | 160 km | 1.50 | 240.00 |
| Discount for Shared Mobilization | -53 km | 1.50 | -79.50 |
| Total cost for Dry Auger Testing | $785.50 | ||
| Bored Well | |||
| Boring 42" hole /ft | 50' | 120.00 | 6000.00 |
| 30" Fiberglass Casing /ft | 52' | 105.00 | 5460.00 |
| 30" Fiberglass Covers (top and bottom) /each | 2 | 185.00 | 370.00 |
| Supply & install gravel & develop well | 500.00 | 500.00 | |
| Boring Rig & Equipment Mobilization (one way) | 160 km | 5.00 | 800.00 |
| Discount for Shared Mobilization | -53 km | 5.00 | -265.00 |
| Total cost for Boring 30" well (pre tax) | $12,865.00 | ||
| Total Well Cost to date (pre tax) | $13,650.50 |
Final thoughts
Although many hours and years of planning, research and comparisons went into the decision to spend a total of $13,650.50 (Canadian dollars) just to bore a hole in the earth, the excitement of the day was almost intoxicating as I thought of what it meant for me and the homestead. Water is key to so many things and not having to spend countless hours hauling water and bucketing water in all seasons was worth the expense. In reality and perhaps to ease the financial pain, if I were to amortize this expense over the expected life of the water well, say 20 years, it works out to $682.52/year. I am sure I would currently spend that in time lost, vehicle cost and water cost.
To look at the costing another way, at the end of the project thus far, the cost, in Canadian dollars, of boring this large diameter well including the test hole is $262.51/foot, pre tax.
The well drilling contractor, Wellen Boring Ltd., was exemplary. Their attention to the smallest of details and willingness to share information made for an enjoyable and educational day.
With the water well in place, the next step is to get it plumbed into the house and that was scheduled for a couple weeks out. Be sure to check back for the next installment in the series as I explore my journey to water security.
If you enjoy this content, please consider joining the My Boreal Homestead Life community. By supplying your email address at the bottom of the page and hitting "sign up" or by clicking Join, you will ensure you get an email notification when I post new blogs to the My Boreal Homestead Life site.
Thank you for joining me on the front porch of My Boreal Homestead Life as we explore this Homegrown, Homestead life, In a modern world.
ADDITIONAL RESOURCES:
- Well Owner’s Handbook A Consumer’s Guide to Water Wells in Minnesota
- Stoney Ridge Farmer - Live drilling a well
- A Landowner's guide to Water Well Management
- Heartway Farms - Your Off-Grid Homestead & This One Thing Changes Everything!
- Homesteading Family - Our Farm Watering System at Riverbend
