It is one thing to have a well drilling contractor bore a new water well for use on the homestead, but the cost to drill a well would not be complete if the water does not get to where I need it. To facilitate this, installing a new well pump and well plumbing are the first order of business.
Well water on the homestead
As I have explored in a number of blogs thus far, my journey with water security has been a long and winding one as I explored in Water - The journey from sandpoint, dugouts and water tanks to a well, ultimately culminating with the decision to bore a large diameter well as I explore in Well, it's a well. The next step to water security..
With the well bored and a water supply generating 100 gallons per minute (GPM), it is now time to get the water to where it needs to be. Short of building a well head over the well and lowering a bucket down to retrieve water, a well pump is a convenient way to get water into the house and to the various areas of the homestead. To do this, there are two different options available that include a submersible pump and a convertible well jet pump.
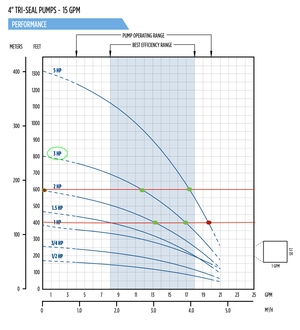
A submersible pump is a pump ranging in size for home use from 1/2 horse power (HP) to 1 HP that is, as the name implies, lowered into the well below the water surface and then when operated pushes the water through the lines. As the article Choosing the right submersible pump for your water well. explains, "A 1/2 HP 5 GPM pump creates more pressure and less flow than a 1/2 HP 10 GPM pump. In the pump industry we typically designate pumps by both the flow rate and horsepower required.". Although one would think that the horse power of the pump would ultimately affect how much water comes out of the tap, the gallons per minute (GPM) has more of a bearing on flow than the horse power. The horse power of the submersible pump will be decided upon by how far the pump needs to push the water as this graphic from Choosing the right submersible pump for your water well illustrates.
A convertible well jet pump is similar to the well jet pump in that it sucks the water out of the well. Although a well jet pump can suck water from depths of 20 - 33 feet, a second intake line is added to make a well jet pump into a convertible well jet pump and thus allow water to be sucked up to depths of several hundred feet. As the article Is it time to switch my Jet Pump to a Submersible Well pump? explains, "Deep well jet pumps have two pipes that go down into the well and are capable of pulling water up from depths of several hundred feet. Deep well jet pumps do this by recirculating a large quantity of water back down the well to a jet assembly that has been installed at the bottom of the two pipes in the well. The jet assembly has a water intake on the bottom and a nozzle and diffuser that the recirculated water is force through to create a vacuum to suck water in from the suction intake. This water is mixed with the recirculated water from the top and is then pushed to the surface.".
However, as the article Is it time to switch my Jet Pump to a Submersible Well pump? and my well pump contractor explained, "The water recirculated by jet pumps to extract water from deeper wells uses a significant amount of additional energy and there is much more resistance to water flow, or friction losses, because of the additional length of pipe required in this type of system." and because "Submersible pumps are installed in the water down in the well so the limitations on sucking water do not apply and recirculation is not necessary. Every gallon (or liter) pumped by a submersible well pump comes out of your faucet while a deep well jet pump may need to pump and recirculate 3 or 4 gallons of water for every gallon that comes out of your faucet!".
With the information in hand and at the recommendation of my well pump contractor, I decided that a 1/2 HP submersible well pump with a minimum 10 GPM would be installed down my newly bored well. This decision was also influenced by a few pros and cons such as,
- A submersible pump requires a control box and power to be supplied to the submersible pump and control box. A number of feet of underground electrical cord will be required to power the system;
- A submersible pump is outside the house and down the well so noise from the pump is not inside the house as it would be with a convertible well jet pump;
- A convertible well jet pump requires priming whereas because a submersible pump pushes the water, no priming is necessary. Being that a small hole can cause the prime to be lost and having dealt with priming a well jet pump for years, this was a big factor to consider;
- A submersible pump is dropped down the well and so service requires pulling out the many feet of supply line to work on the pump. Because the pumps are sealed at the factory they are generally not serviceable on site and so are often just replaced;
- A convertible well jet pump is generally in the basement or a pump house and so servicing or replacement can be done without having to remove from the well. However, the jets can become encased in calcium deposits and should be inspected periodically;
- An electrician or figuring it out myself would be required to revamp the breaker box and install the control box for the submersible pump.
Installing a new well pump
With the decision made to put in a submersible pump it was time to line up the well pump contractor. Prior to the work being done, the local well pump contractor I was using came to determine the materials that would be needed to complete the installation. Being the new well is only twelve feet from the house, the amount of piping and digging that would have to be done was quite small. However, as I explained to the well pump contractor, I was concerned about cave in under the house because of the proximity to the house that digging would happen, the fact that there is only a sand cellar under the house and that the soil structure was not super rigid. But he assured me that they would be careful and that it should not cause a problem. Trusting in his abilities, we set the date for November 3, 2022 provided the weather held.
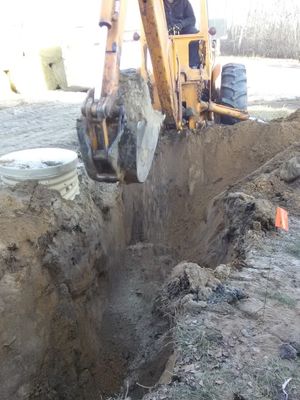
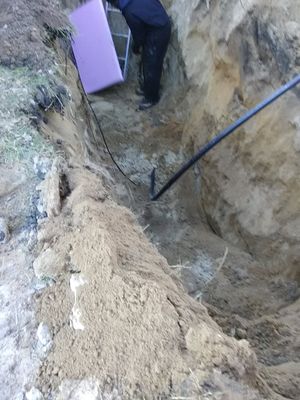
And the weather held greeting with a chilly, but sunny, day to do the work. Early on the morning of November 3 the well pump contractor showed up with the necessary equipment and materials to do the work. After unloading the backhoe the first order of business was to dig the hole between the house and well that would allow the well pump contractor to burrow into the cellar through which to pass the 1 1/4 inch Medium Density Polyethylene Series 75 Polytube and wire for setting up the control box and supply power to the submersible pump. The Series 75 polytube is made from Linear Low-density polyethylene (LLDPE) and although there are many harmful elements that come from the plastics we commonly use, as I explored in Canning Water...Yes, Water! - Reusing odd shaped jars, the LLDPE plastic is probably one of the better. Although something else may have proved to be better, the cool water temperature, constant water movement and lack of sunlight to the piping will ensure that this industry installation standard will provide little to no contamination of the water supply as the product risk assessment identifies.
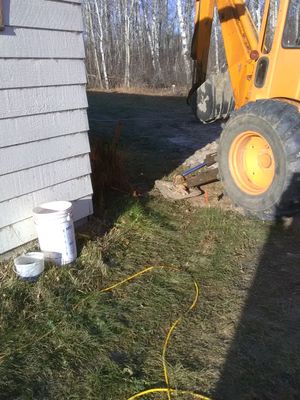
The well pump contractor stayed about two feet from the house foundation when he started to dig. The well pump contractor needs to go a minimum of seven feet down so the hole needs to be fairly large to allow for slumping of side walls with the soil structure as it is.
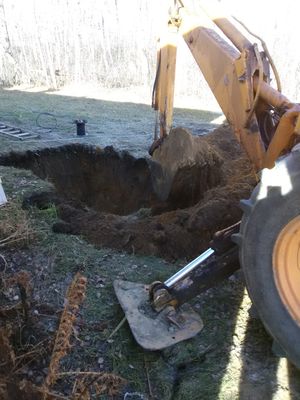
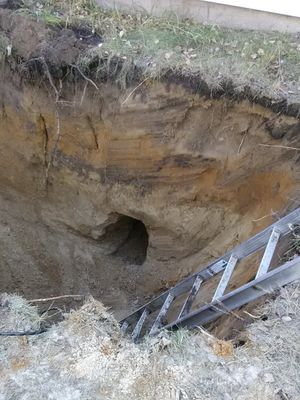
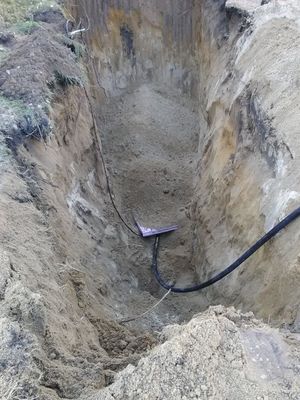
Although this close proximity digging was a little stressful for me, in short order the hole was dug with no collapse from under the house and the well pump contractor was able to start digging the trench to the well that would allow for the Series 75 polytube and wiring to lay. Being a short 12 foot run, the digging of trench was relatively quick and before long the well pump contractor was digging to expose the side of the well to allow access for installation of the pitless adapter.
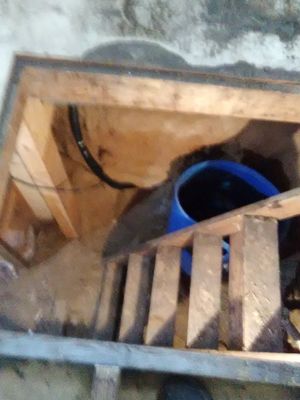
With the trench and hole dug, accessing the cellar was the next order of business. Using a shovel the well pump contractor started to burrow under the house while his helper started digging from inside the cellar.
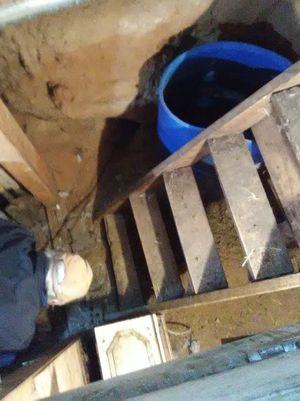
After digging through for a bit, a piece of rebar was driven through to guide the digging and eventually a hole was dug under the house. Nothing collapsed thankfully.
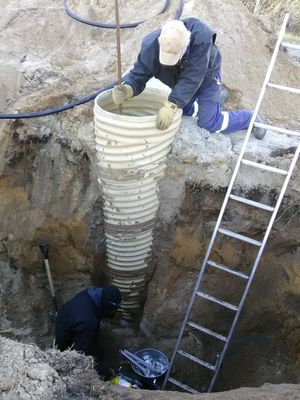
And with everything dug out and the well exposed, the well pump contractor was ready to pass the polytube supply line and wire into the cellar of the house.
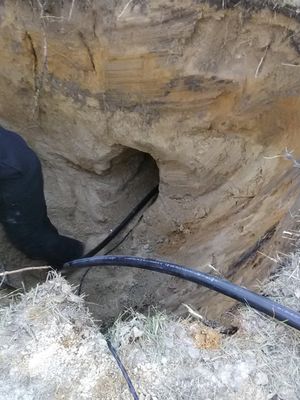
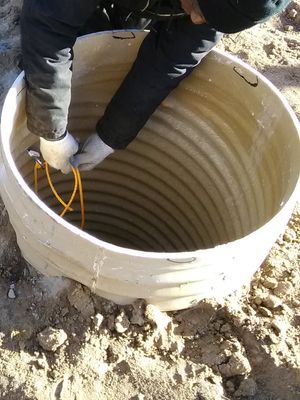
The supply line and power cable were pulled into the cellar giving enough length to do the pump installation required in the house.
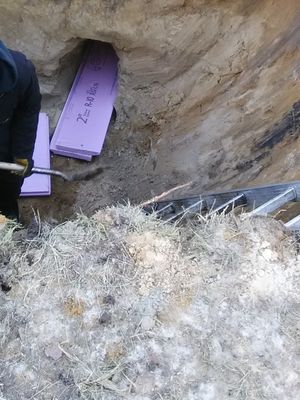
The winter in Saskatchewan can be very cold and although piping is typically placed up to eight feet or more into the ground to prevent freezing, lines can still freeze as I found out with my sewer line a few years back. So with the supply line from the well only being about seven feet down, the well pump contractor and I had a conversation about freezing pipes. He explained that when it is not doable to dig as deep as needed, that the use of Styrofoam to help prevent frost from coming in direct contact with the supply lines is used. Not only does the Styrofoam create a pocket of warmer soil, by placing the Styrofoam directly over the supply line the frost is forced around the supply line and thus prevents the freezing of the supply line. And so, a four inch layer of Styrofoam was added over the supply line and power supply prior to burying everything.
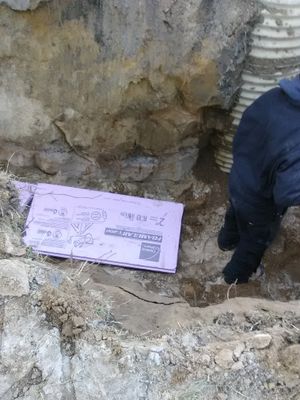
It is also important to ensure that Styrofoam was also placed over the supply line going into the cellar. After Styrofoam installation, dirt was put over top to hold the Styrofoam in place and the tunnel was filled in.
With the supply line insulated and partially buried, the well pump contractor was able to install the pitless adapter, making sure to also insulate around all the lines. A pitless adapter allows for the submersible pump to semi-easily be removed from the well should it need servicing and prevents kinking of the line coming out of the well.
Installation of the brass pitless adapter involves drilling a hole in the well cribbing well below the frost line and installing the brass adapter. It is definitely a two person job.
Once completed, the well pump contractor insulated everything and then started back filling the hole and trench. I am closer than I ever have been to getting water into the house.
And with the pitless adapter installed and the hole and trench backfilled, it was now time to lower the pump into place. The home stretch was in view. Approximately 30 feet of the 1 1/4 inch Medium Density Polyethylene Series 75 Polytube was unrolled and the male insert adapter end of the pitless adapter was attached to the top of the polytube with the submersible pump being attached to the bottom. The remaining electrical wire that was fed into the house was then stretched out the length of the polytube and the submersible pump was wired and waterproofed. Finally a full length of rope was attached to the submersible pump that will allow lifting and lowering of the submersible pump without placing undo stress on all the well plumbing connections.
The whole contraption was then lowered into the well. An exciting moment for me, to be sure.

As the submersible pump is slowly lowered, completion of the submersible pump installation is done by sliding the male insert adapter end into the female insert adapter. The submersible pump was then tied off using the rope that was attached to the submersible pump prior to lowering it into the well. The submersible pump was now installed into my new water well.
Cost of Well pump installation
As I explored in Well, it's a well. The next step to water security. boring a large diameter well is not cheap. Although the cost to drill a well thus far is $13,650.50 (Canadian dollars) pretax, the well pump installation was not part of that cost and so it must be added. This part of the project cost can be broken down as follows:
| Quantity | Description | Price |
| 1 | 1/2 HP Stainless steel submersible pump | 1,065.00 |
| 1 | 1/2 HP Control box | 145.00 |
| 1 | 1 1/4 pitless adapter | 55.00 |
| Misc brass fittings and adapters | 65.00 | |
| Shop supplies | 35.00 | |
| Styrofoam insulation | 130.00 | |
| Work - installation, basement entry, excavation, trenching, hookup, backfill | 1,500.00 | |
| Total Cost (pretax) | $2,995.00 |
Final thoughts
Luckily, skillfully and thankfully, the well pump contractor was able to complete this part of the project without having my house collapse. And although I am closer than I have been to having the water in the house, there is still a few things that need doing. With the cost this far at $16,645.50 (Canadian dollars) pretax, it has definitely not been a cheap or stress free undertaking. But hopefully, once the wiring and plumbing are completed in the cellar, I will have water to use in the house.
If you enjoy this content, please consider joining the My Boreal Homestead Life community. By supplying your email address at the bottom of the page and hitting "sign up" or by clicking Join, you will ensure you get an email notification when I post new blogs to the My Boreal Homestead Life site.
Thank you for joining me on the front porch of My Boreal Homestead Life as we explore this Homegrown, Homestead life, In a modern world.
Additional Resources
Water - The journey from sandpoint, dugouts and water tanks to a well
Rainwater collection - essential water for use on the homestead
A Test well - The next step to Water security
Homesteading Family - Our Farm Watering System at Riverbend
Stoney Ridge Farmer - How to Install A Solar Off Grid Well pump System