Like most people, I like eating fruit and berries, but for a variety reasons I don't like to buy them in the store. In late summer, I will typically buy off the fruit truck that shows up in my community but it is typically just pears, peaches and cherries. For the fruit and berries that grow well here, in addition to foraging, I set up a food forest orchard in which to grow them with interspersing some in flower beds and garden. But when you want more fruit trees and are out of room in these spaces it is time to set up a new space. As another full blown food forest orchard garden is not really required, I decided that a fruit tree guild is a good alternative.
What is a tree guild
In the simplest of terms a tree guild is a small grouping of trees and plants that work together, much like a food forest, to support each other and/or a primary species. It can take on many shapes, be any size and contain the same layering that a food forest does as I outlined in Establishing a Food Forest Orchard Garden - But Will it Save Me Money. And by choosing certain types of plants, it can also provide seasonal interest. Whether a tree guild is developed in the corner of your city lot or in a huge track of lawn, a tree guild gives one the opportunity to provide seasonal interest through plant selection, provide food for yourself and develop a mini ecosystem that supports all sort of life whilst helping to landscape your property.
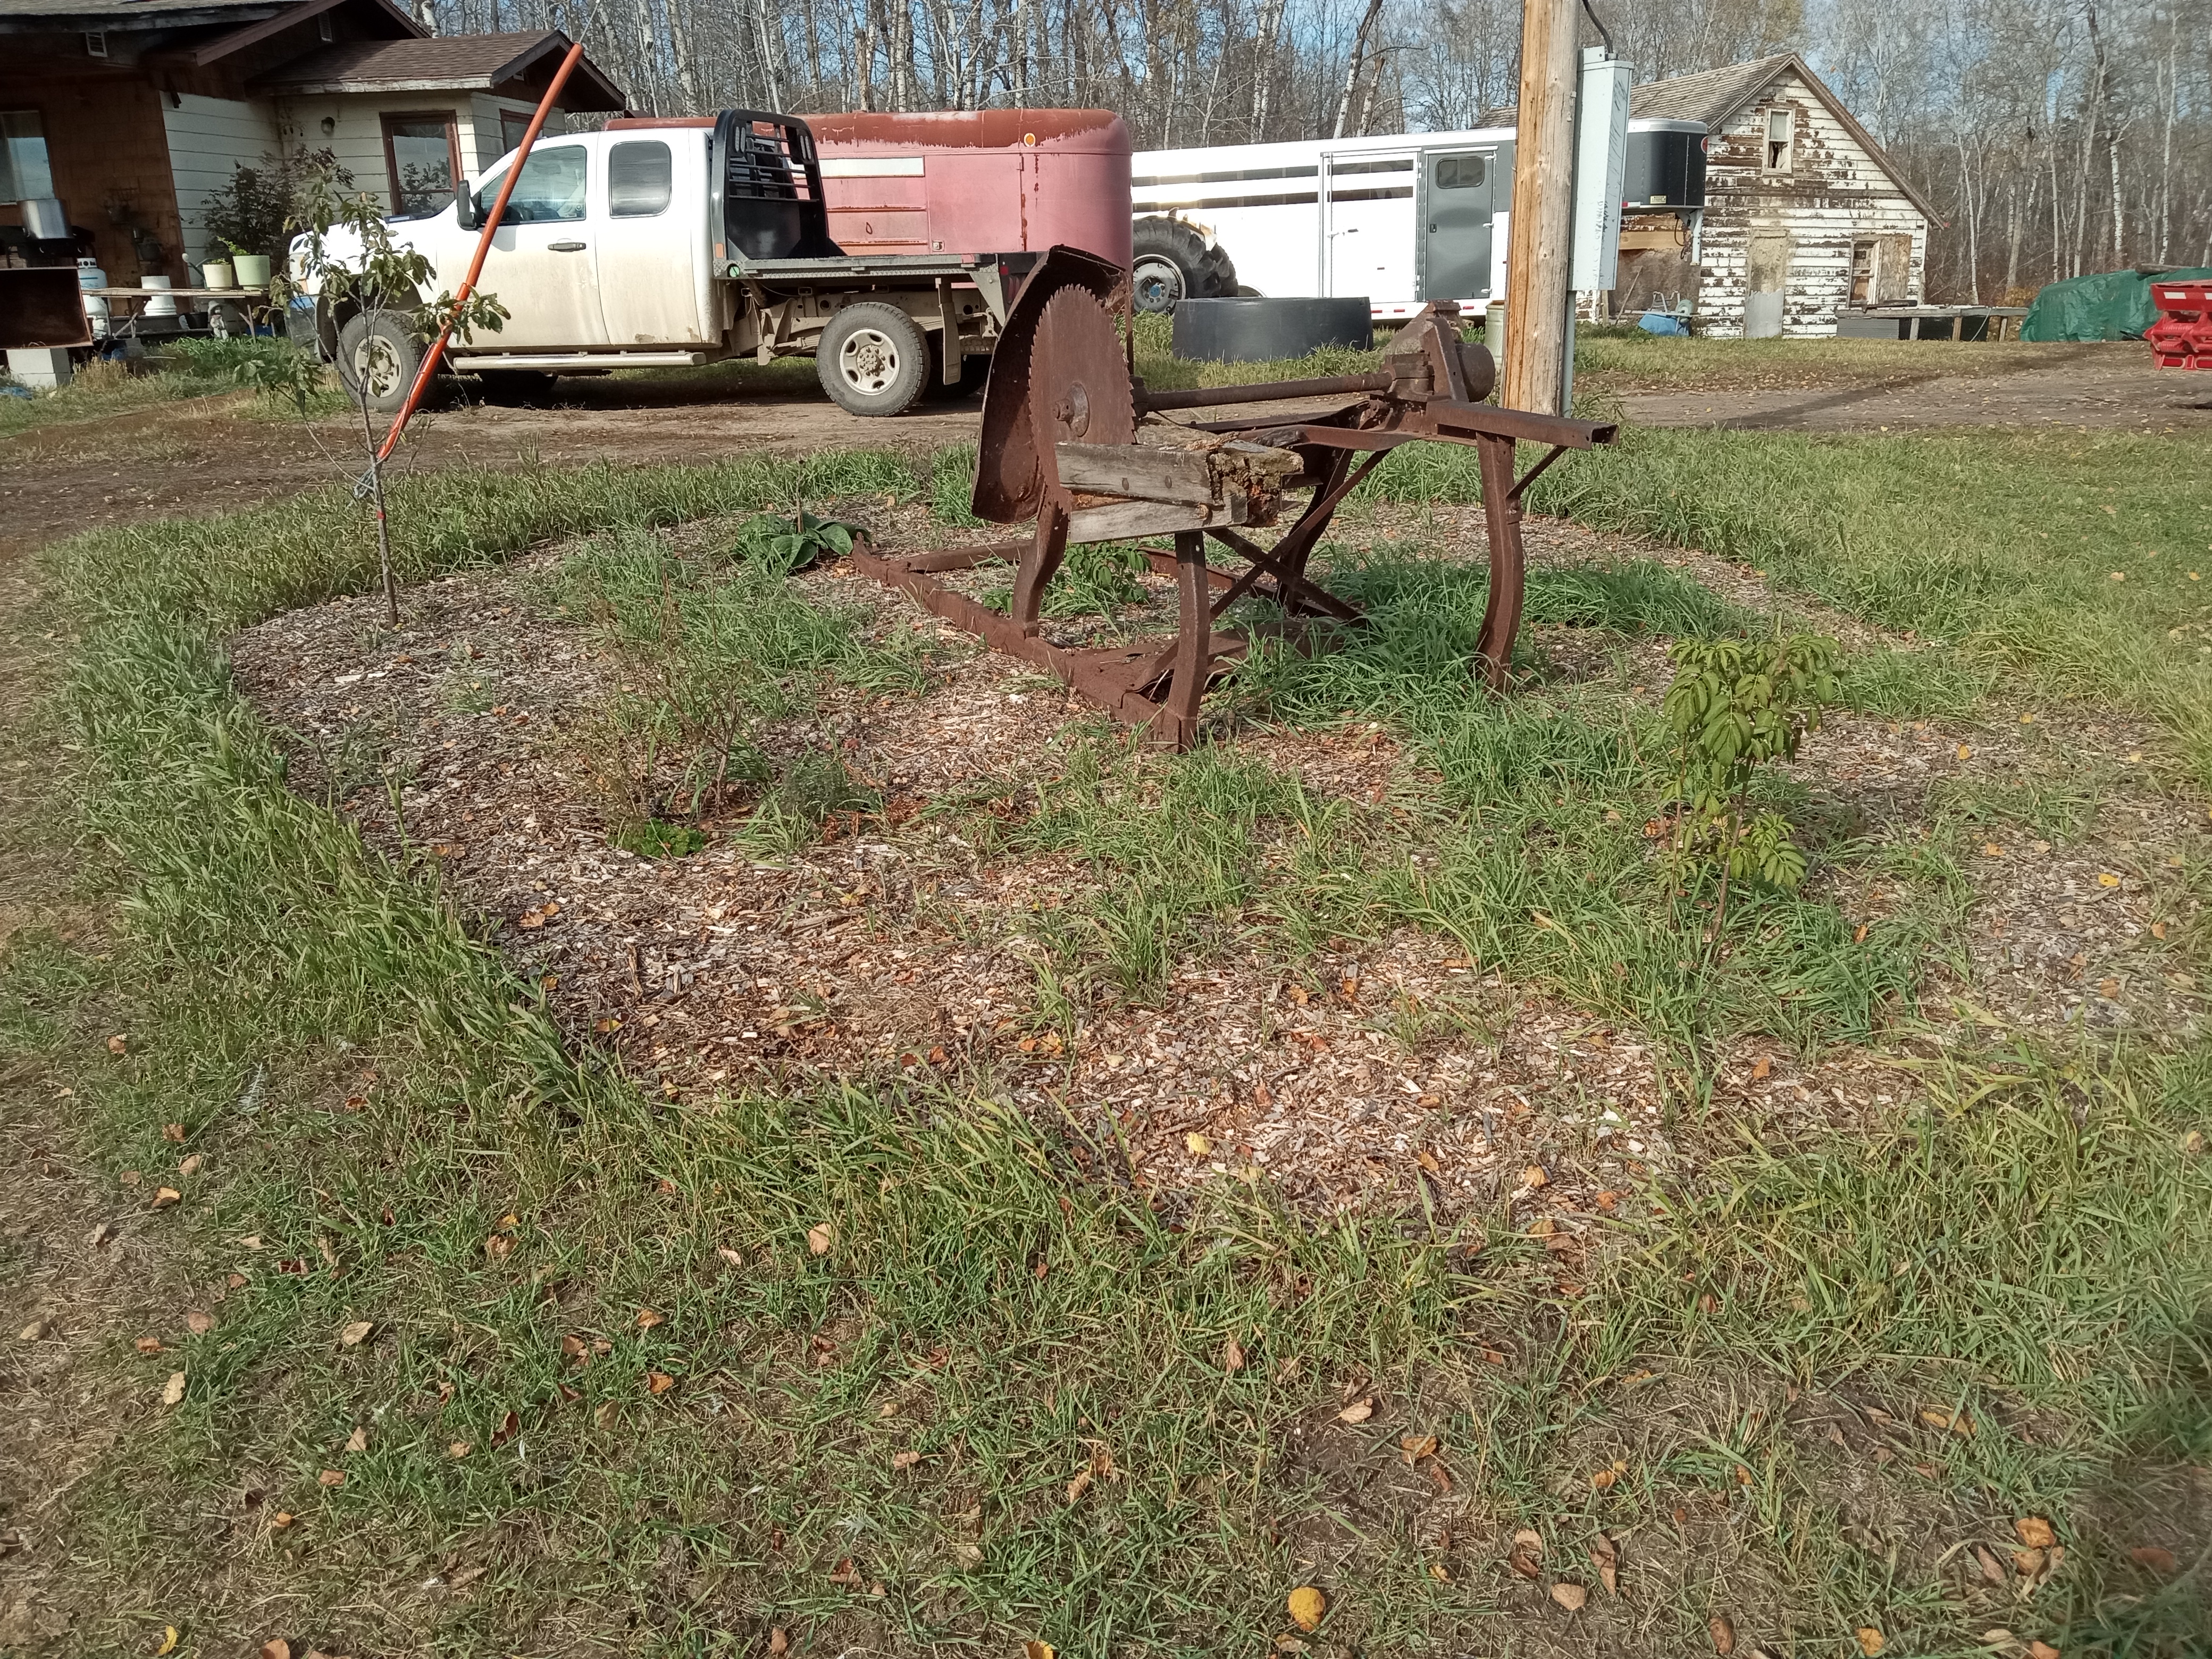
While all these factors are important and are worth considering when creating a tree guild, additional interest can also be developed with some hardscape to provide visual interest in the landscaping. Hardscape is anything that is non-living that is added to the landscape. Adding hardscaping can bring about an element of functionality, structure and visual interest, regardless of the season. It would include things like driftwood, statues, bird baths, decorative plant pots and even old farm machinery.
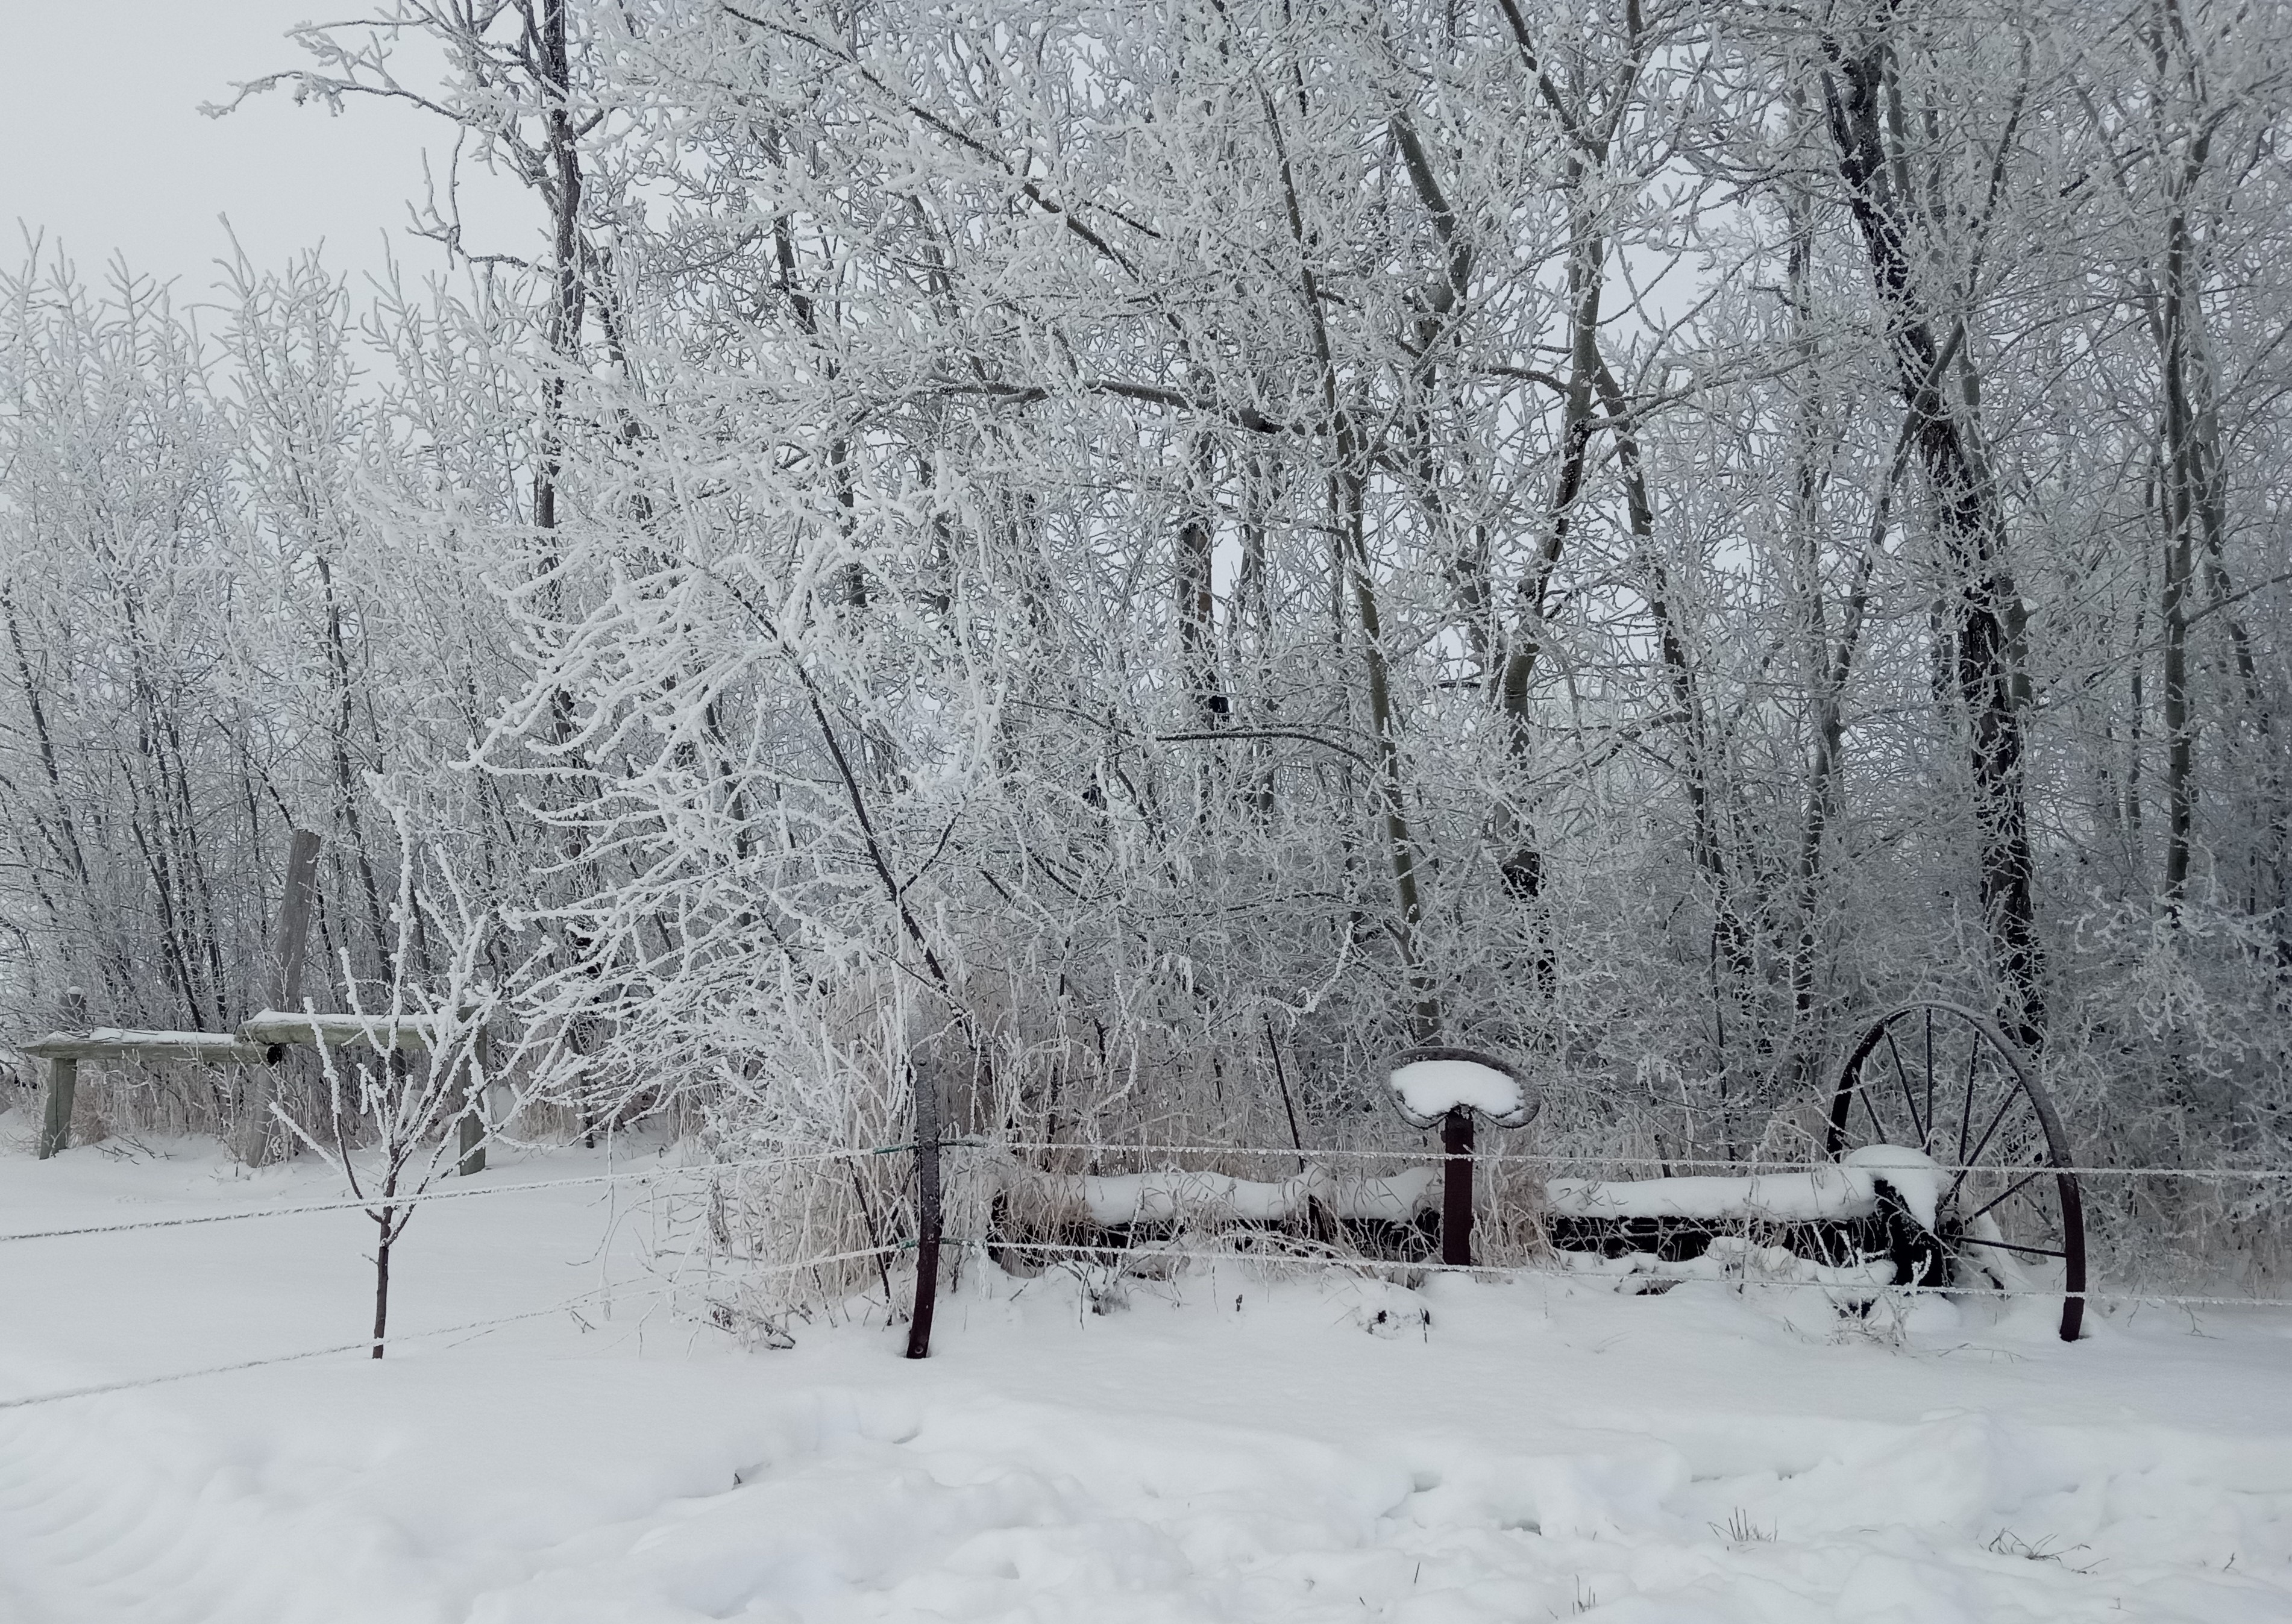
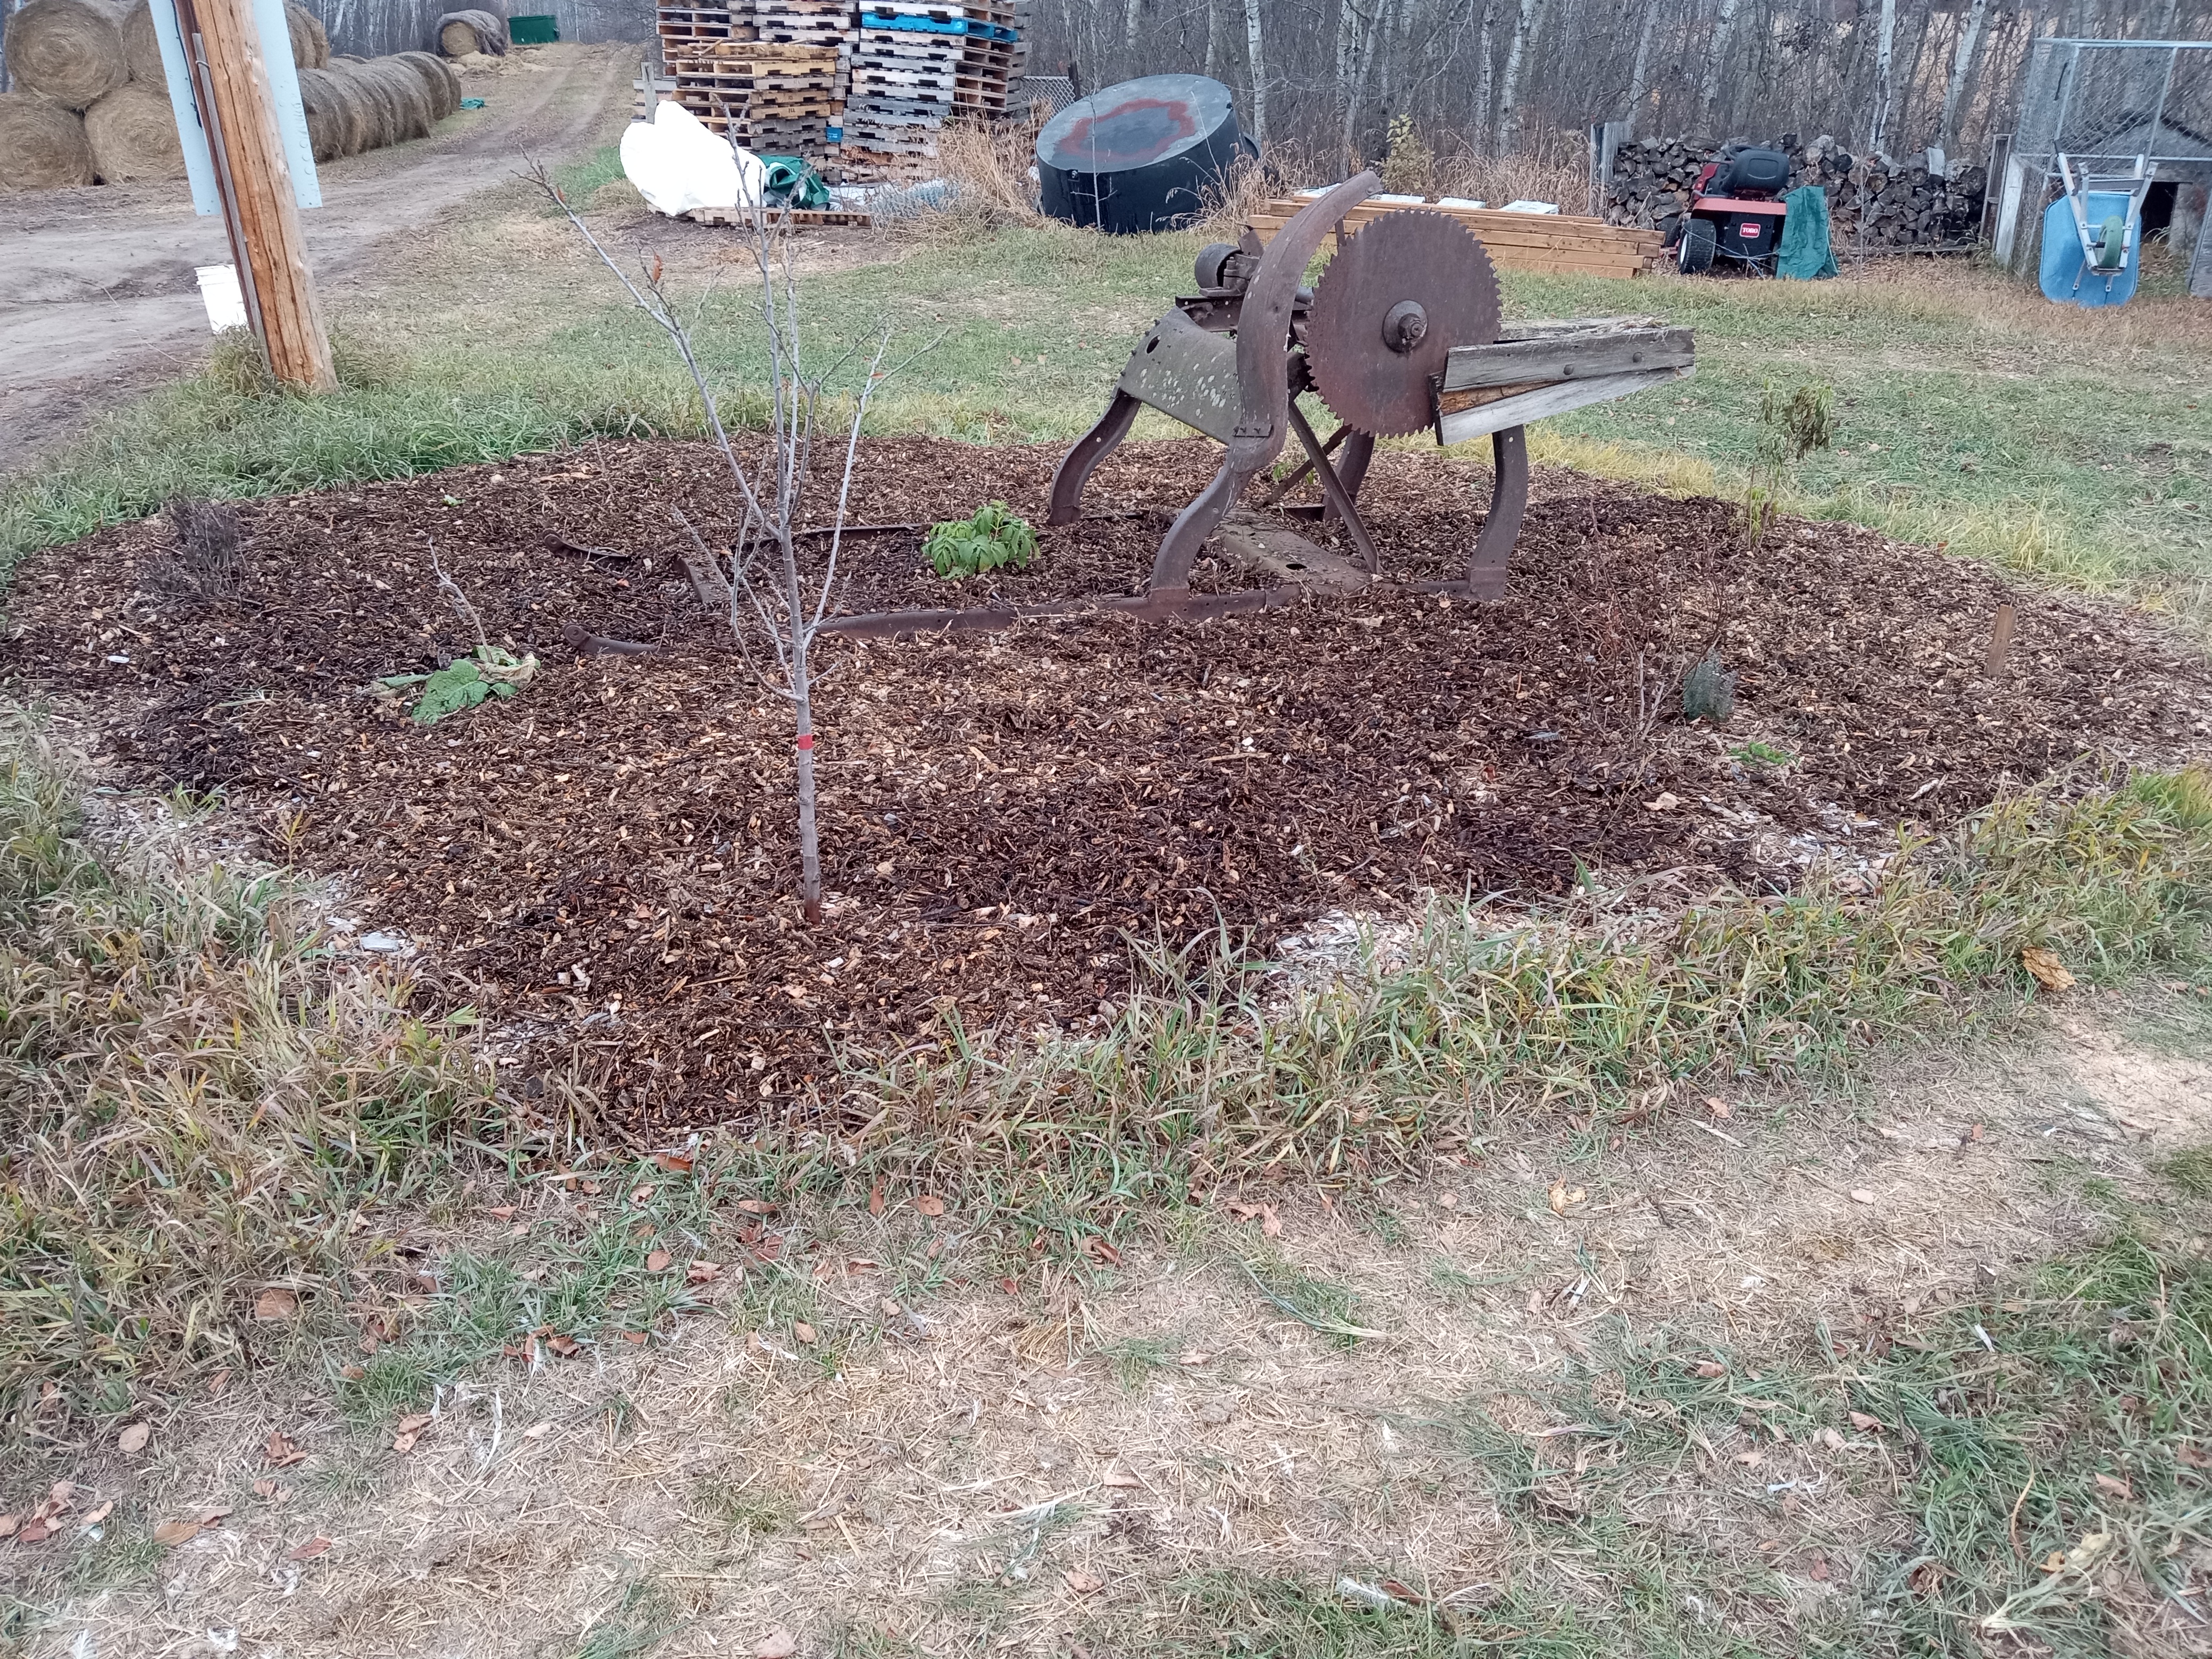
Although it may look like a piece of junk to some, the placement of this hardscape allows for an unexpected focal point that represents the ties I have to farming whilst allowing the area to naturalize with food producing shrubs and bushes along with some plantings of desirable species. And if needed, I could easily pull it out to use it. But in addition, it provides some beautiful vistas in the winter and serves as a fence post for my electric fence.
How to design a Tree Guild
I had a number of fruit trees that I needed to get in the ground and although I could have planted them individually, I decided that for ease of mowing and the benefits of planting a number of them in groups, a fruit tree guild made the most sense. At least for some of them.
Deciding on the location for the tree guild was first and foremost. In thinking it through, I considered what I wanted to put in the guild, winds, soil conditions, slope and aesthetics. To decide on the location I knew that I needed a pollinator for my Brook Gold Plum and for the Brook Red Plum, so somewhere relatively close to these two trees was desirable. In addition, I had planted a Mount Royal Plum in the vicinity so it was making sense to establish a guild close by and incorporate the tree as part of the guild. Thus making the primary focus of the guild being the plum trees.
Once I decided on possible locations, I then considered the soil. As most of my soil is a sand or a sandy loam, the soil would not enter into the equation because unless I was going to dig out all the sand and back fill with organic matter, the soil would not matter. I was not prepared to do that. Rather I decided on adding garden soil and manure to the planting holes with the knowledge that the fruit tree roots would go in search of nutrients once established. The soil thought process also enforced the planting of the guild as it would allow me to easily water and to improve the soil in a large area over time through the practice of Back to Eden garden method as I explored and implemented in Achieving a Permaculture Design Principle with the Back to Eden Gardening method.
The wind was then considered. For the most part, I am protected in the yard proper except for a north east wind in winter which likes to come down the driveway and make things bitter. So to protect the yard from those bitter winds, the guild would need to be in a location that would slow the winds in winter once the trees grew up.
I do have some slope to my land and so this factor had to enter into the planning of the tree guild. As I like to say, I live on a hill in a hole! But to mitigate the slope, I decided on developing swales as I did with the food forest orchard garden in Establishing a Food Forest Orchard Garden - But Will it Save Me Money. By mounding up the soil in a crescent shape on the downward side of the drip line of each tree, these swales will slow the water down and allow it to soak into the sandy soil and benefit the site.
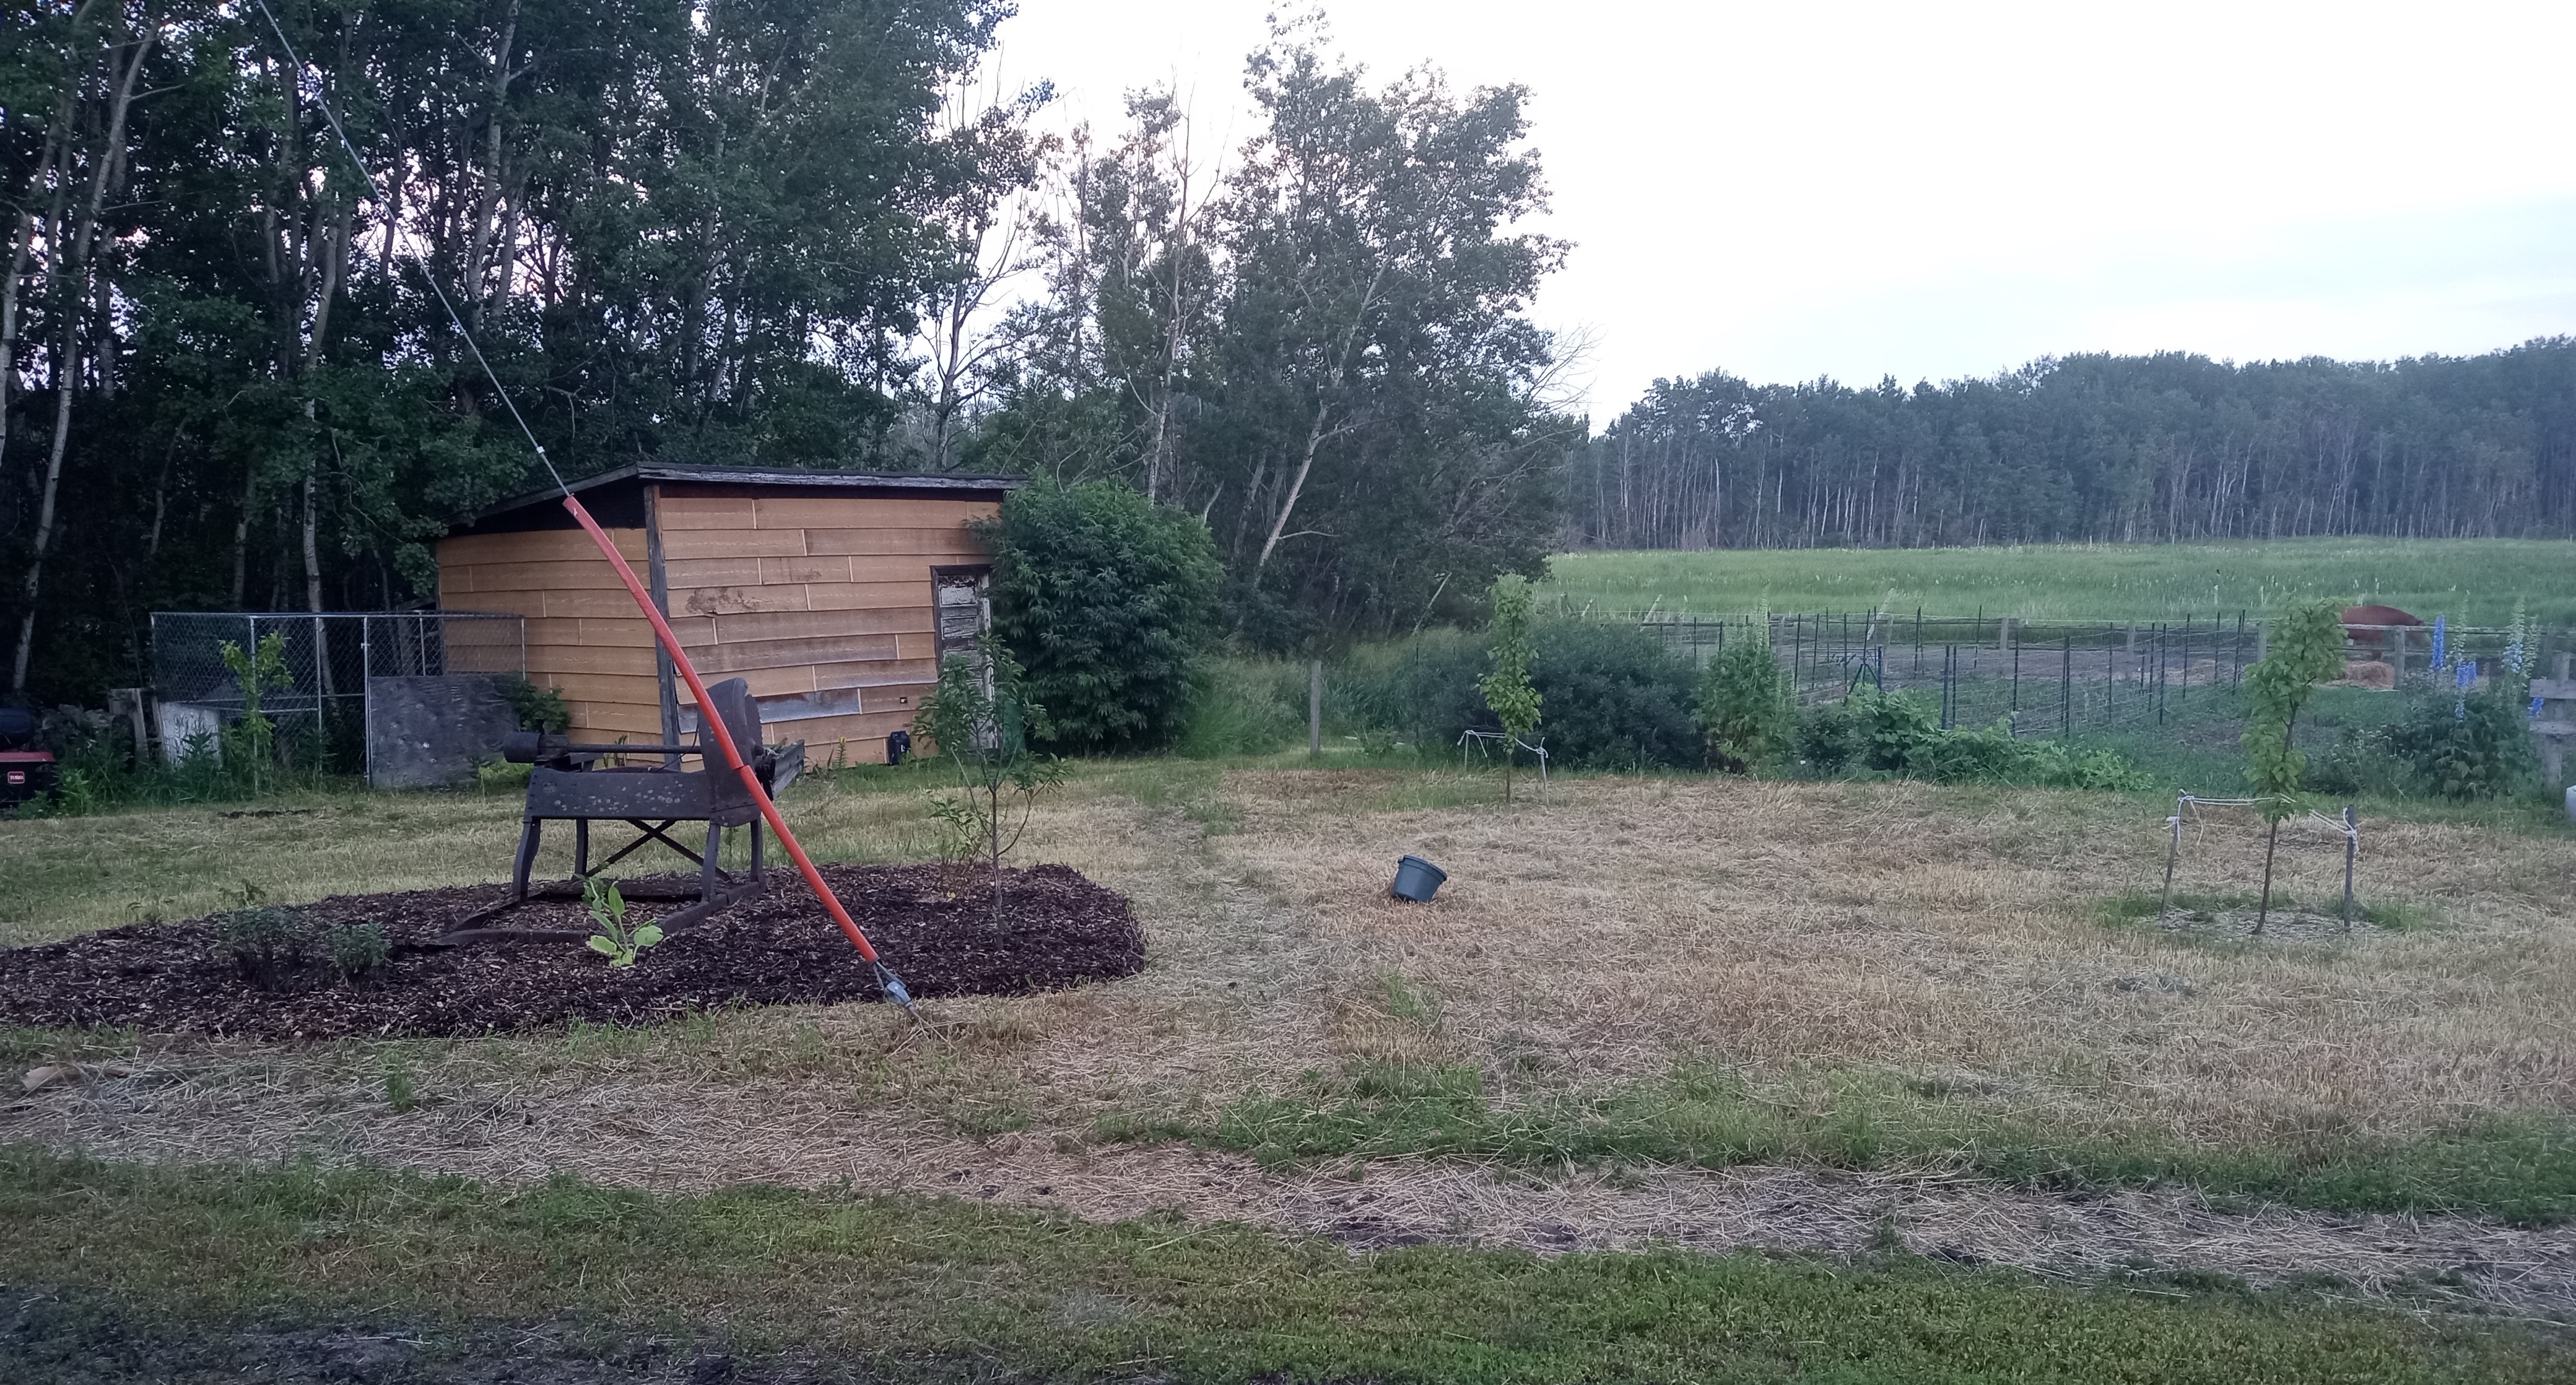
With all these factors considered, I decided to put it in a location that rarely gets used at the bottom of the driveway under my yard light. But to build a tree guild for only a couple trees didn't make much sense and so I decided that I would be adding a couple elderberries and perennial herbs and vegetables to the mix. I also have plans of planting annual vegetables as part of the guild to simulate natural forest layering. All these plants combined will create a diverse environment in which birds, fungi, and insects can thrive whilst helping to improve the soil through nitrogen fixing plants, mulchers and accumulators. An ecosystem that provides medicinal food, fruit and beauty at the same time.
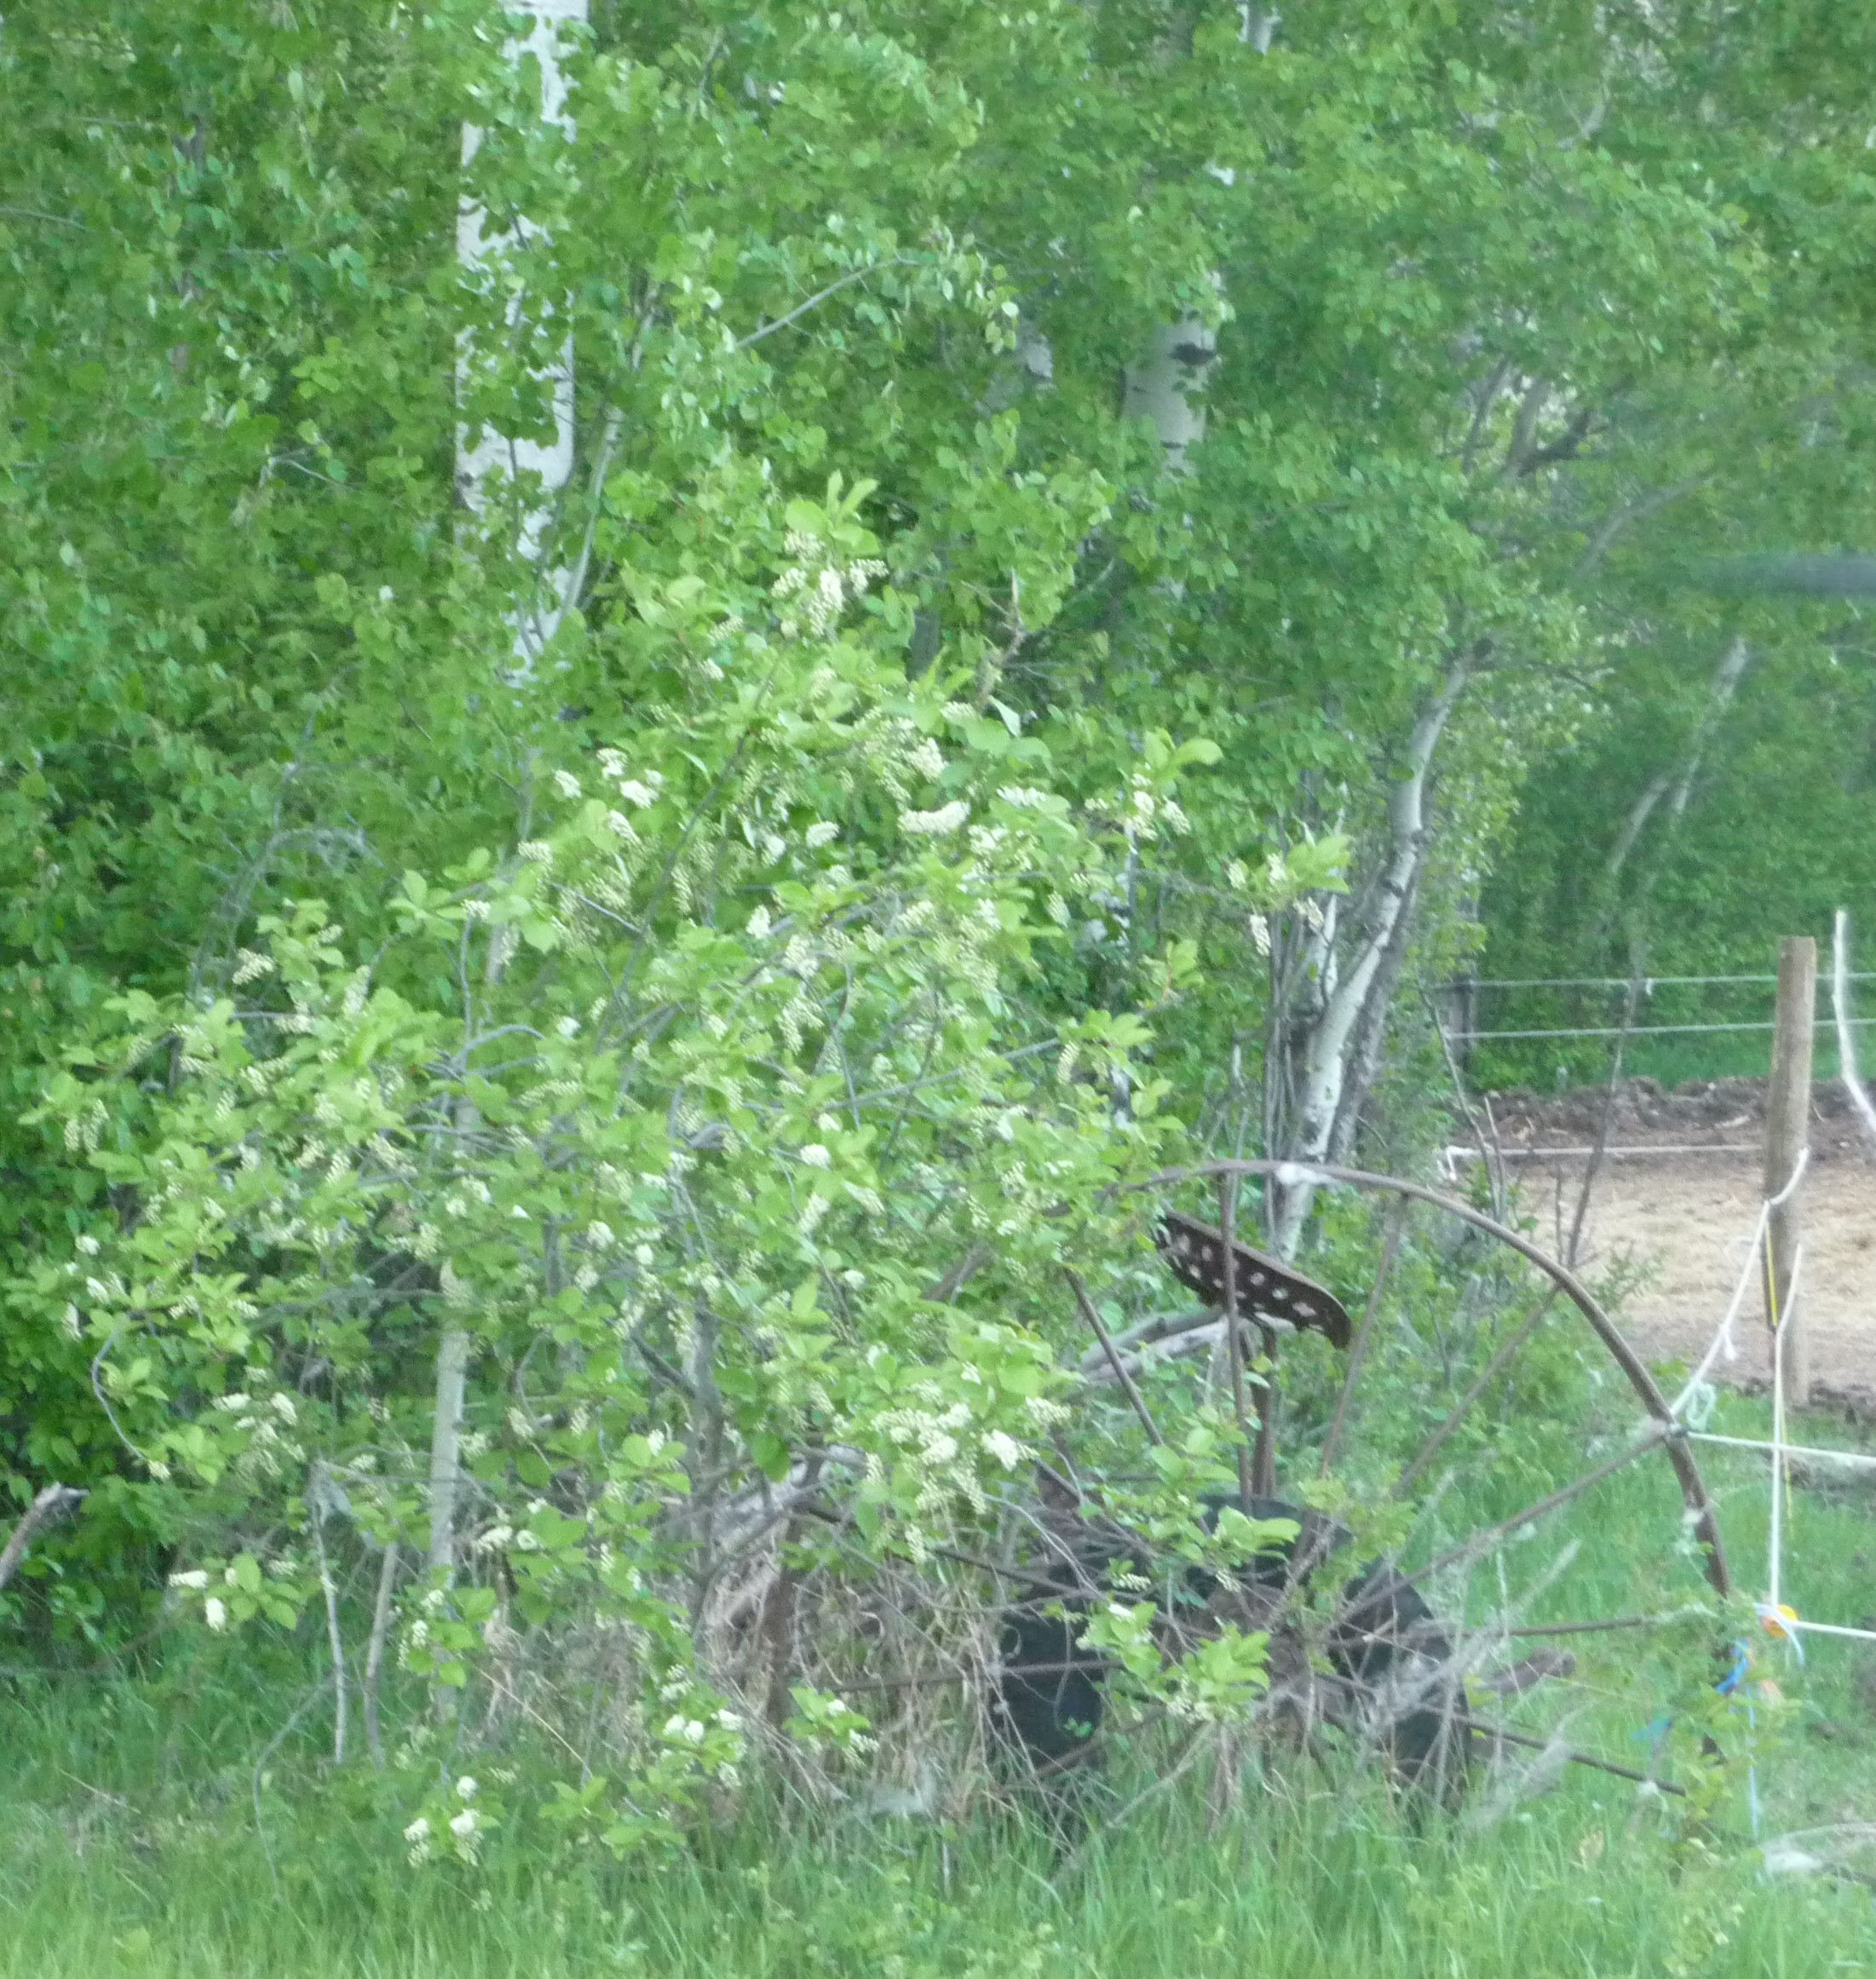
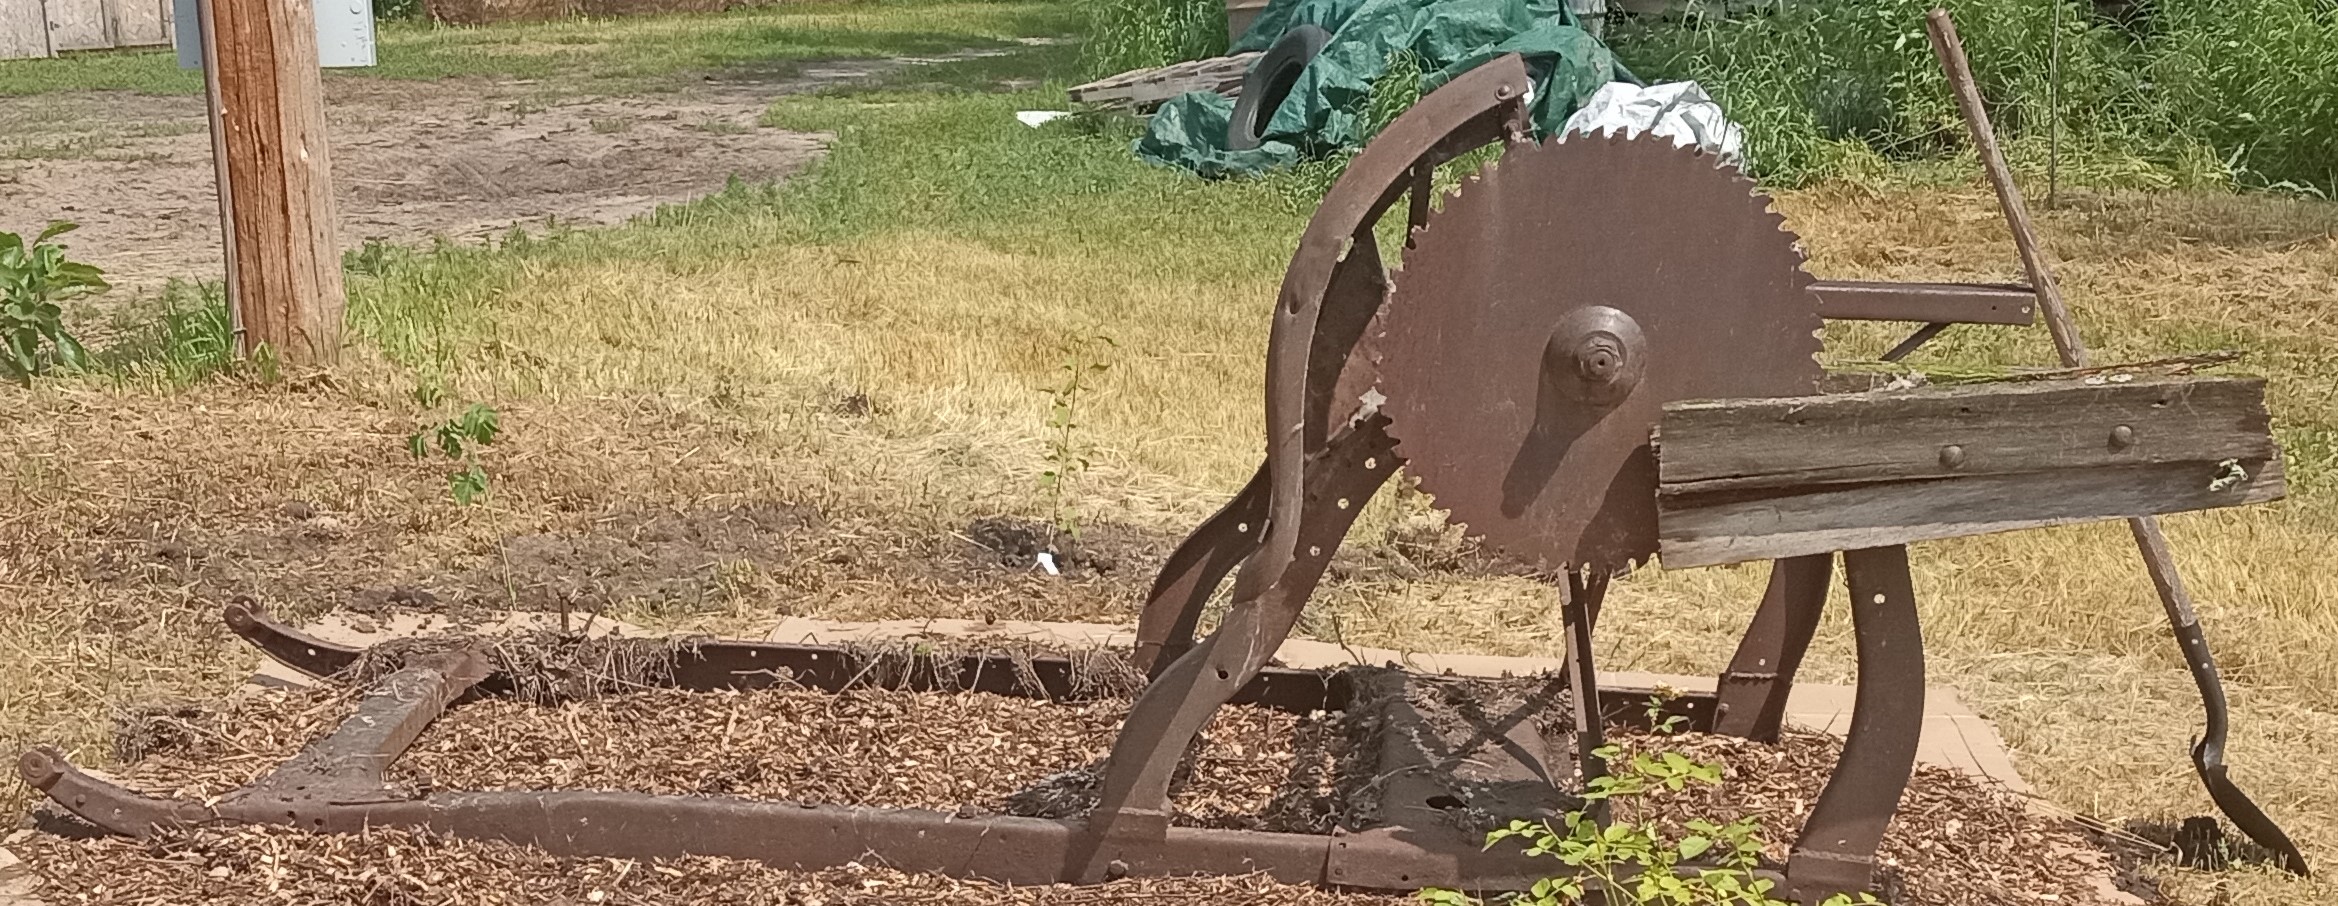
With the location and composition of the guild decided, it dawned on me that although it would produce food, it would most likely be a little boring and needed some beautification. Perennial bush roses and flowering almond were added to the planning with future plans to add more annuals and perennials. It was then that I went for a walk and noticed an old buzz saw that was used for cutting firewood. I had gotten this many years ago with plans to use it. But like so many things, those plans never materialized. There and then I decided that integrating this buzz saw into the tree guild was something I would be doing. It would not only represent my ties to the forest industry, it would provide some visual interest and serve to mark the guild in the winter.
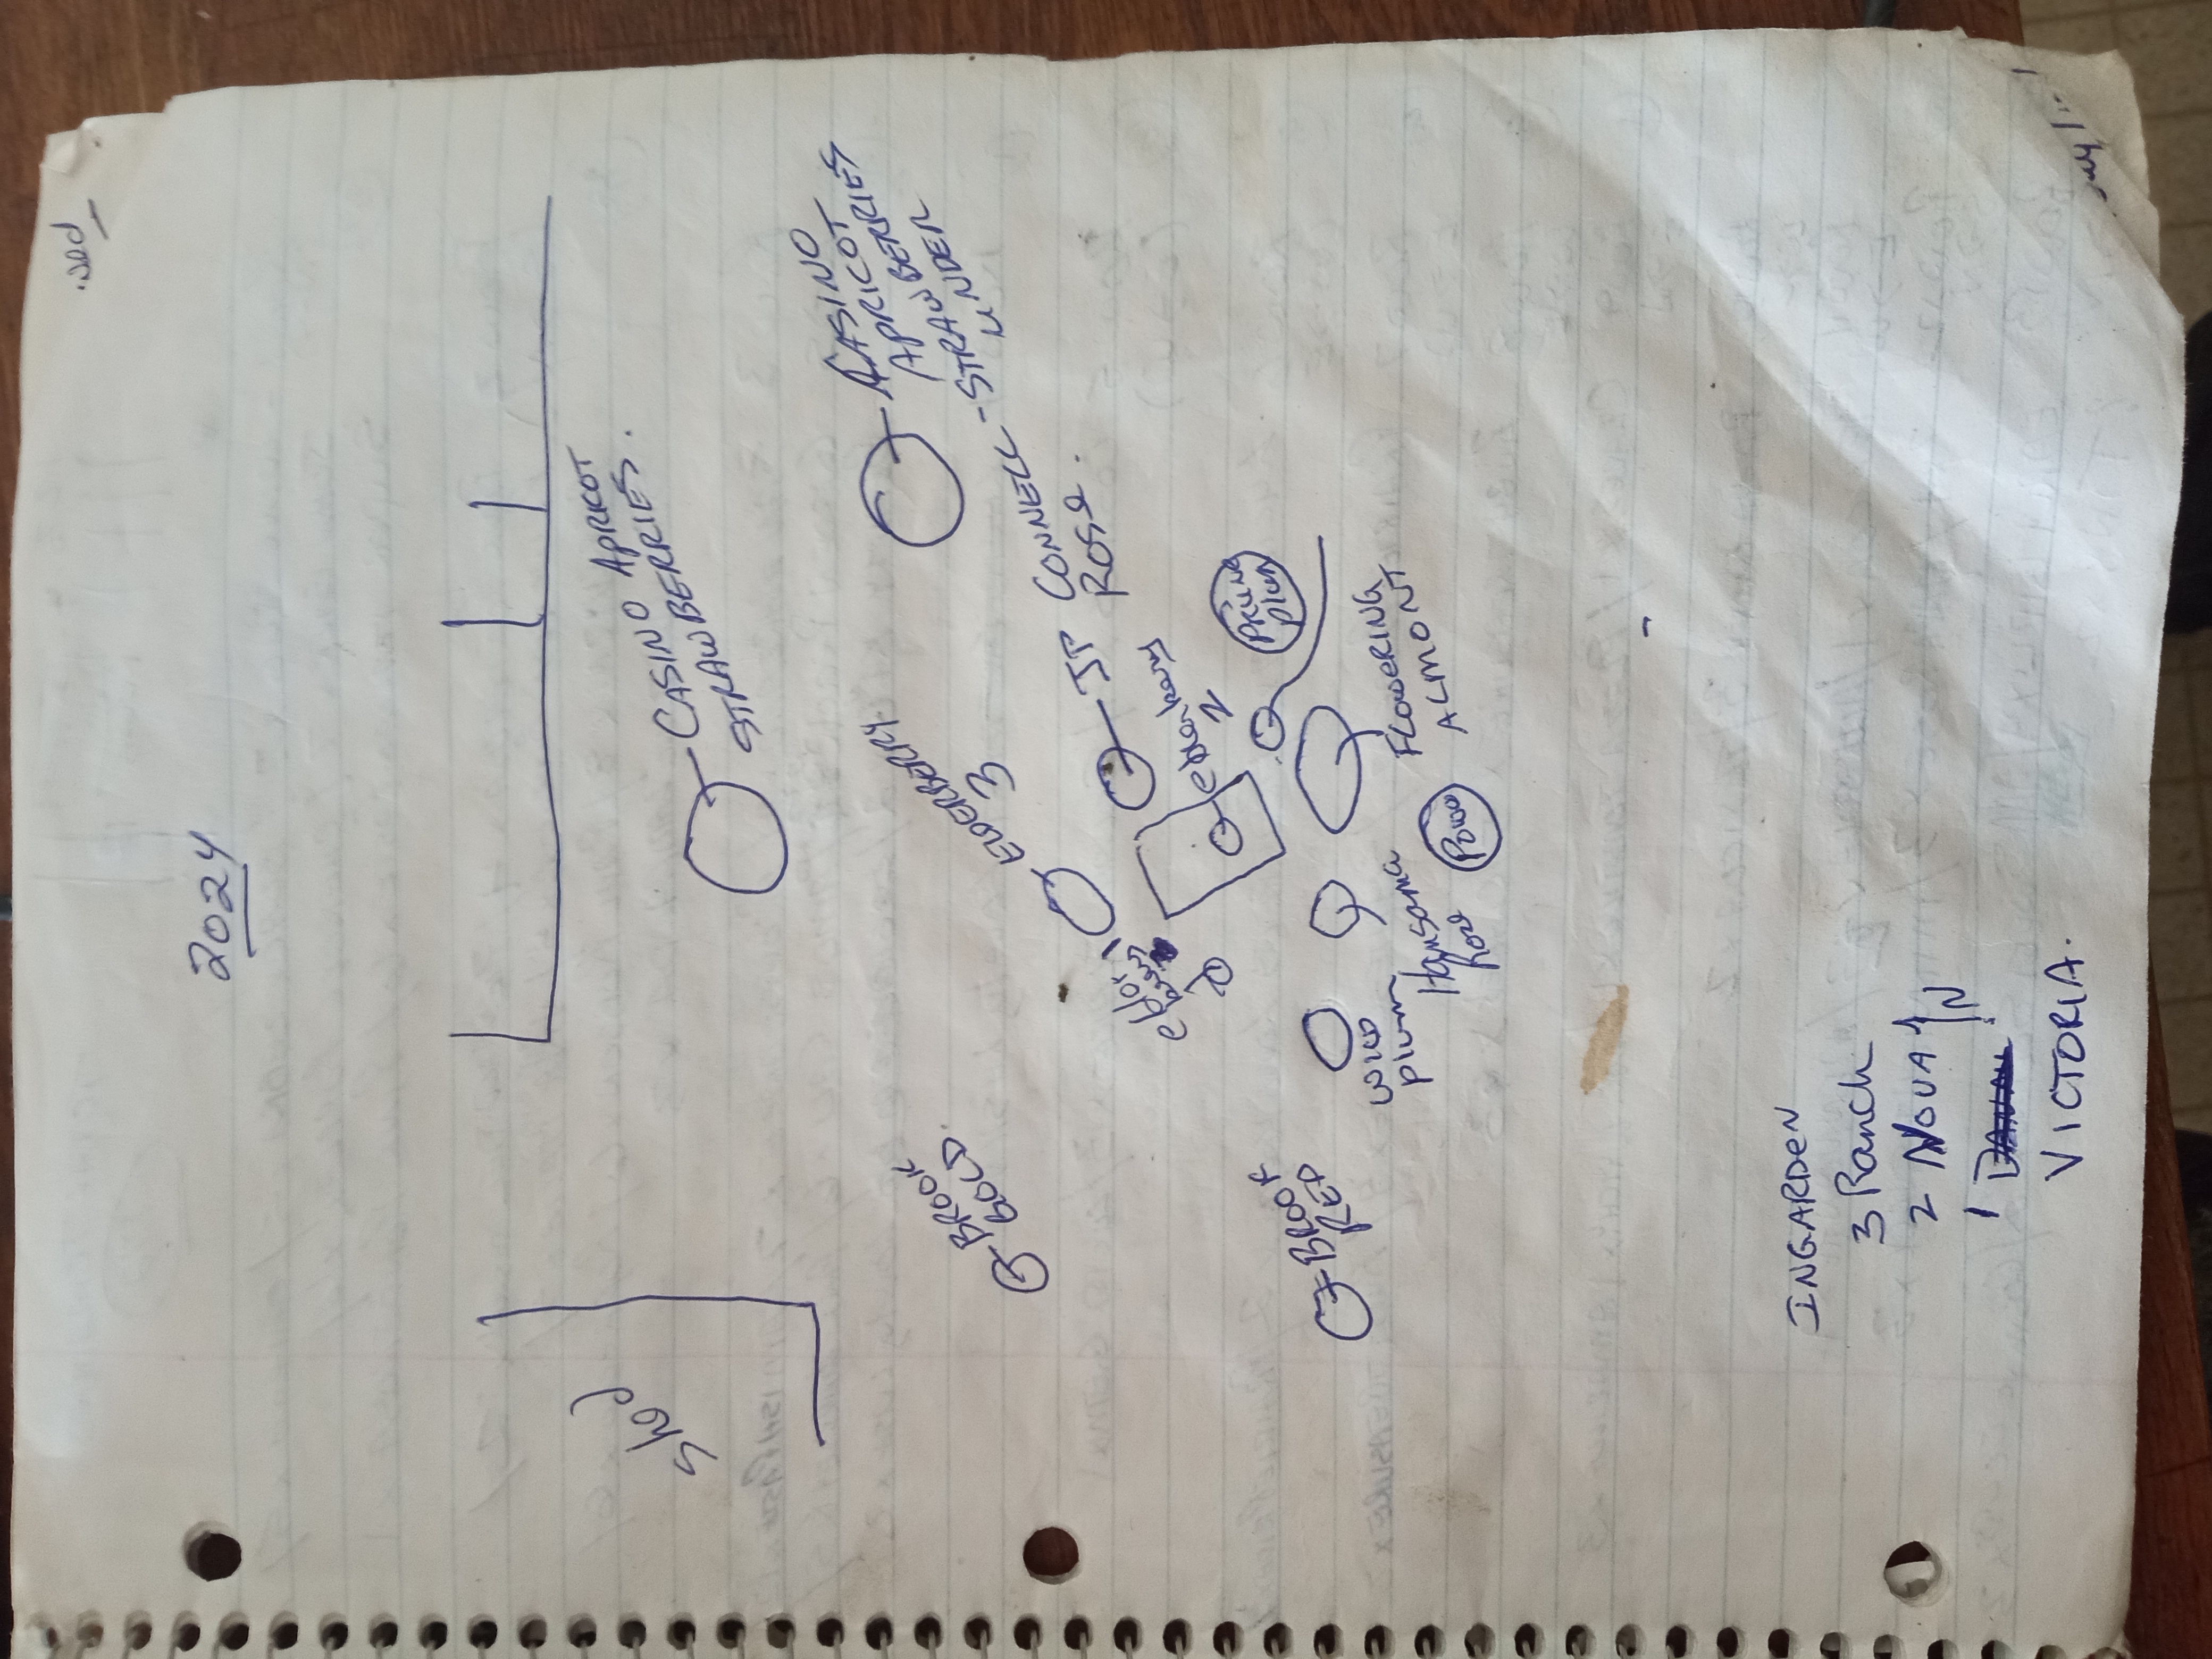
All of this decided I sketched my plan out to rough scale so that I could better visualize the finished guild. Because I typically adjust as I go when doing these types of projects, drawing it to scale is something I rarely do. The drawing is simply a guide.
Building the Fruit Tree Guild
As I mentioned earlier, the development of the fruit tree guild would involve implementing the Back to Eden Permaculture method. I did give some consideration to establishing a cover crop but with quack grass being my nemesis, I decided that Back to Eden would be a better choice. With the rough plan in hand, my first task after laying out the design on the ground, utilizing curved borders for ease of mowing the adjoining grass, was to mow the site as short as possible so as to almost scalp the site. I normally would work the site so as to loosen the soil and remove what quack grass roots I could, but being the organic layer was so thin and the soil so sandy, mowing the site made the most sense. So with lawn mower in hand, the site was scalped to almost bare earth.
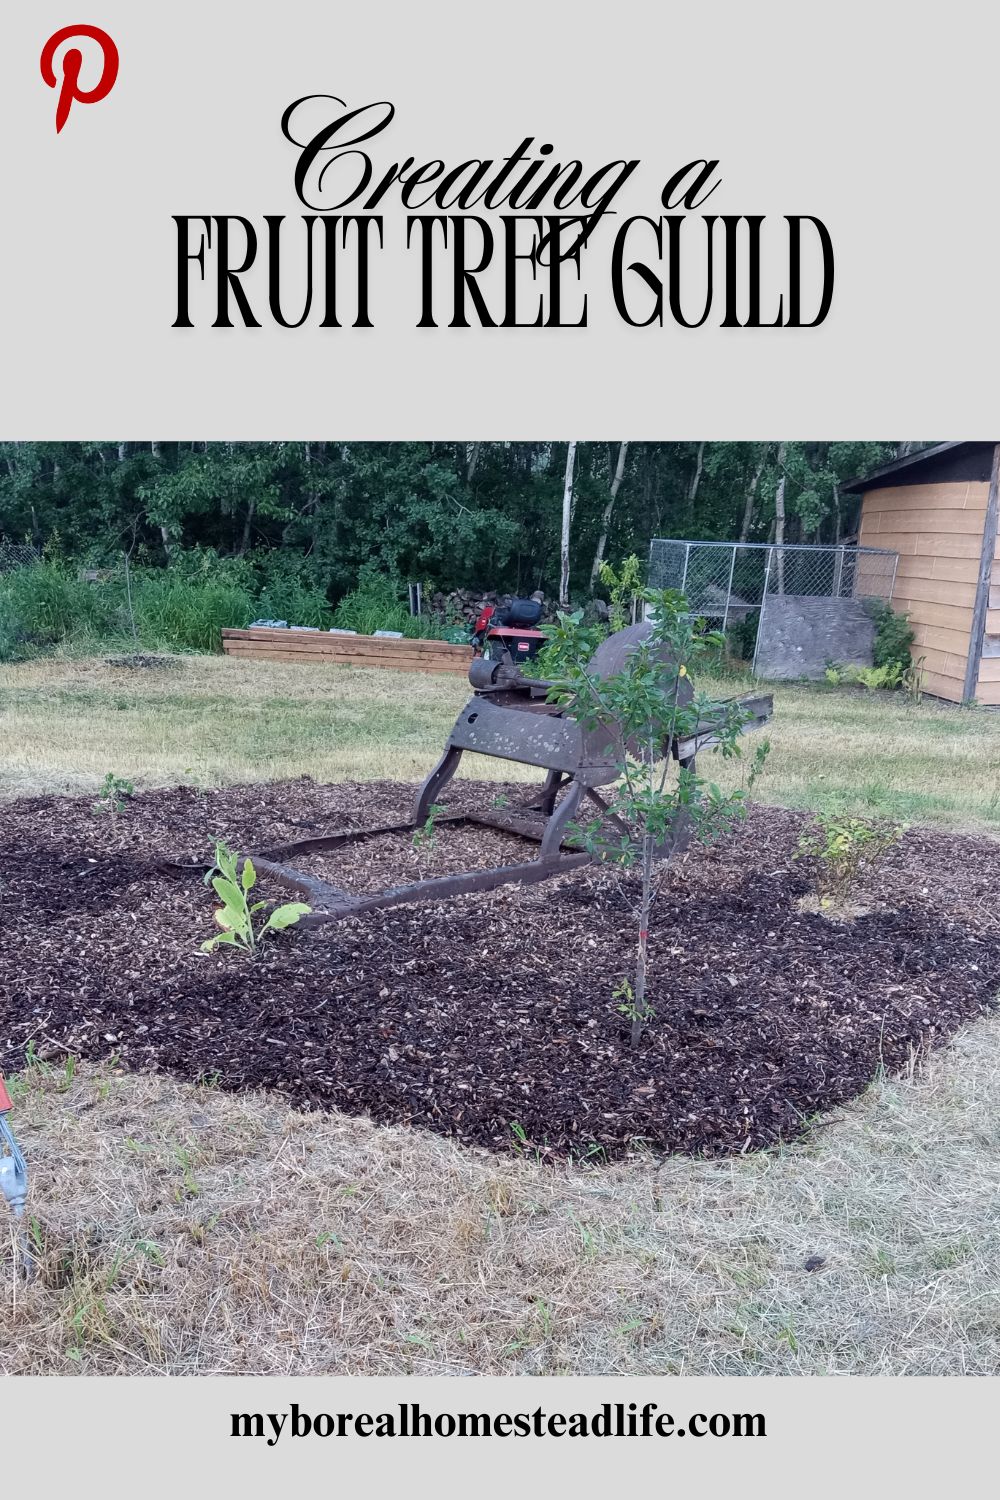
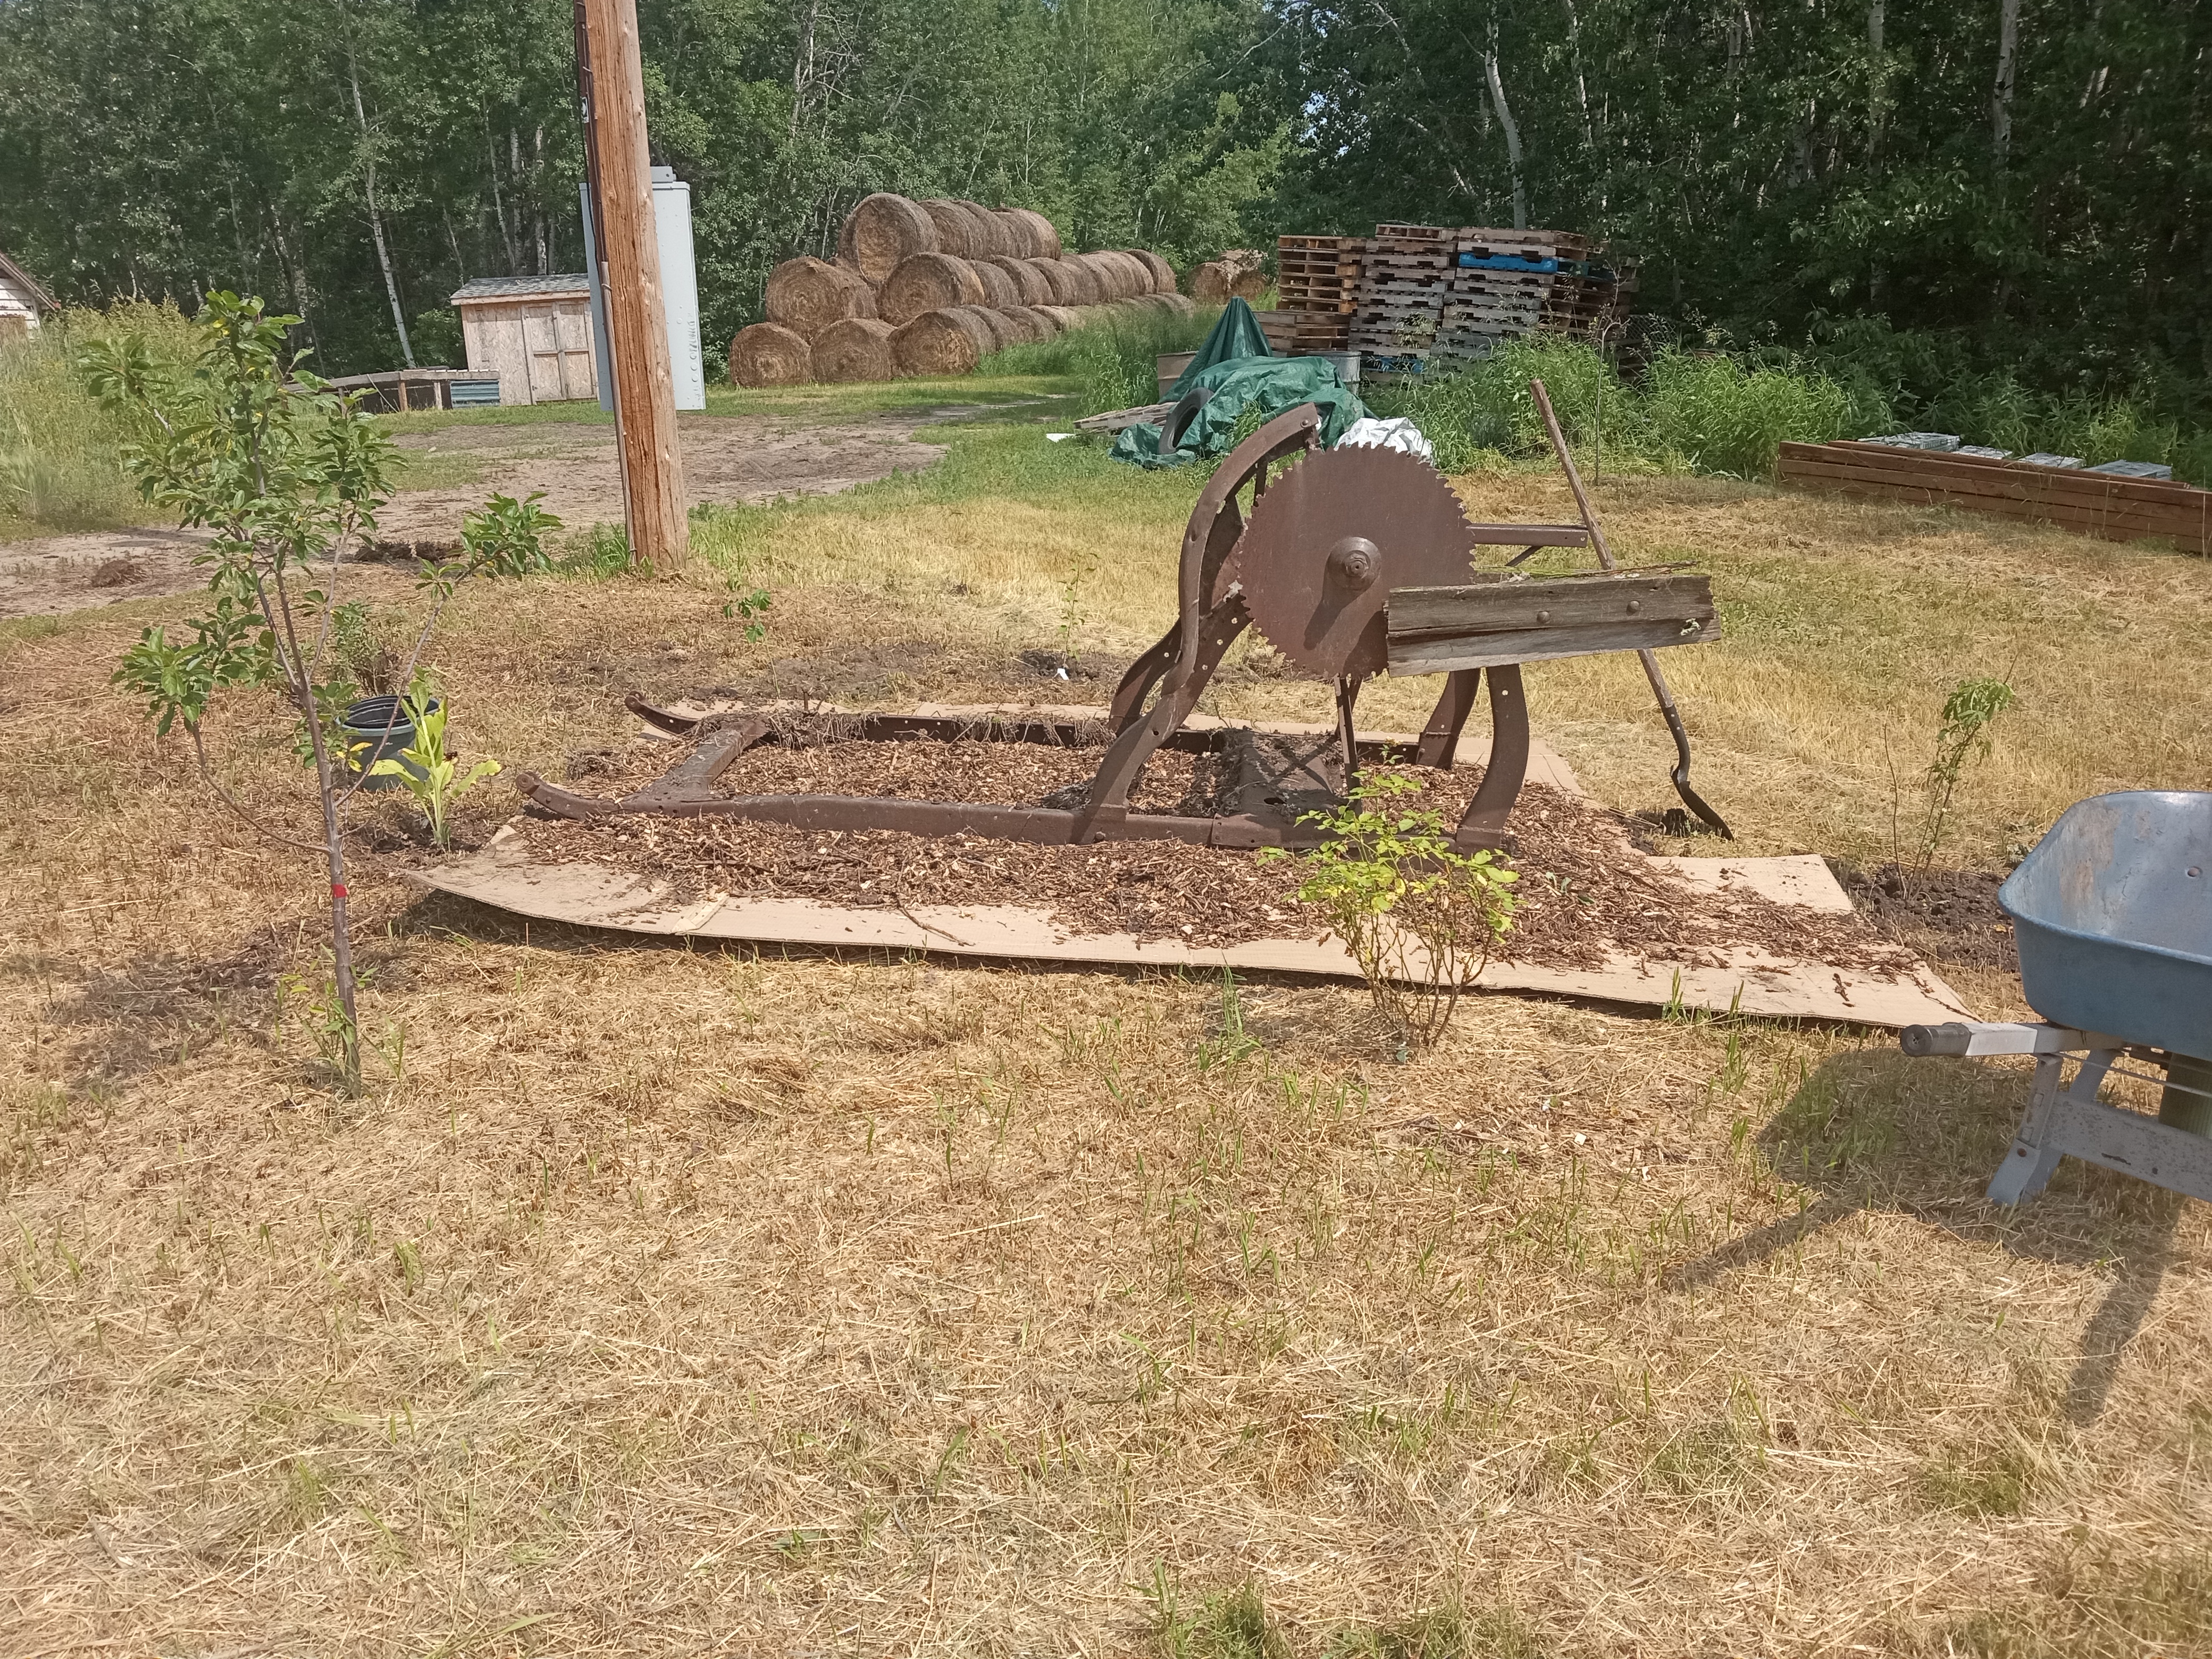
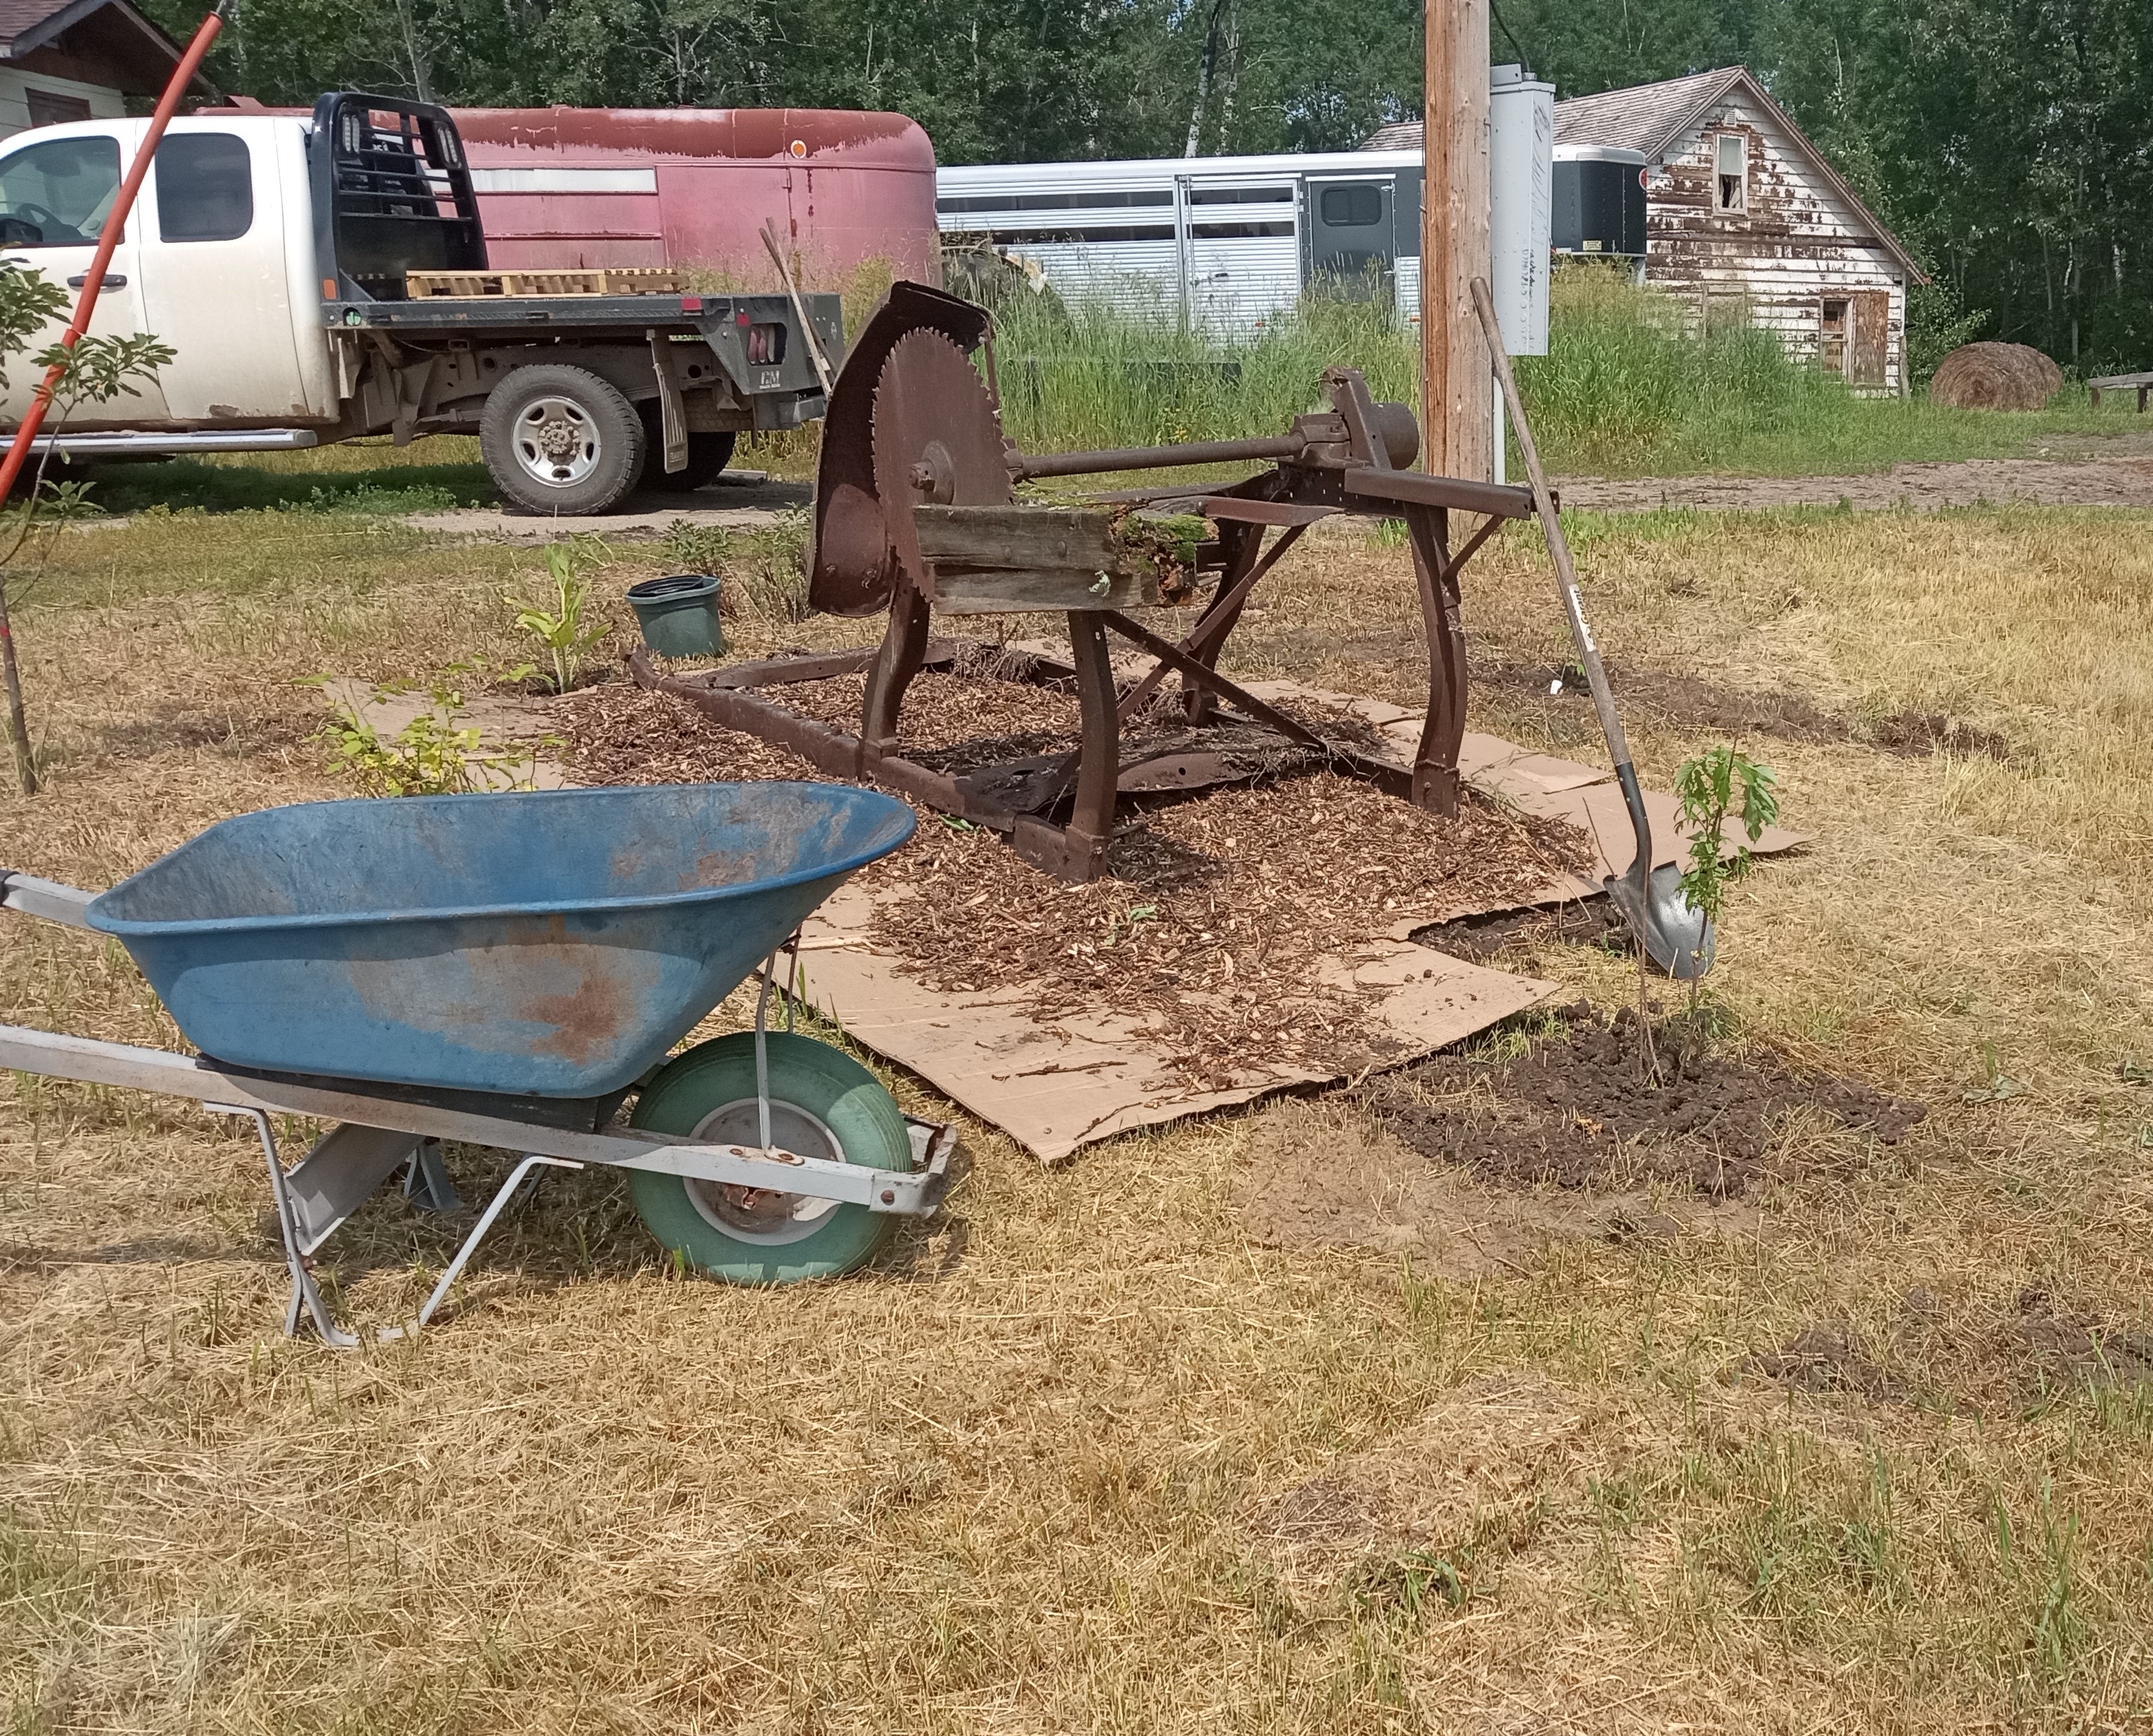
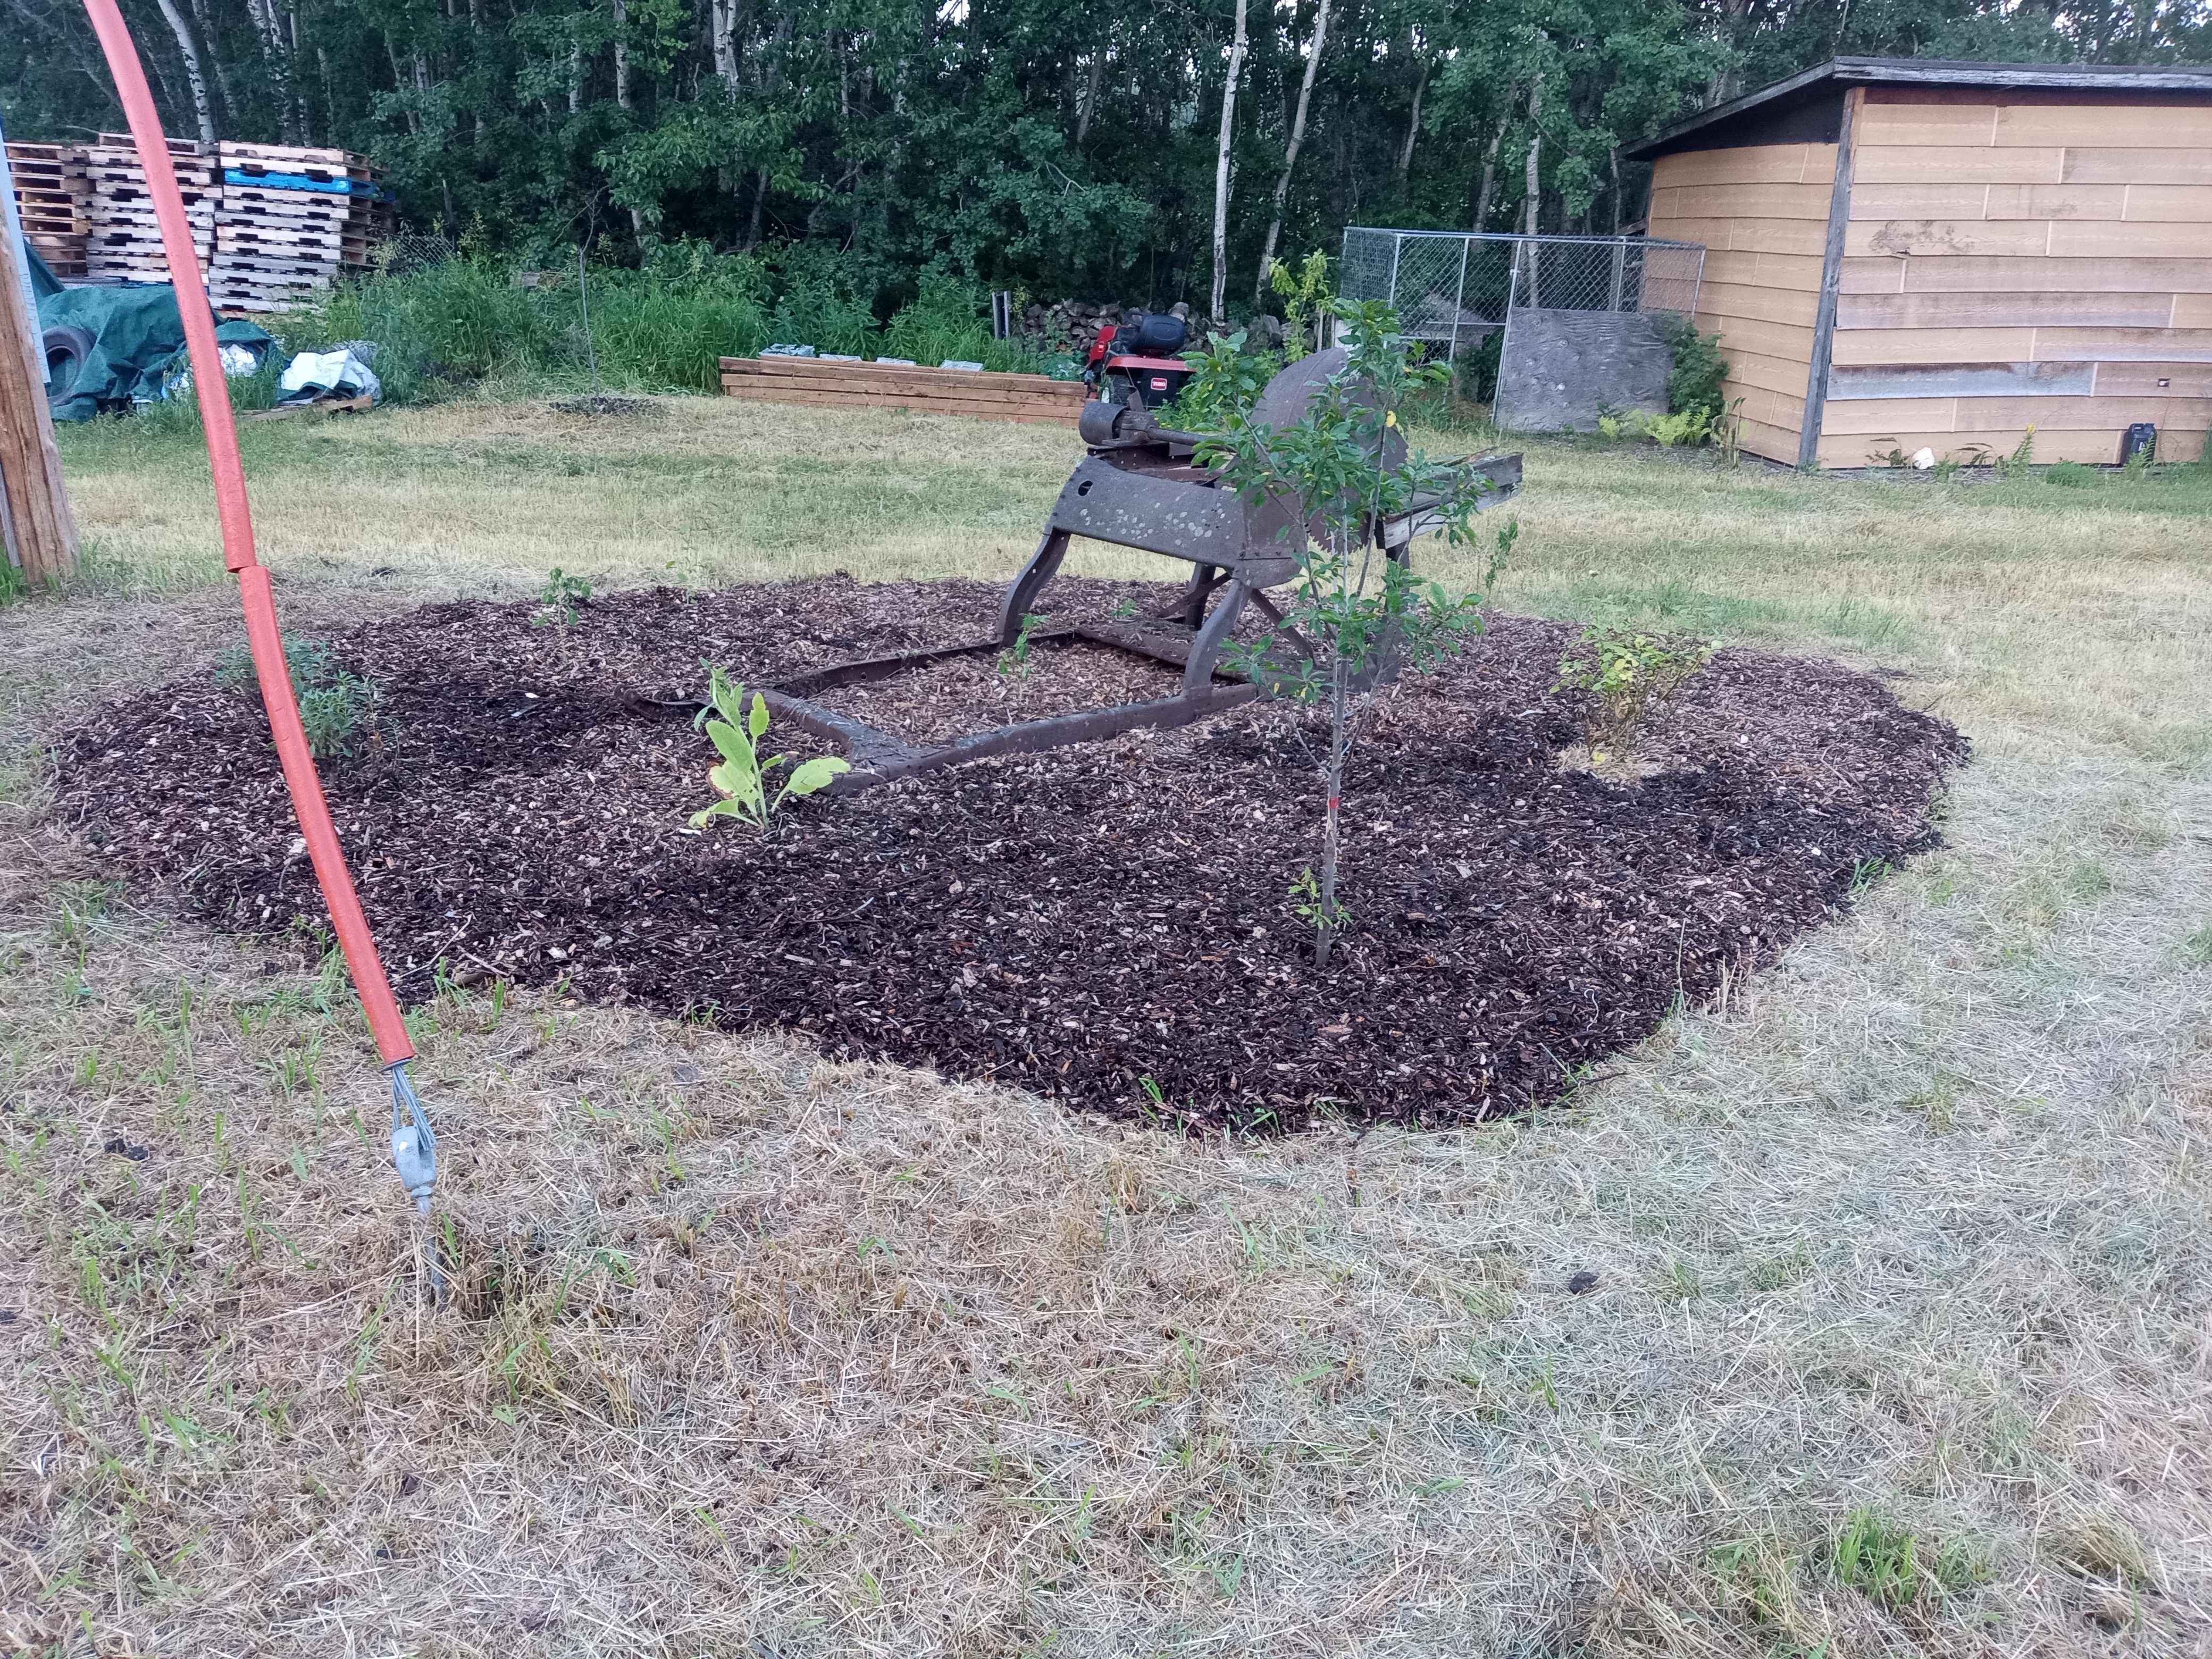
Once the site was scalped, moving in the buzz saw for the hardscape was the next order of business. Deciding to put it in the center of the guild did require some leveling of the site. But once done I was able to put down a layer of cardboard to act as a weed barrier for the site and to help conserve moisture. A light sprinkling of wood mulch held the cardboard in place while I positioned the buzz saw. After some fine tuning to position the buzz saw, the hardscape was in place and I was able to move on with the rest of the fruit tree guild development.
Although it is customary when creating a flower bed, garden or food forest to create the bed and then plant the trees and plants, being that I had previously planted the Mount Royal Plum and I needed to develop the swales on the site, as discussed above, I decided to forgo laying down the cardboard and wood mulch until after everything was planted. One tree and/or plant at a time, I assessed the need for a swale and when needed would utilize the soil and/or sod not needed for backfilling the hole to create the swale.
Using the plan as a guide coupled with evaluation of plant requirements for space, eventually the guild was planted with the anchor species of the Mount Royal Plum and the cross pollinator plum, Canada Plum (Prunus Nigra). The shrub layer containing Ranch, Nova and Victoria elderberries I started from cuttings I bought a few years back from Elderberry Grove were added to the guild. The spacing of these trees and shrubs were not all set so that individual crowns would be evident. But rather once mature, it is expected that some of the crowns will intermingle so as to replicate a forest canopy.
The lower shrub layer containing flowering almond along with shrub and bush roses was next to go in, adding some color and texture to the guild. The rose hips could also be gathered if I wanted at a later time. The final layer, for now, was the herbaceous layer which I started with the planting of an accumulator species, a sterile version of Comfrey, Russian Comfrey. I also threw in some extra herbs I had just laying around. The guild was now planted.

With everything in the ground I could then finish covering the site with cardboard. Although this proved to be a little challenging because of the curved edges of the fruit tree guild and going around the plants, I eventually got it done. Although I normally would water the cardboard, I decided to simply apply the wood mulch over the entire surface and one wheel barrow at a time, I eventually got it covered, albeit it only shallowly. Although it is recommended that a minimum of 6 inches (15 cm) of mulch be put down, a couple inches would have to do for now.
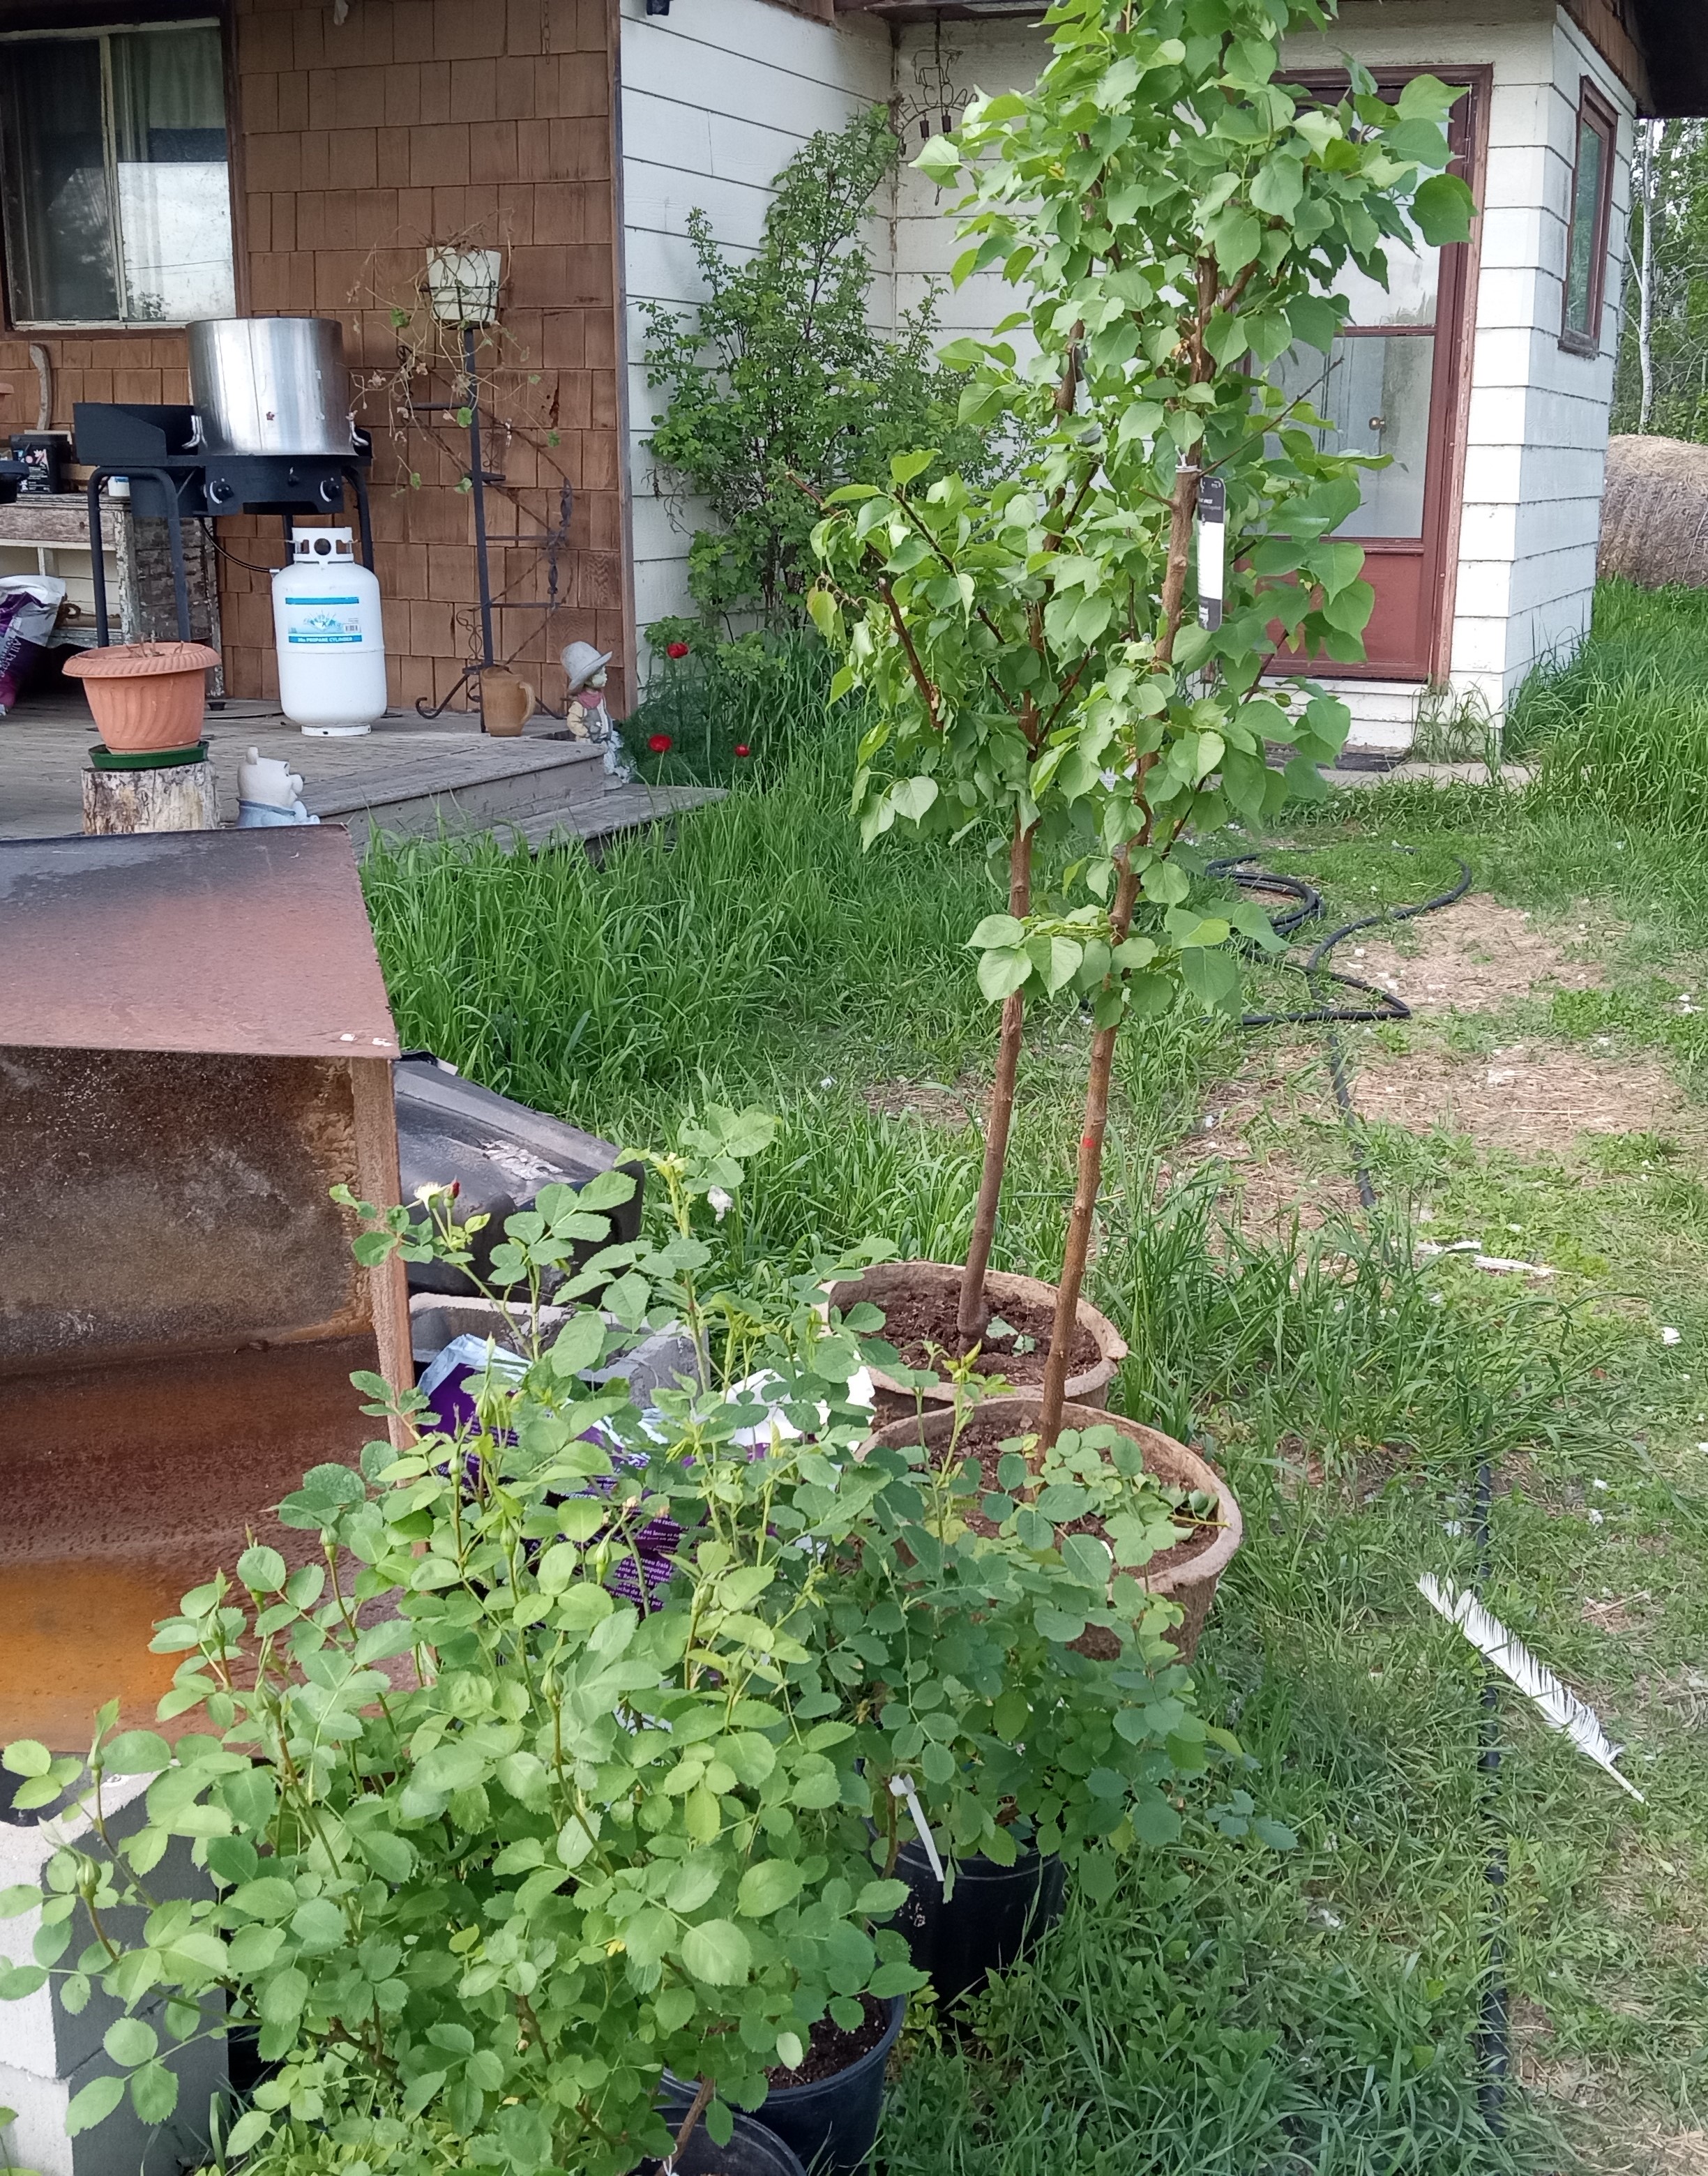
But I still had a couple Casino Apricots that didn't have a home in the fruit tree guild. After some thought about yard function and proximity to the fruit tree guild, garden and house, I decided on developing two planting sites between the guild and the main garden. The sod was dug out, the hole was dug and back filled with manure and soil while planting the trees.
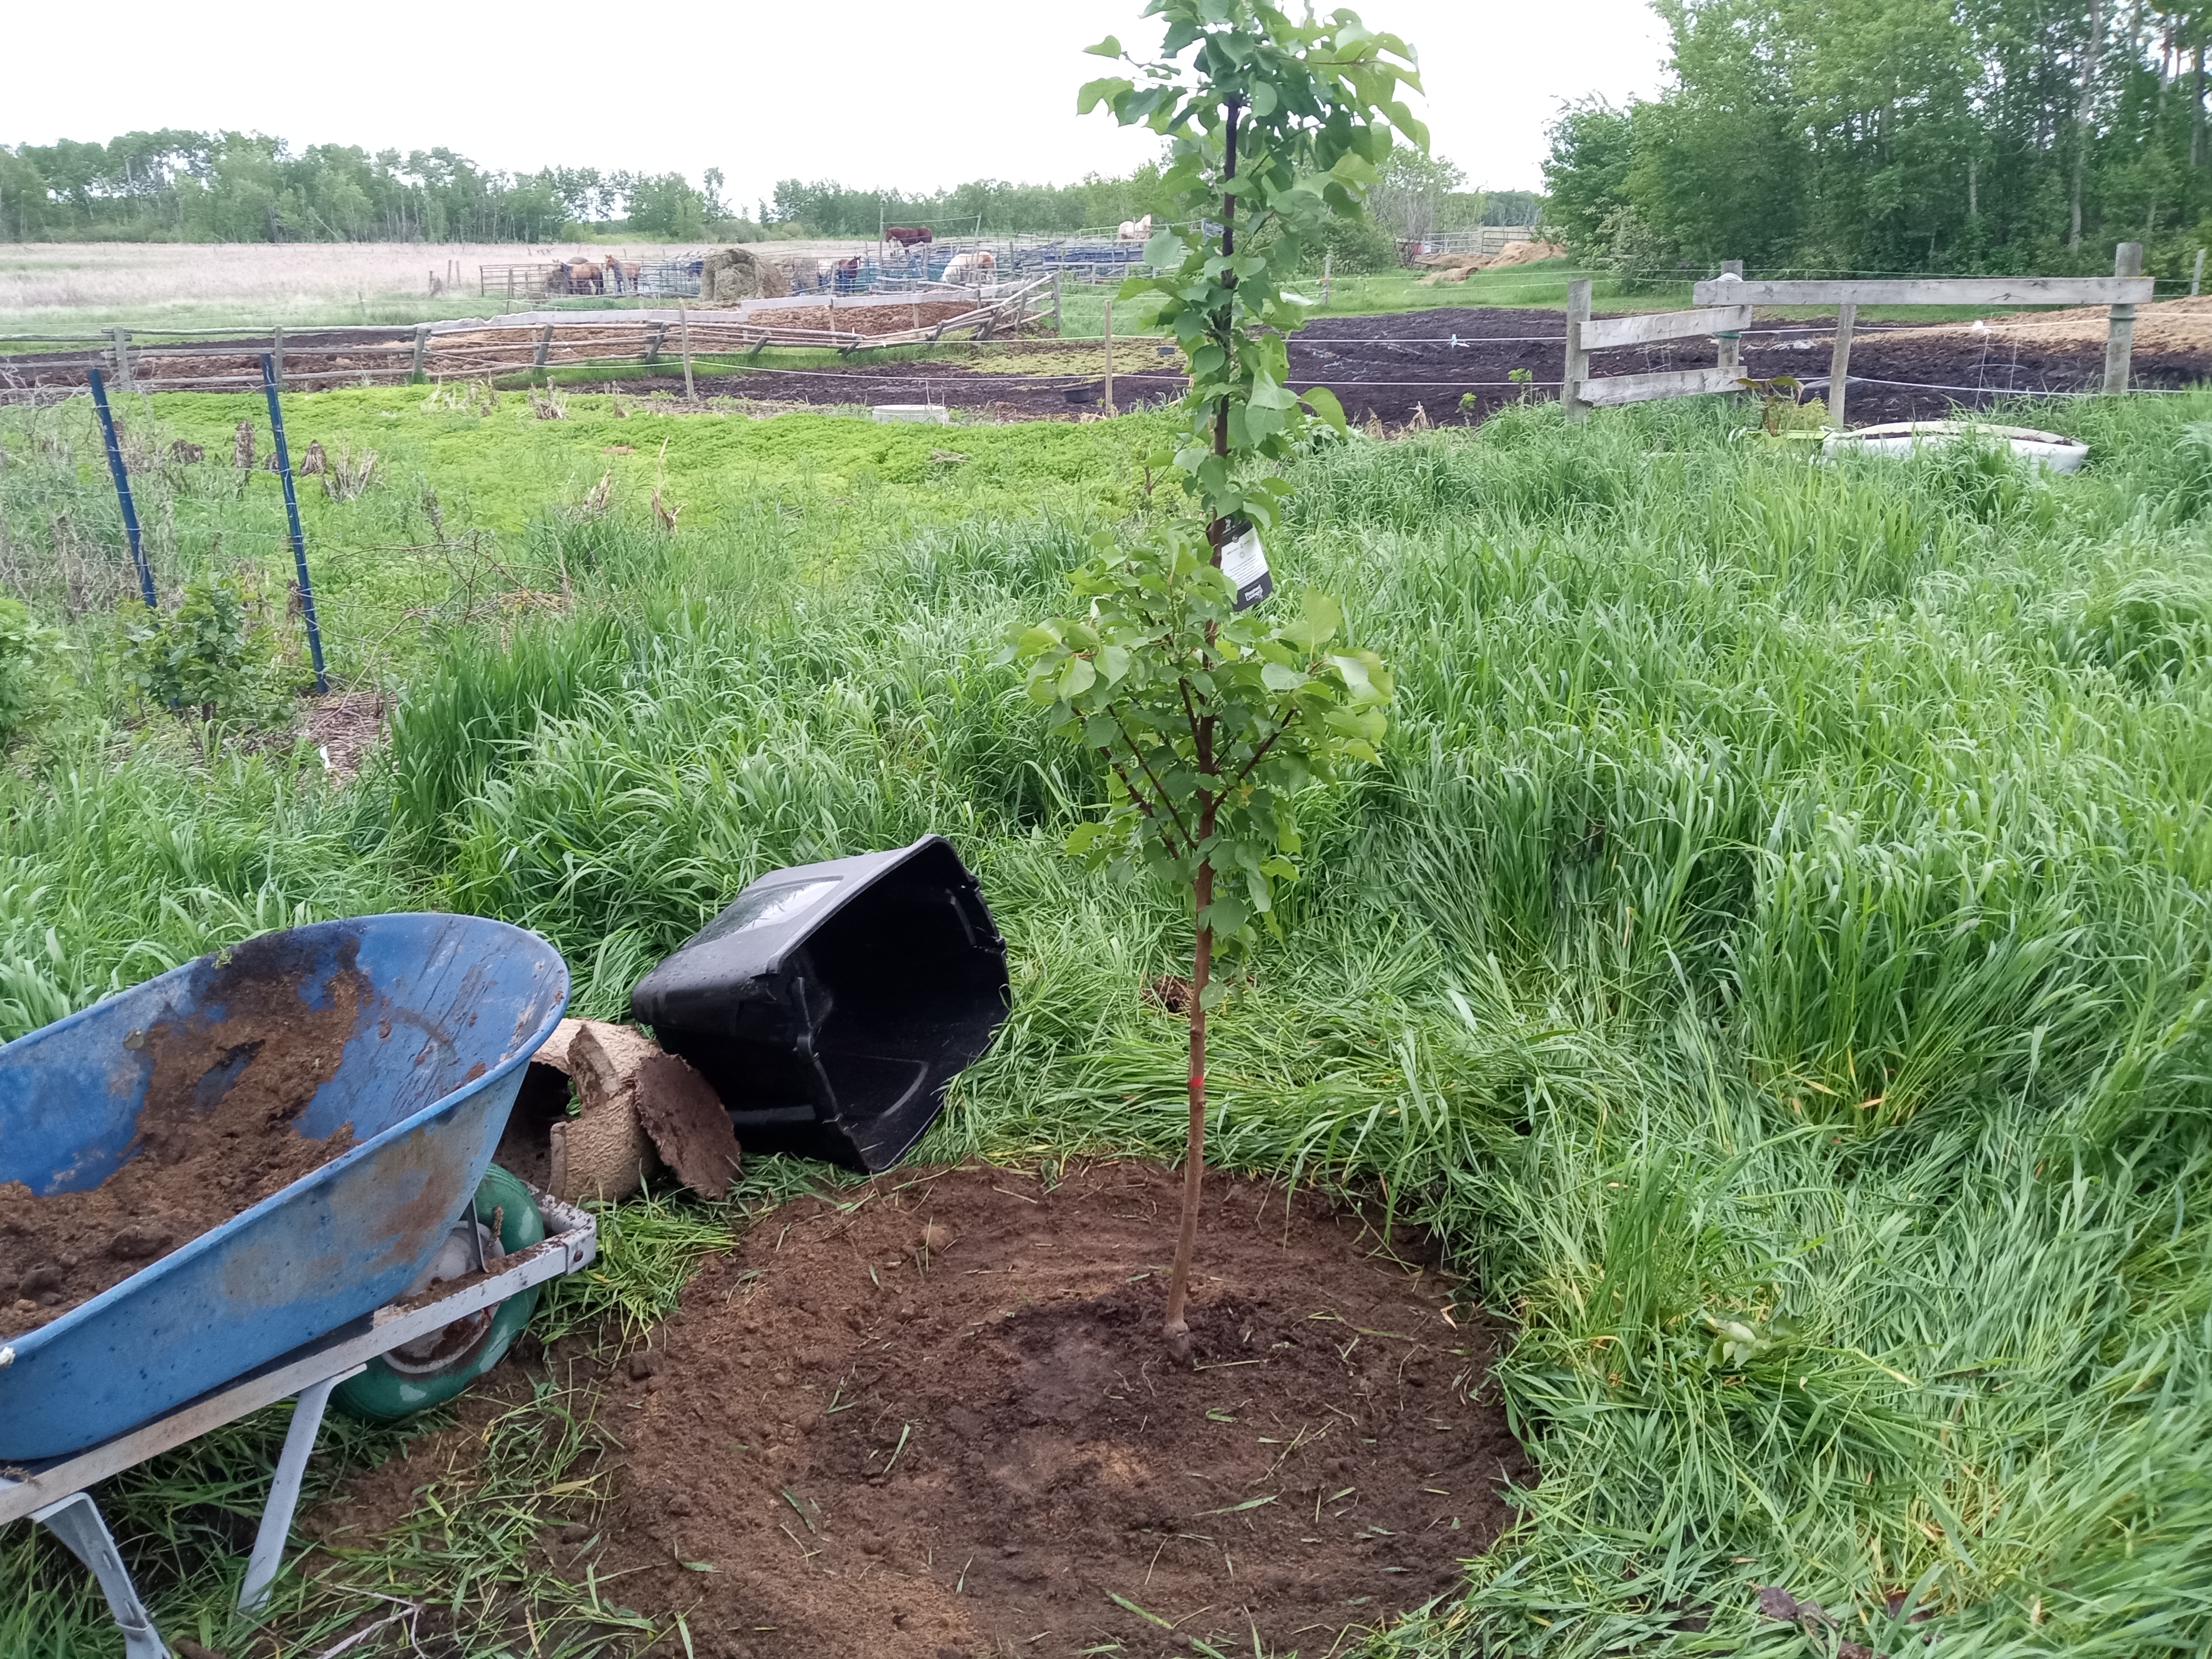
Each of the two apricot trees had cardboard placed around them, topped with wood mulch and had a combination of strawberries and herbs planted around them, stacking functions of the site. I look forward to how they will do in the future. All in all I am pretty happy with how things turned out.
It was all going good, until it wasn't
I finished the fruit tree guild the beginning of July. And although the plantings were all thriving, there was also something else thriving. The quack grass! Remember how I mentioned that I normally wet the cardboard and put a good thick layer of wood mulch on? Being that I did neither in the fruit tree guild, the cardboard did not conform to the soil surface and thereby smother the weeds nor did the thin layer of mulch stop light penetration. I thought I could short cut the process, but live and learn! So throughout the summer, I would periodically go through and pull quack grass so as to keep things at a dull roar. Until I could not keep ahead of it anymore.
Although the quack grass was easy to remove, it got to the point with the fruit tree guild that the grass was growing faster than I could remove it. And then as it happens, life happens and it really got ahead of me.
But luckily for me, the extreme cold and snow held off and on November 9, I was able to get the fruit tree guild cleaned of all it's volunteer quack grass. It was cold on the hands but it was worth it. One less thing to do in the spring. I was also able to get another couple inches of wood mulch across the guild, restoring it to a more optimal depth.
The guild can now sit and things settle into place until spring when I will be able to add some of the other food forest components such as vining annuals like squash. But I wasn't done for this year though. With the fall as it was, shortly after I weeded the fruit tree guild I was able to get some strawberry rhubarb from my folks place. As I explored in Every garden should have this perennial vegetable I believe everyone should have rhubarb in their yard. Although I have two massive plants, this strawberry rhubarb originally came from my grandparents farm and so I didn't want to loose the opportunity to acquire some. And with winter coming and my folks selling their home, the middle of November it needed to be. The ground was still thawed and so after planting and mulching a little extra, the last contribution for 2024 was made to the fruit tree guild. After all, I had to try.
Final Thoughts
I am very happy with how the fruit tree guild turned out. There is a lot of food and beauty that will hopefully be produced in years to come from the foundation perennial plants. And with the supplementation of annual vegetables and flowers coupled with future perennial plantings of herbs and such, this little patch of about 120 square feet (11square metres) should produce an abundance. And with the addition of the two Casino Apricots, the fruit that I will be able to produce leaves me with a feeling of anticipation and hope.
But in the meantime, it fills my heart with solace as I enjoy the beauty of the fruit tree guild in summer. As it does even in the winter.
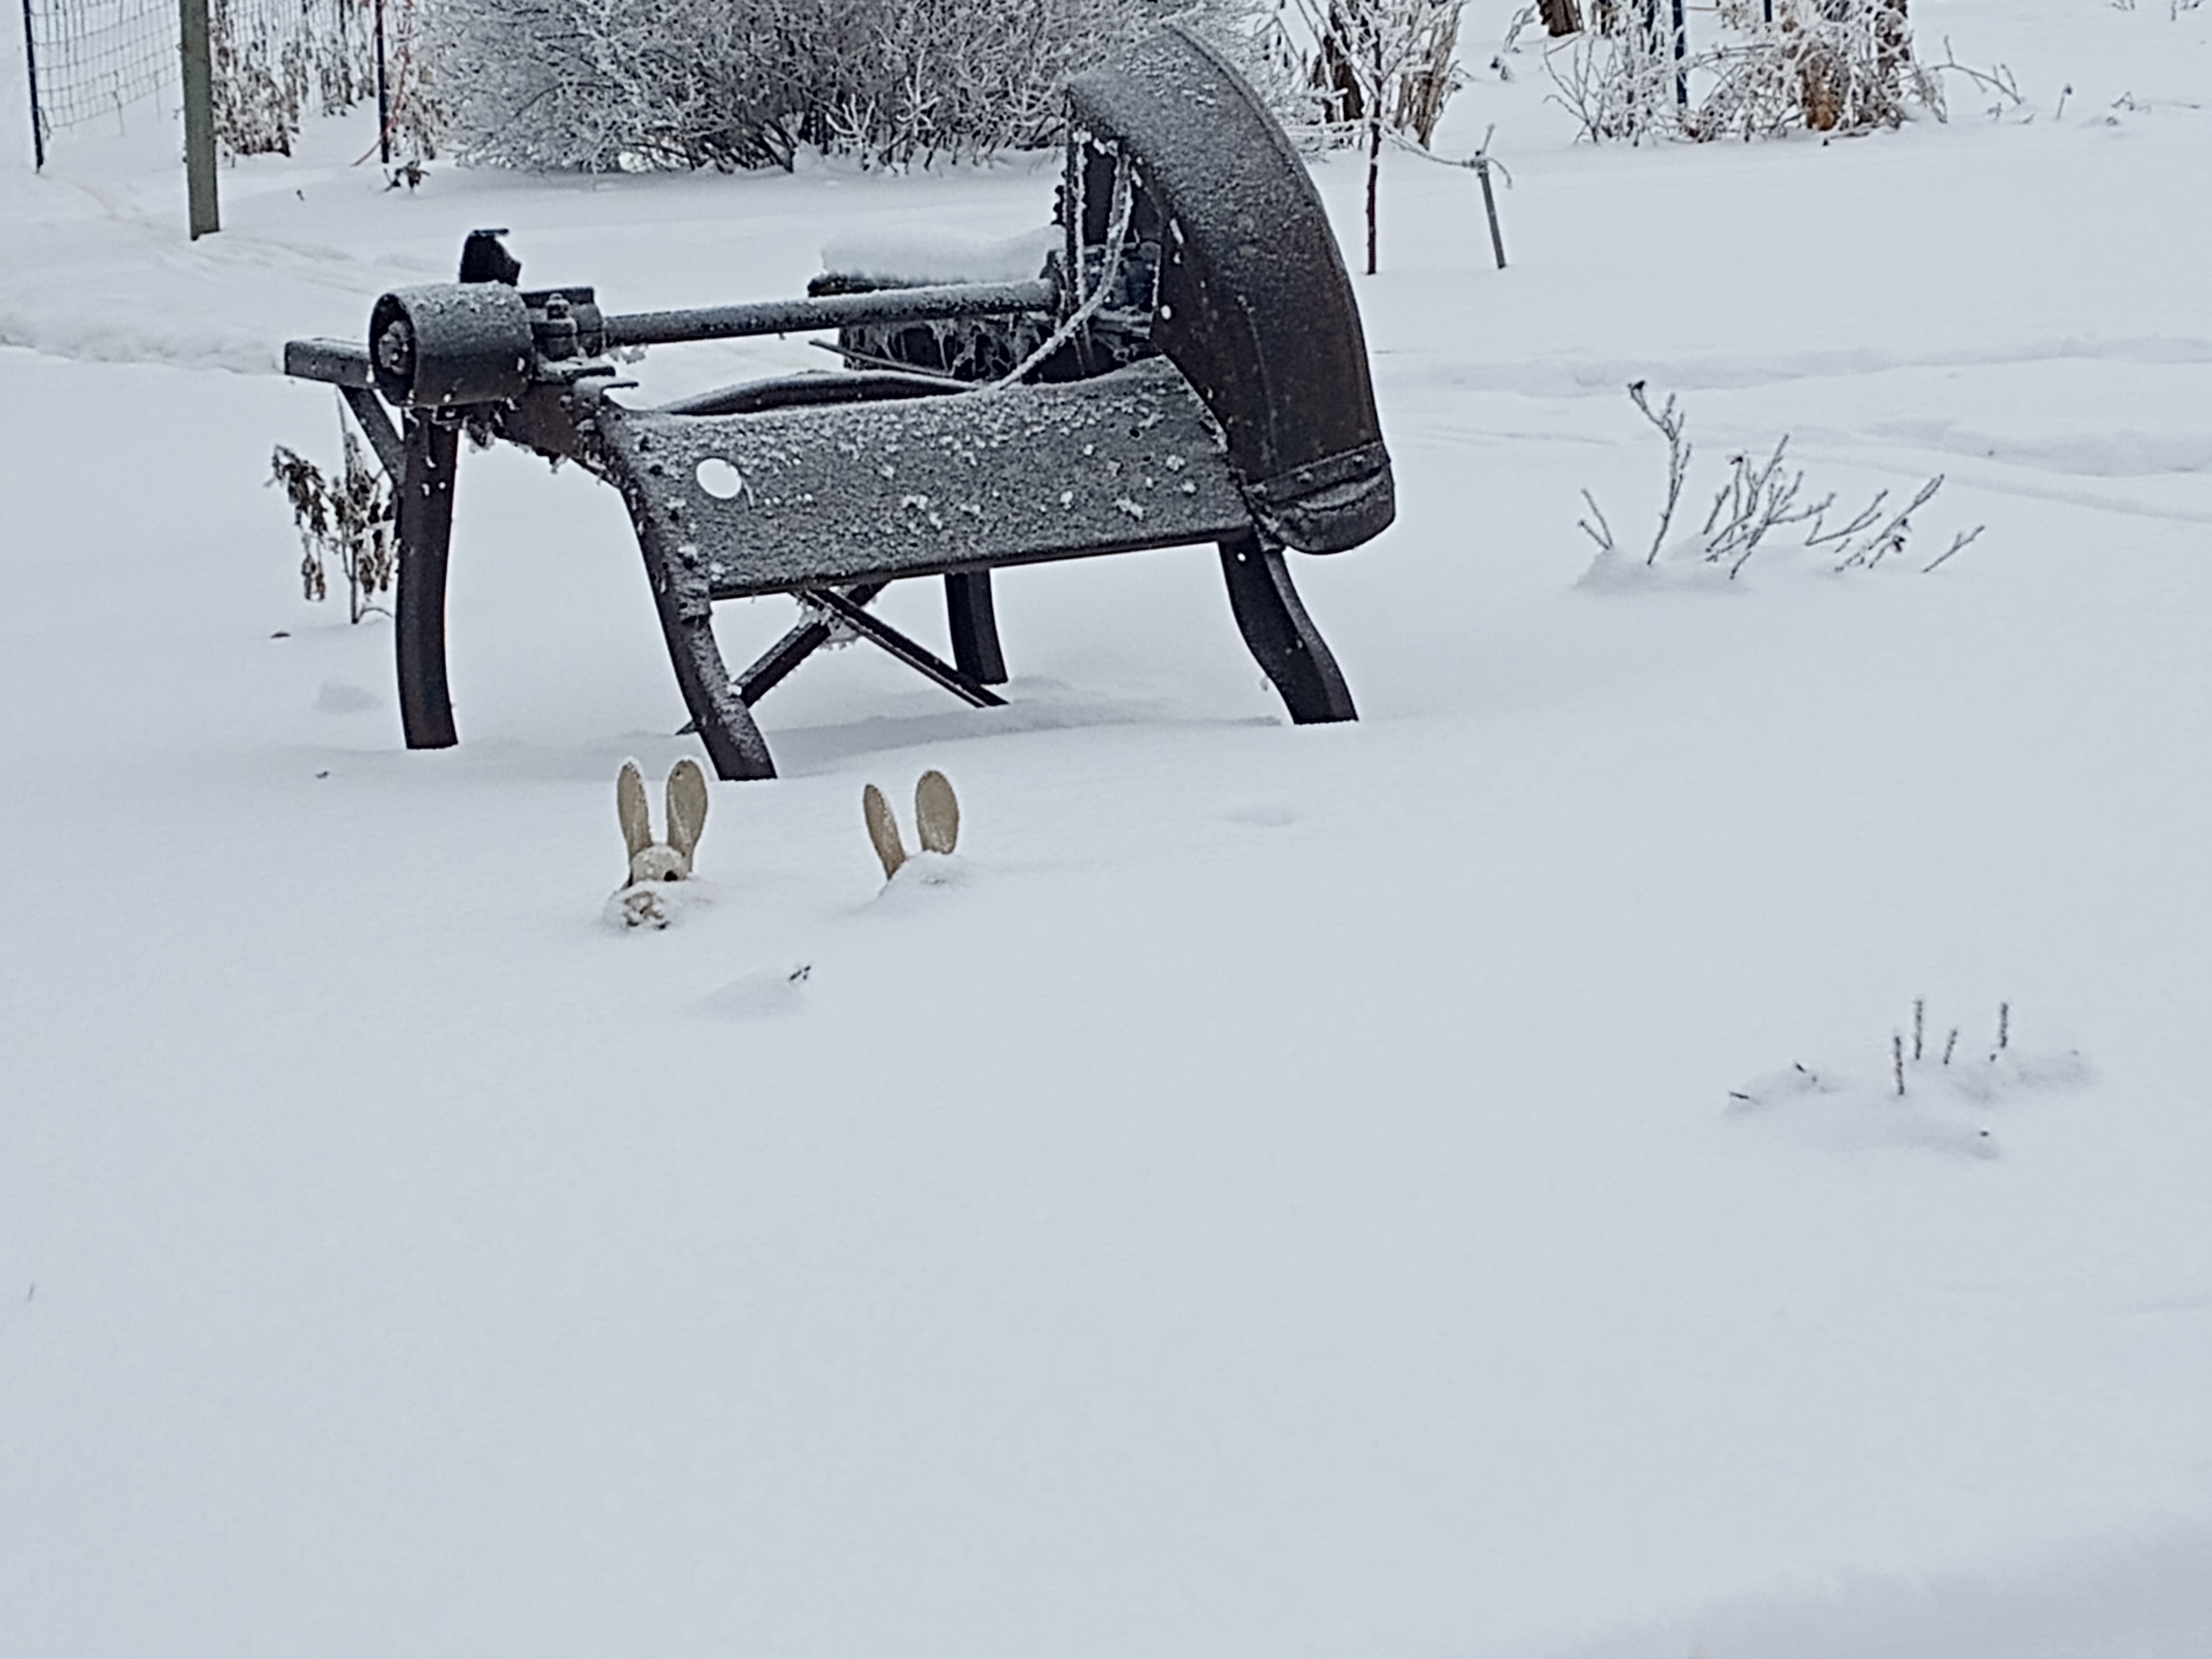
You may have noticed, I made one final addition to the fruit tree guild for 2024. Two rabbit statues from my folks place! After all, gotta have a little fun too!
I hope you found this of interest and that it gives you some food for thought about developing your own fruit tree guild on your property, however big or small. If you did enjoy it, please consider joining the My Boreal Homestead Life community. By supplying your email address at the bottom of the page and hitting "sign up" or by clicking Join the community, you will ensure you get an email notification when I post new blogs to the My Boreal Homestead Life site.
Thank you for joining me on the front porch of My Boreal Homestead Life as we explore this Homegrown, Homestead life, In a Modern World.
Additional Resources
- Build Your Own Permaculture Fruit Tree Guild - Verge Permaculture
- How to Build a Permaculture Fruit Tree Guild - Stark Bros
- Tree Guild Permaculture – How To Plant A Tree Guild - Gardening Know How
- Food Forest Orchard Garden in review...2023 - My Boreal Homestead Life